
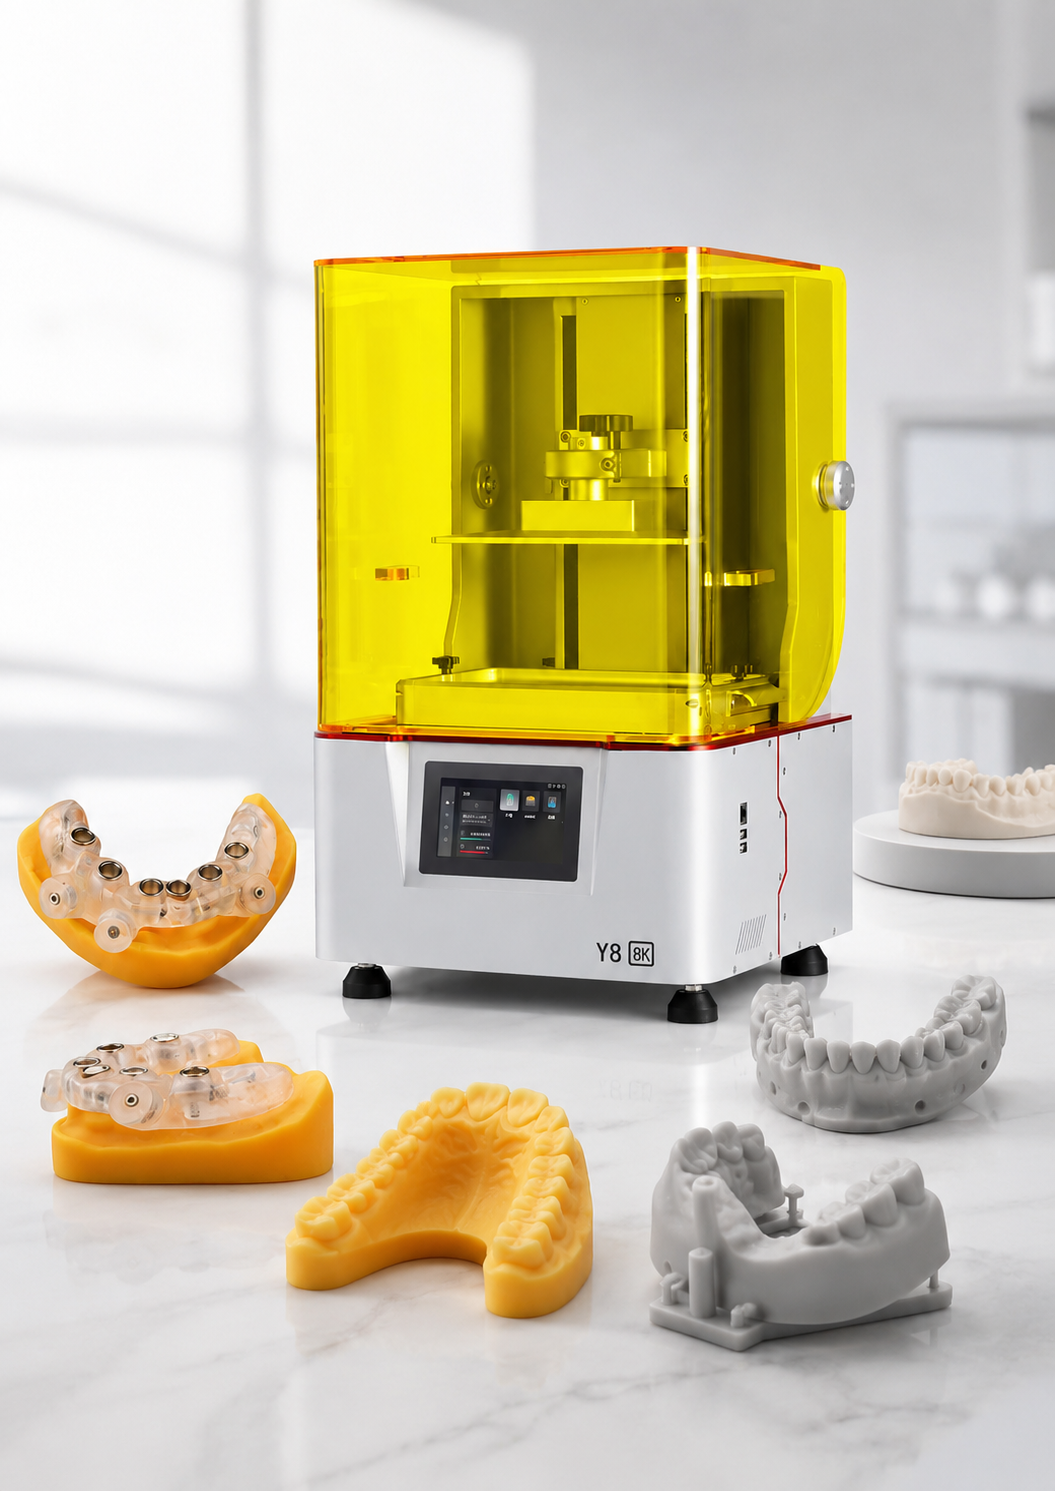
Dental 3D printer accuracy verification means printing a known reference geometry, running it through your normal wash, dry and post-cure routine, digitizing it with a scanner substantially more accurate than the parts you are measuring, and comparing that scan against the original CAD file using surface deviation analysis. Report trueness and precision as two separate numbers, not one “accuracy” figure. What you are testing is never the printer alone: resin, build orientation, shell design, post-curing dose and storage time all move the result. A verification run only means something if you have defined an acceptance limit for the indication first.
Why a spec sheet cannot answer this question
Most datasheets list XY pixel size, layer thickness and build volume. None of those are accuracy results. They describe how finely the machine can address the build area, not how closely a finished, washed, dried and post-cured part matches the file it came from. A printer with small pixels can still produce a model that is uniformly 80 µm undersized because the resin shrank during post-curing, and no amount of pixel arithmetic will reveal that.
The same applies to a bare “±0.05 mm” claim. Without the geometry tested, the resin, the parameter set, the post-processing protocol and the measurement method, the number is not reproducible and cannot be compared against another supplier’s number. When you evaluate machines, ask for those five conditions alongside any accuracy figure. If a supplier cannot state them, treat the figure as marketing rather than data.
This is also why in-house verification is worth the afternoon it costs. The only accuracy that matters to your lab is the accuracy of your printer, with your resin, on your parameters, after your post-processing.
Accuracy is two numbers
International metrology practice splits accuracy into trueness and precision. ISO 5725-1 defines trueness as how close the average of many results sits to the accepted reference value, and precision as how closely repeated results agree with each other. Bias describes the first; standard deviation describes the second.
The distinction is practical, not academic. A printer that produces ten models all 150 µm wide of the reference is repeatable and wrong, which is a parameter or compensation problem you can usually correct. A printer that produces ten models scattered between −120 µm and +130 µm is unstable, which is a hardware, resin-handling or post-processing consistency problem. Both would look identical if you reported a single averaged “accuracy” value, and the corrective actions are completely different.
In dental model research, trueness is normally expressed as root mean square (RMS) deviation between the scanned part and the reference file, with precision expressed as the spread across repeated specimens. Published work on full-arch casts with crown and bridge preparations reported overall trueness in the range of roughly 74 to 194 µm across printing technologies, orientations and shell thicknesses, with the authors treating 0.2 mm as their clinical acceptability threshold. Those are study conditions, not a specification you can inherit, but they show the order of magnitude a realistic full-arch test tends to land in.
What you need before you start
- A reference geometry with a known digital master. Two types are useful, and most labs should run both. An engineering test artifact, of the kind described in ISO/ASTM 52902 for geometric capability assessment of AM systems, isolates specific behaviours such as flatness, hole and pin dimensions, and fine feature reproduction. A clinically representative arch model tells you how the machine behaves on the geometry you actually sell.
- A digitizer you can trust. The reference scanner should be materially more accurate than the deviations you are trying to detect; desktop laboratory scanners used in accuracy studies are commonly specified in the range of a few microns of trueness. Verifying a printer with an instrument of similar uncertainty produces a number that mostly measures the scanner. Test methods for the two device classes are separated in dental standards: ISO 12836 covers fixed or mechanically guided digitizers, while ISO 20896-1 covers hand-held intraoral devices.
- 3D inspection software capable of point-based pre-alignment, best-fit registration, RMS calculation and colour deviation mapping.
- A frozen parameter set, written down: resin, lot, resin temperature, layer height, exposure, orientation, support scheme, wash solvent and duration, drying method, post-cure time and intensity.
- Stable conditions and PPE. Nitrile gloves, eye protection and adequate ventilation whenever uncured resin is handled, and the resin SDS available at the bench. Uncured resin is a skin and eye irritant, and washing solvent handling has its own requirements.
A step-by-step dental 3D printer accuracy verification workflow
- Freeze one parameter set. Change nothing else for the whole run. If you want to compare two orientations or two resins, that is two runs, not one.
- Plan the layout. Print at least five specimens, distributed across the plate rather than clustered in the centre. Position on the build platform is itself a variable, and clustering hides it.
- Print. Record ambient and vat temperature at the start of the build.
- Wash. Follow the resin manufacturer’s solvent and time recommendation. Over-washing can soften surfaces and erode fine detail; under-washing leaves a resin film that cures onto the part and reads as oversize.
- Dry completely. Residual solvent trapped on or in a part distorts both the post-cure and the scan. This step is separate from washing and should not be rushed.
- Post-cure with a documented time, intensity and temperature, using controlled UV post-curing equipment rather than ambient light or an improvised box. Post-curing is where a large share of dimensional change happens.
- Condition before measuring. Let parts return to room temperature. If your models are stored before use, repeat the measurement after realistic storage intervals; dimensional change does not stop when the part leaves the curing chamber.
- Scan every specimen with the reference digitizer using a consistent spray or powder policy, ideally none.
- Align each scan to the master file. Do a landmark or point-based pre-alignment first, then a best-fit registration.
- Analyse. Compute the global RMS, generate a colour deviation map, and take defined linear measurements at the landmarks that matter clinically, such as inter-molar width, die height and margin diameter.
- Compare against your acceptance limit and record pass or fail per specimen, not just the group average.
- File the report with the full parameter set attached. A verification result without its conditions is not traceable and cannot be repeated after a resin change.
Keep the stages distinct in your records. Printing, washing, drying, post-curing and final inspection each contribute their own error, and a report that collapses them into “printed and checked” cannot tell you which one drifted.
What to verify, by indication
| Application | What matters most | Suggested measurement | Common failure mode |
|---|---|---|---|
| Orthodontic and aligner models | Cross-arch dimension, tooth position, base stability | Full-arch RMS plus inter-canine and inter-molar linear checks | Arch distortion during post-curing; hollow bases deforming |
| Crown and bridge working models with dies | Margin definition, die height, proximal contact areas | Local best-fit on the prepared area, not global only | Global RMS looks fine while margins are rounded |
| Surgical guides | Sleeve seat position and angulation, tissue-surface fit | Landmark measurement of sleeve axes plus surface deviation | Warp from thin unsupported spans; resin indication mismatch |
| Denture bases and trial setups | Flatness of the fitting surface, long-term stability | Deviation map of the intaglio surface, re-measured after storage | Insufficient post-curing producing drift over weeks |
| Fine-detail and fit-critical parts | Small feature reproduction, hole and pin sizes | Engineering test artifact rather than an arch | Exposure-driven oversize or undersize of small features |
Guide and appliance work has its own material requirements beyond dimensions. Whatever the deviation report says, customers should confirm resin indication, post-curing process and local regulatory requirements before clinical or intraoral use. A model resin that prints accurately is still a model resin; passing a dimensional check says nothing about biocompatibility or intraoral suitability. Where guides are involved, start from a resin actually indicated for the purpose, such as a dedicated surgical guide and model resin, and follow its documented curing protocol rather than your general model protocol.
Alignment method changes the answer
Best-fit registration distributes error evenly across the surface. It is the right default for a general trueness figure, and it is what most published dental accuracy studies use, typically after a landmark-based pre-alignment on defined reference points.
It also flatters systematic errors. A model that is uniformly 0.4% undersized will best-fit into the middle of the reference and report a modest RMS, when what you actually have is a scaling problem worth correcting in the slicer. Landmark-based or datum-constrained alignment exposes that; best-fit hides it. Run both when a result looks suspiciously good.
Global RMS has a second blind spot. It averages the whole surface, so a well-formed arch with two poorly reproduced margins can pass while being unusable. For anything fit-critical, add a local analysis restricted to the region of interest, and report positive and negative deviations separately rather than as a signed mean, which cancels.
The variables that move results more than the printer does
- Post-curing dose. Research on printed denture bases found that specimens receiving no post-curing drifted to roughly 201 µm of error after 28 days, while a 60-minute post-cure group sat near 126 µm, with the largest change occurring on the first day. A systematic review of post-processing effects on printed dental casts likewise identified post-curing conditions as the most influential factor, with reported deviations spanning tens of microns depending on curing time and environment.
- Storage and time. Measure once at 24 hours and again after the storage period your models actually see. A model that passes on day one and is used in week three has not been verified for week three.
- Build orientation and plate position. Both change support contact, drainage and thermal history. Hold them constant within a run and vary them deliberately between runs.
- Shell thickness and hollowing. Hollow bases save resin and change stiffness. A part that is stiff enough to resist post-cure shrinkage stress behaves differently from one that is not.
- Resin type, lot and temperature. Different chemistries shrink differently, and a cold vat behaves differently from a conditioned one. A water-washable dental model resin and a solvent-washed resin will not necessarily share a compensation factor.
- Wash and dry consistency. Solvent saturation increases over time. Timed, documented washing is part of the parameter set, not a housekeeping step.
Setting acceptance limits
Do not import a limit from a datasheet. Derive it from what the part has to do.
The literature offers reference points rather than rules. Studies of models for fixed prostheses have used a clinically acceptable marginal discrepancy of around 120 µm as their justification for tighter model requirements, and full-arch model studies frequently work to a 100 to 200 µm band. Those figures come from specific study designs and specific indications; they are context for your decision, not a substitute for it.
A workable approach:
- Identify the tightest functional tolerance the finished restoration or appliance must meet.
- Allocate a share of that budget to the model or printed part, leaving room for scanning, design, and the downstream process.
- Set separate limits for global trueness and for the critical local region.
- Define how many specimens must pass for a run to pass.
- Review the limit after your first three or four verification cycles, when you know what your process actually delivers.
When to re-verify
Run the workflow again when any of the following occurs: a new resin type or a new lot with a noticeably different batch record; replacement of the LCD panel, release film or optical components; a firmware or slicer update; a change of post-curing unit, or lamp ageing in the existing one; a significant shift in workshop temperature; a new operator taking over post-processing; a fit complaint from a clinic that you cannot explain; and on a fixed interval defined in your quality system regardless of events. Suppliers should be able to describe their own quality control process for shipped machines, but factory testing does not substitute for verification under your conditions.
Troubleshooting deviation patterns
| Pattern in the deviation map | Likely contributors | What to check first |
|---|---|---|
| Uniform undersize across all axes | Polymerization shrinkage, post-cure shrinkage, cold resin | Scaling compensation; resin temperature; post-cure protocol |
| Uniform oversize | Over-exposure, light bleed, residual uncured resin cured onto surfaces | Exposure time; wash duration and solvent saturation |
| Posterior arch ends splayed or pinched | Base design, shell thickness, uneven post-cure | Add cross-arch support in the base design; rotate part in the curing chamber |
| Base not flat, model rocks | Uneven drying or curing, thin base, stress at support removal | Drying step; support density; base thickness |
| Fine features rounded or lost | Exposure too high, wash residue, or scanner resolution limit | Print a feature artifact; confirm the scanner can resolve the feature |
| Good trueness, poor precision | Plate position effects, film wear, inconsistent post-processing timing | Map results by plate position; check film and panel condition |
| Result drifts over weeks | Insufficient post-cure, storage conditions | Extend post-cure; re-measure a stored control specimen |
Results vary with geometry, resin and parameters, so treat this table as a starting hypothesis rather than a diagnosis.
Common Mistakes to Avoid
- Testing only a bare cube or bar. It will not predict full-arch behaviour, where cross-arch distortion dominates.
- Printing one specimen. One part gives you no precision estimate at all, and precision is half the answer.
- Scanning before the part has stabilized. Warm, freshly cured parts are still moving.
- Skipping the drying step and letting solvent influence both cure and measurement.
- Reporting a signed mean deviation. Positive and negative errors cancel and flatter the result.
- Changing two variables at once so that no conclusion can be attributed to either.
- Using an intraoral scanner as the reference instrument for a full-arch model, when full-arch digital impression accuracy is itself an area where standards work notes intrinsic limitations.
- Treating a passed dimensional check as clearance for clinical use. It printed accurately is not it is validated for the indication.
FAQ
Is resolution the same as accuracy? No. Resolution describes the smallest addressable feature; accuracy describes how closely the finished part matches the file. Post-processing sits between the two.
How many specimens should I print? Five or more, spread across the plate, is a reasonable minimum for a usable precision estimate. More is better if the decision is a purchase.
Can I verify a printer with an intraoral scanner? For small regions, sometimes. For full arches, a qualified laboratory desktop scanner is the safer reference, and dental standards separate the test methods for hand-held and fixed digitizers for that reason.
Does post-curing really change dimensions? Yes. Published work links post-curing conditions to measurable dimensional change, and insufficient post-curing to continued drift over the following weeks.
What accuracy should a dental resin printer achieve? That depends on the resin, geometry, parameters and post-processing, which is why verification exists. Ask suppliers for figures with stated test conditions rather than a bare number.
How often should I re-run verification? On every material or hardware change, and on a fixed interval set by your quality system.
Does a model resin passing verification mean it can go in the mouth? No. Dimensional performance and clinical suitability are separate questions, and the resin’s stated indication governs the second.
Conclusion
Dental 3D printer accuracy verification is not a specification you can read off a page. It is a short, repeatable procedure: a known reference, a frozen parameter set, disciplined post-processing, a qualified scanner, deviation analysis reported as trueness and precision, and an acceptance limit you set for the indication. Labs that run it a few times a year usually find that their biggest gains come from post-curing consistency and model design rather than from the machine itself.
If you are evaluating hardware for this kind of work, dental 3D printers for labs and clinics differ in how they handle repeatability across the plate, which is exactly what verification exposes. Share your typical model size, resin requirement, application, expected workflow and whether you need production capacity or a sample first, and the technical team can suggest a configuration and a test plan to match. You can reach them through the contact page.
References
- ISO 5725-1, Accuracy (trueness and precision) of measurement methods and results — Part 1: General principles and definitions. https://www.iso.org/standard/69418.html
- ISO/ASTM 52902:2023, Additive manufacturing — Test artefacts — Geometric capability assessment of additive manufacturing systems. https://www.iso.org/standard/79683.html
- ISO 20896-1:2019, Dentistry — Digital impression devices — Part 1: Methods for assessing accuracy. https://www.iso.org/standard/69402.html
- Jang et al., Evaluation of Dimensional Changes According to Aging Period and Postcuring Time of 3D-Printed Denture Base Prostheses: An In Vitro Study, Materials, 2021. https://pmc.ncbi.nlm.nih.gov/articles/PMC8539717/


