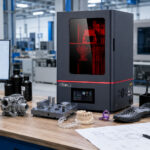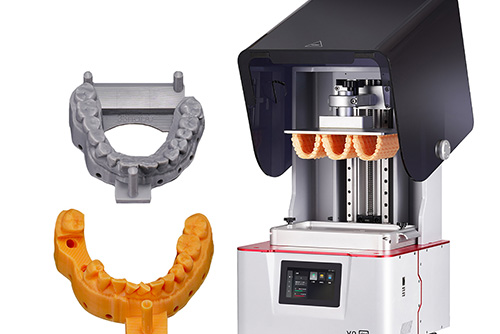
A dental 3D printer is not a standalone machine decision. It is part of a complete digital dental workflow that may include intraoral scanning, CAD design, nesting software, resin printing, cleaning, UV curing, finishing, inspection, and documentation.
For dental clinics, the main goal is often faster chairside support, improved control over model production, or reduced dependence on external turnaround. For dental labs, the goal may be higher daily output, repeatable model quality, easier batch production, or support for multiple dental applications.
That is why the right question is not simply “Which dental 3D printer has the highest resolution?” A better question is:
Which dental 3D printer can support my required applications, materials, accuracy expectations, post-processing workflow, and production volume?
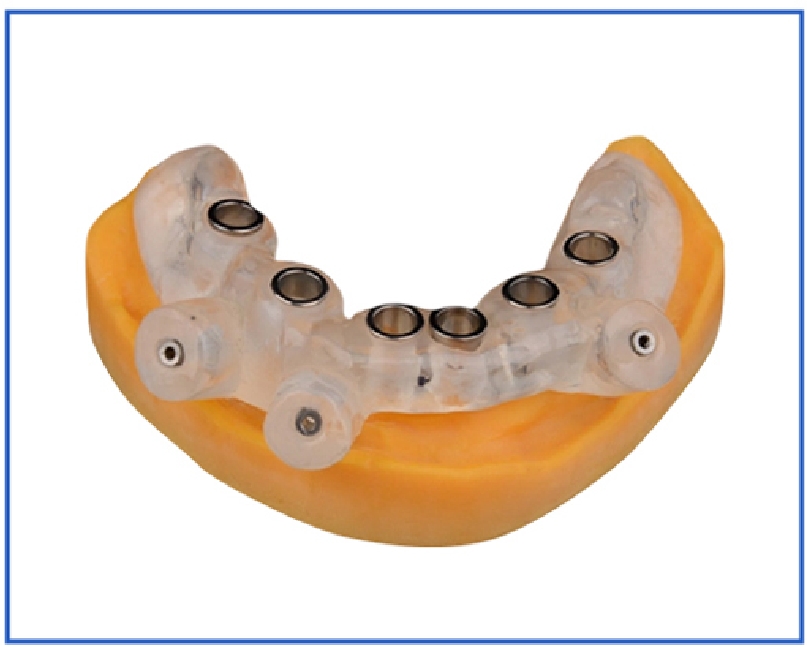
A printer with impressive technical specifications may still be unsuitable if it cannot work with the required resin, does not fit the lab’s daily build volume, requires too much manual adjustment, or lacks stable support for post-processing and troubleshooting.
Step 1: Define the Main Dental Application First
Before comparing machines, define the main dental application. Different dental workflows have different requirements for accuracy, surface finish, material indication, strength, dimensional stability, and curing process.
Common dental 3D printing applications include:
- Dental study models
- Orthodontic models
- Implant models
- Surgical guide preparation
- Temporary crown and bridge workflows
- Custom trays
- Splints and occlusal guards
- Denture base or try-in workflows
- Dental education and case presentation models
- Lab verification models
For example, a printer used mainly for orthodontic models may need stable batch production and a suitable build platform size. A printer used for surgical guide workflows may require stricter resin indication checks, validated curing steps, and careful dimensional control. A clinic printing occasional models may prioritize usability and workflow simplicity, while a dental lab may prioritize throughput, repeatability, and maintenance efficiency.
Step 2: Check Accuracy Beyond the Marketing Number
Accuracy is one of the most important factors when choosing a dental 3D printer, but it is also one of the easiest to misunderstand.
Printer accuracy may be affected by:
- XY pixel size or laser spot size
- Z-axis stability
- Layer thickness
- Resin shrinkage
- Exposure settings
- Support design
- Build orientation
- Temperature control
- Washing method
- UV curing time and wavelength
- Calibration and maintenance
- Software compensation settings
A lower XY value does not automatically mean the final dental part will fit better. Final accuracy depends on the complete workflow, including resin behavior and post-curing.
For clinics and labs, it is better to ask:
- Can the printer produce repeatable results for my intended dental application?
- Can the supplier provide recommended resin settings?
- Can test prints be evaluated before purchase?
- Is the printer stable across repeated batches?
- Can the workflow support the required fit and surface quality?
When possible, buyers should request sample prints using their own file type or application scenario. This gives a more realistic view than comparing technical specifications alone.
Step 3: Match Build Volume to Daily Production
Build volume determines how many parts can be printed in one batch and whether larger dental models can fit without awkward positioning.
A small printer may be suitable for a clinic that prints a few models per day. A larger or more production-oriented printer may be better for a dental lab handling multiple cases, orthodontic model batches, or several applications in one workflow.
When reviewing build volume, consider:
- Number of dental arches per batch
- Full-arch model size
- Implant model size
- Surgical guide layout
- Support space
- Part orientation
- Daily case volume
- Peak workload, not only average workload
A printer that is too small may create bottlenecks. A printer that is too large may increase resin handling requirements, space usage, and maintenance needs if the actual workload is low.
The best choice is usually the printer that matches your real case volume with enough room for growth, without overcomplicating the workflow.
Step 4: Review Resin Compatibility Carefully
Resin compatibility is critical in dental 3D printing. Dental applications may require specific material properties, including dimensional stability, strength, surface finish, transparency, heat resistance, or biocompatibility depending on the intended use.
A dental 3D printer should be reviewed together with the resin system. Buyers should confirm:
- Whether the resin is suitable for the intended dental application
- Whether the resin is designed for model use, guide use, tray use, temporary use, or other specific workflows
- Whether print settings are available for the printer
- Whether the post-curing unit is compatible with the resin’s required wavelength and curing process
- Whether the resin supplier provides technical documentation or instructions for use
- Whether local regulatory requirements apply
For dental applications, it is especially important to avoid assuming that any “dental resin” can be used for any dental purpose. A model resin may be suitable for dental model preparation but not for intraoral use. A surgical guide resin, temporary resin, splint resin, or tray resin may have specific processing and curing requirements.
Important dental application note: Customers should confirm resin indication, post-curing process and local regulatory requirements before clinical or intraoral use.
Step 5: Compare LCD, SLA, and DLP Workflow Needs
Dental 3D printers often use vat photopolymerization technologies such as LCD, SLA, or DLP. Each technology can support professional dental workflows when properly configured, but buyers should evaluate the complete system instead of relying only on the technology name.
LCD Dental 3D Printers
LCD resin printers use a light source and LCD masking system to cure each layer. They can support efficient layer-by-layer printing and may be suitable for clinics and labs that need model production, dental applications, and cost-effective professional workflows.
SLA Dental 3D Printers
SLA systems typically use a laser-based curing process. They may offer fine detail and stable surface quality depending on the printer design, resin, and settings. Buyers should evaluate print speed, maintenance, material availability, and workflow support.
DLP Dental 3D Printers
DLP systems use a projector to cure each layer. They may be used in dental workflows that require speed and precision, depending on the optical system, build area, resin compatibility, and calibration.
The practical selection should focus on whether the system can produce the required dental output reliably, not only whether it is LCD, SLA, or DLP.
Practical Table: Dental 3D Printer Selection Criteria
| Selection Factor | What to Check | Why It Matters | Buyer’s Practical Question |
|---|---|---|---|
| Main application | Models, guides, trays, splints, temporary parts, orthodontic models | Different applications need different resin and workflow control | What will we print most often? |
| Accuracy and repeatability | XY resolution, Z-axis stability, calibration, sample results | Dental fit depends on the whole workflow, not one number | Can it repeatedly produce usable dental parts? |
| Build volume | Platform size, number of arches per batch, full-arch capacity | Affects throughput and daily productivity | How many cases can we print per batch? |
| Resin compatibility | Dental model resin, surgical guide resin, temporary resin, water-washable resin, other materials | Resin indication and settings affect final use | Does the printer support the resin we need? |
| Post-processing | Washing, drying, UV curing, curing wavelength, curing time | Final properties may depend on correct post-curing | Is the curing workflow clearly defined? |
| Software workflow | File preparation, support generation, nesting, parameter settings | Reduces operator errors and training time | Can our team prepare files efficiently? |
| Maintenance | Vat replacement, screen life, calibration, cleaning | Affects downtime and operating cost | How easy is routine maintenance? |
| Technical support | Setup guidance, resin matching, troubleshooting, sample printing | Helps reduce implementation risk | Can the supplier support our real application? |
| Safety handling | Resin storage, ventilation, PPE, waste handling | Resin workflows require safe operation | Can we manage resin safely in our workspace? |
| Total cost | Printer, resin, curing box, consumables, training, maintenance | Purchase price is only part of the investment | What is the long-term operating cost? |
Step 6: Evaluate Printing Speed Realistically
Printing speed matters, but it should not be separated from accuracy, resin settings, and post-processing time.
A dental lab may care about how many models can be completed per day. A clinic may care about whether a case can be completed within a practical appointment or same-day workflow. However, the fastest print setting is not always the best setting for dental results.
When comparing printing speed, include:
- Print time per batch
- Number of parts per batch
- Washing time
- Drying time
- UV curing time
- Support removal
- Finishing and inspection
- Reprint rate caused by errors
A printer that prints slightly slower but produces fewer failures may be more efficient in real operation. For professional dental use, consistent output is usually more valuable than headline speed.
Step 7: Check the Software and File Preparation Workflow
A dental 3D printer should fit into the clinic or lab’s digital workflow. If file preparation is complicated, operators may spend too much time on support placement, nesting, slicing, or parameter adjustment.
Before purchase, check whether the workflow can handle:
- STL, OBJ, or other common dental file formats
- Full-arch model preparation
- Hollowing or base trimming if required
- Support generation
- Part orientation
- Batch nesting
- Resin-specific parameters
- Printer profile management
- Repeatable settings for different applications
For dental labs with several operators, workflow consistency is important. The system should reduce the need for guesswork. For clinics with limited technical staff, ease of operation and training support may be more important than advanced manual controls.
Step 8: Do Not Ignore Washing and UV Curing
Post-processing is not an optional detail in resin dental printing. After printing, parts usually need to be cleaned to remove uncured resin and then UV-cured according to the resin’s process requirements.
Incorrect post-processing may affect:
- Fit
- Surface quality
- Strength
- Biocompatibility for applicable materials
- Odor
- Tacky surface
- Long-term stability
- Patient safety for approved intraoral workflows
A complete dental 3D printing setup should include a suitable washing method and UV curing equipment. Clinics and labs should confirm the curing wavelength, curing time, part orientation, temperature requirements, and resin instructions before using a printed part for its intended application.
This is especially important for surgical guides, splints, trays, temporary dental parts, and any application that may involve clinical or intraoral use.
Step 9: Review Safety and Workspace Requirements
Resin 3D printing requires responsible material handling. Dental clinics and labs should plan the workspace before installing the printer.
Important workspace considerations include:
- Ventilation
- Resin storage
- Gloves and eye protection
- Spill control
- Cleaning area
- Waste resin handling
- Separate post-processing space
- Operator training
- Maintenance procedures
- Documentation for repeatable workflows
Uncured resin should be handled carefully. Operators should follow resin safety data sheets, equipment instructions, and local workplace requirements. A clean, controlled workflow helps protect staff and improves print consistency.
Step 10: Compare Supplier Support, Not Just Hardware
For professional dental users, supplier support can be as important as hardware specifications. A clinic or lab may need help with equipment selection, resin matching, parameter setup, sample testing, workflow planning, troubleshooting, and maintenance.
When comparing suppliers, ask:
- Can they help review your application before purchase?
- Can they recommend suitable resin options?
- Can they explain the washing and curing workflow?
- Can they provide sample printing support?
- Can they support troubleshooting after installation?
- Can they help with printer maintenance questions?
- Can they advise on workflow planning for clinics or labs?
Yidimu provides industrial resin 3D printers, dental 3D printers, flexible resin 3D printers, resin materials, UV curing boxes, and technical support for professional users. For dental buyers, the most useful consultation usually starts with the intended application, model size, resin requirement, expected daily workload, and post-processing workflow.
Workflow or Checklist
Dental 3D Printer Buying Checklist
Use this checklist before choosing a dental 3D printer for a clinic or lab.
- Define the main application
- Dental models
- Orthodontic models
- Surgical guides
- Temporary dental applications
- Splints or trays
- Lab production
- Education or research
- Confirm the required resin
- Model resin
- Surgical guide resin
- Temporary resin
- Water-washable resin
- Flexible or specialty resin
- Application-specific dental resin
- Check resin indication and documentation
- Intended use
- Printer compatibility
- Washing process
- UV curing process
- Storage instructions
- Local regulatory requirements
- Evaluate accuracy and repeatability
- Sample prints
- Fit check
- Surface quality
- Dimensional stability
- Batch repeatability
- Match build volume to workload
- Cases per day
- Arches per batch
- Full-arch model size
- Peak workload
- Future growth
- Review the complete workflow
- Scan file
- CAD design
- File preparation
- Resin printing
- Washing
- Drying
- UV curing
- Finishing
- Inspection
- Calculate total operating cost
- Printer
- Resin
- Resin tank or vat
- Build platform maintenance
- LCD screen or optical components
- Washing equipment
- UV curing box
- PPE and cleaning materials
- Staff training
- Assess supplier support
- Application consultation
- Sample printing
- Resin matching
- Technical training
- Troubleshooting
- Replacement parts
- Long-term maintenance support
Step-by-Step Workflow from Dental File to Finished Part
Step 1: Capture or Receive the Digital File
The workflow usually starts with an intraoral scan, lab scan, or dental CAD file. The file should be checked for completeness, correct anatomy, and proper case design before printing.
Step 2: Prepare the Design
Use dental CAD software to design or prepare the required model, guide, tray, splint, or temporary part. The design should match the intended clinical or lab workflow.
Step 3: Select the Correct Resin
Choose a resin according to the application. Do not use a general model resin for applications that require a specific dental indication.
Step 4: Prepare the Print File
Import the file into slicing or preparation software. Set orientation, supports, nesting, layer thickness, and resin profile according to the printer and resin recommendations.
Step 5: Print the Part
Run the print using validated or recommended parameters. Avoid changing exposure settings casually unless you understand the effect on fit, surface quality, and material behavior.
Step 6: Wash the Printed Part
Clean the part according to the resin instructions. Over-washing or under-washing may affect the surface, fit, or final properties.
Step 7: Dry and Inspect Before Curing
Allow the part to dry properly before UV curing. Check for visible defects, uncured resin, support marks, or print failure.
Step 8: UV Post-Cure
Cure the part with suitable UV curing equipment. Confirm wavelength, time, temperature, and part orientation based on the resin process.
Step 9: Finish and Remove Supports
Remove supports carefully and finish the surface as required. Avoid damaging critical fit areas.
Step 10: Final Inspection
Check fit, surface quality, dimensions, and application-specific requirements before use. For clinical or intraoral applications, confirm material indication, process requirements, and local compliance before use.
Common Mistakes to Avoid
Mistake 1: Choosing by Resolution Only
High resolution is useful, but final dental results depend on the full workflow. Resin shrinkage, exposure settings, support placement, washing, and curing all affect final accuracy.
Mistake 2: Ignoring Resin Indication
Not all dental resins are suitable for all dental applications. A resin for models may not be suitable for surgical guides, splints, trays, or temporary intraoral use.
Mistake 3: Forgetting the UV Curing Box
Many resin dental workflows require controlled UV post-curing. A printer without suitable post-processing equipment may not deliver stable final results.
Mistake 4: Underestimating Daily Production Volume
A clinic or lab may buy a printer that is too small for real workload. This can create production bottlenecks, especially for orthodontic models or lab batch work.
Mistake 5: Comparing Print Speed Without Batch Capacity
A fast printer with limited build area may not be faster in real production. Compare complete daily output, not only single-print time.
Mistake 6: Using Unverified Print Settings
Changing exposure, layer thickness, or curing settings without testing may cause fit problems, surface defects, or inconsistent results.
Mistake 7: Not Planning Resin Safety Handling
Uncured resin requires careful handling, PPE, ventilation, cleaning procedures, and waste management. A safe workflow should be planned before installation.
Mistake 8: Buying Without Sample Testing
Sample prints can show whether the printer, resin, and workflow fit your application. For clinics and labs, sample testing is often more useful than relying only on brochures.
Mistake 9: Ignoring Maintenance Requirements
Resin tanks, build platforms, optical systems, LCD screens, and cleaning areas require maintenance. Poor maintenance can reduce consistency and increase failed prints.
Mistake 10: Treating Dental 3D Printing as a One-Step Process
Dental 3D printing is a workflow. The final result depends on design, printing, washing, curing, inspection, and staff training.
How to Choose a Dental 3D Printer for Different Users
For Dental Clinics
Dental clinics should usually prioritize workflow simplicity, application fit, resin safety, and support. If the clinic wants to print models, surgical guides, or temporary applications, the team should confirm which workflows are realistic for in-house use.
A clinic should ask:
- Who will operate the printer?
- How often will the printer be used?
- Which applications are needed first?
- Is the curing workflow manageable?
- Are local clinical requirements clear?
- Can the supplier provide training and troubleshooting?
For Dental Labs
Dental labs usually need stronger batch capacity, repeatability, and efficient maintenance. Labs may print multiple cases per day and may need to support different resin types.
A lab should ask:
- How many cases must be printed per day?
- How many models fit on one platform?
- Can the printer handle long production schedules?
- How easy is vat, screen, or platform maintenance?
- Can the workflow support several operators?
- Can resin settings be standardized?
For Model-Making Companies and Production Users
Model-making teams and professional production users may focus on surface finish, dimensional stability, production scheduling, and material flexibility. Some teams may need dental models plus industrial prototypes or specialty resin applications.
They should ask:
- Does the printer support multiple resin workflows?
- Can it produce smooth surfaces with minimal finishing?
- Is the build volume suitable for larger models?
- Can technical support help with non-standard applications?
- What post-processing equipment is needed?
For Research Centers
Research users may need open workflow flexibility, material testing, and repeatable parameter control. They should evaluate whether the printer allows suitable control over print settings while still providing stable mechanical and optical performance.
Key Technical Factors to Compare
Accuracy
Look at the complete accuracy chain: optical resolution, mechanical stability, resin behavior, calibration, support design, and post-curing. For dental use, repeatable fit is more important than a single specification.
Surface Finish
Dental models, temporary parts, and presentation models may require smooth surfaces. Surface finish depends on layer thickness, resin quality, orientation, supports, and curing.
Build Platform Stability
A stable build platform helps reduce failed prints and dimensional variation. For dental labs, platform stability becomes more important when printing many models in one batch.
Z-Axis Structure
The Z-axis affects layer consistency and surface quality. A stable Z-axis can support better repeatability, especially for taller prints or batch production.
Light Source and Uniformity
Uniform exposure helps reduce differences across the build plate. Buyers should ask how the printer manages light uniformity and whether the supplier provides calibration guidance.
Temperature Control
Some resin workflows may benefit from stable environmental or material conditions. Temperature can affect resin viscosity and print behavior, depending on the material.
Resin Tank Design
The resin tank should be easy to clean, replace, and maintain. For busy labs, vat handling can affect downtime and daily efficiency.
Software Profiles
Application-specific resin profiles can reduce manual setup errors. Buyers should confirm whether the printer includes recommended settings for the resin they plan to use.
Total Cost: Look Beyond the Printer Price
The printer price is only one part of the investment. A complete dental 3D printing workflow may include:
- Printer
- Resin
- Washing equipment
- UV curing box
- Build platform
- Resin tank or vat
- Replacement film or screen components
- Gloves, tools, filters, and cleaning supplies
- Software
- Training
- Maintenance
- Failed print cost
- Staff time
A lower-cost printer may become expensive if it causes frequent failures, requires excessive manual adjustment, or lacks technical support. A higher-spec printer may be unnecessary if the clinic only prints occasional models.
The best investment is the system that matches your real workflow and can be operated consistently by your team.
Recommended Yidimu Internal Links
Use the following internal links to help readers continue evaluating equipment, materials, and workflows on the Yidimu website:
- Dental 3D Printers
- Dental 3D Printing Solutions
- Yidimu Eternal D1 Dental 3D Printer
- Dental 3D Printer Eternal Y8
- Resins
- X01 Water-Washable Dental Model Resin
- Temporary Dental Model Resin
- Surgical Guide Model Resin
- UV Curing Boxes
- Sample Printing Service
- Service & Support
- Contact Us
Suggested anchor text examples:
- Learn more about Yidimu dental 3D printers
- Explore dental 3D printing solutions for clinics and labs
- Review dental model resin options
- Ask Yidimu for sample printing support
- Contact Yidimu for printer and resin selection
FAQ
What is the most important factor when choosing a dental 3D printer?
The most important factor is application fit. A dental 3D printer should match the parts you need to print, the resin required, the expected accuracy, the post-processing workflow, and the daily production volume. Resolution matters, but it should not be the only selection factor.
How accurate does a dental 3D printer need to be?
The required accuracy depends on the dental application. Study models, orthodontic models, surgical guides, trays, splints, and temporary parts may have different fit requirements. Buyers should evaluate sample prints, resin settings, and the complete workflow rather than relying only on one resolution number.
Can one dental 3D printer print all dental applications?
One printer may support multiple dental workflows, but not every resin or application is automatically suitable. Customers should confirm printer compatibility, resin indication, post-curing requirements, and local regulatory requirements before using printed parts for clinical or intraoral applications.
Is LCD or SLA better for dental 3D printing?
LCD and SLA systems can both support dental printing depending on the printer design, resin compatibility, workflow, and required output. The better choice depends on application, build volume, repeatability, post-processing, maintenance, and supplier support.
Do dental clinics need a UV curing box?
In many resin workflows, yes. UV post-curing is often required to help printed parts reach their intended properties. The curing process should match the resin instructions, including wavelength, time, temperature, and part positioning.
What resin should I use for dental models?
Dental model resin is commonly used for study models, orthodontic models, and model-based workflows. The exact resin should be selected according to the application, required surface quality, dimensional stability, printer compatibility, and post-processing process.
Can printed dental parts be used in the mouth?
Only materials intended and processed for the specific intraoral application should be considered for intraoral use. Customers should confirm resin indication, post-curing process and local regulatory requirements before clinical or intraoral use.
How much build volume does a dental lab need?
It depends on the number of cases printed per day, the size of the models, and whether the lab prints single cases or batches. Labs producing orthodontic models or multiple full-arch cases may need a larger build platform than clinics printing occasional models.
Should I request sample prints before buying?
Yes, sample prints are recommended when possible. They help show real surface quality, fit, support marks, resin behavior, and workflow suitability for your application.
What information should I provide when asking Yidimu for a recommendation?
You should provide your main application, model size, resin requirement, expected daily print volume, accuracy expectations, post-processing workflow, and whether the printed part is for model use, lab use, or potential clinical/intraoral use.
Optional References
The following sources are useful for understanding terminology, dental 3D printing boundaries, medical device considerations, and resin printing safety:
- FDA: 3D Printing of Medical Devices
- FDA: Process of 3D Printing Medical Devices
- FDA: FDA’s Role in 3D Printing
- ISO/ASTM 52900:2021 Additive Manufacturing — Fundamentals and Vocabulary
- CDC/NIOSH: Safe 3D Printing guidance
- Yidimu: Industrial Resin & Dental 3D Printer Manufacturer
Conclusion
Learning how to choose a dental 3D printer means looking beyond resolution and price. Clinics and labs should evaluate the complete workflow: application, build volume, resin compatibility, accuracy, software, washing, UV curing, safety, maintenance, and supplier support.
For professional dental users, the best printer is the one that can support repeatable results for the intended application with a clearly defined resin and post-processing process. Before purchasing, customers should confirm resin indication, post-curing process and local regulatory requirements before clinical or intraoral use.
Yidimu can help clinics, dental labs, model-making companies, research teams, and professional production users review printer selection based on real workflow needs. To get a practical recommendation, contact Yidimu with your model size, resin requirement, application, expected workflow, and daily production needs.