When comparing dental 3D printers, build volume is often one of the first specifications people check. It looks simple: a larger build platform seems to mean more productivity. In real dental workflows, the decision is more specific.
Dental 3D printer build volume requirements depend on what you print, how many cases you process per day, how quickly cases must be delivered, and whether your post-processing setup can keep up with the printer. A dental lab printing many full-arch models has different needs from a clinic printing surgical guides or a small number of models for same-day treatment planning.
For professional users, build volume should be evaluated together with accuracy, resin indication, layer settings, support strategy, washing, drying, UV curing, inspection, and case traceability. Customers should confirm resin indication, post-curing process and local regulatory requirements before clinical or intraoral use.
What Does Build Volume Mean in a Dental 3D Printer?
Build volume is the maximum printable space inside the printer. It is usually described as three dimensions:
- X-axis: platform width
- Y-axis: platform depth
- Z-axis: maximum print height
For dental applications, the X-Y build area is often more important than Z height because most dental models, guides, splints, and restorations are printed with relatively low height compared with industrial parts. Z height still matters for taller objects, vertical nesting strategies, denture bases, certain appliances, and custom production fixtures.
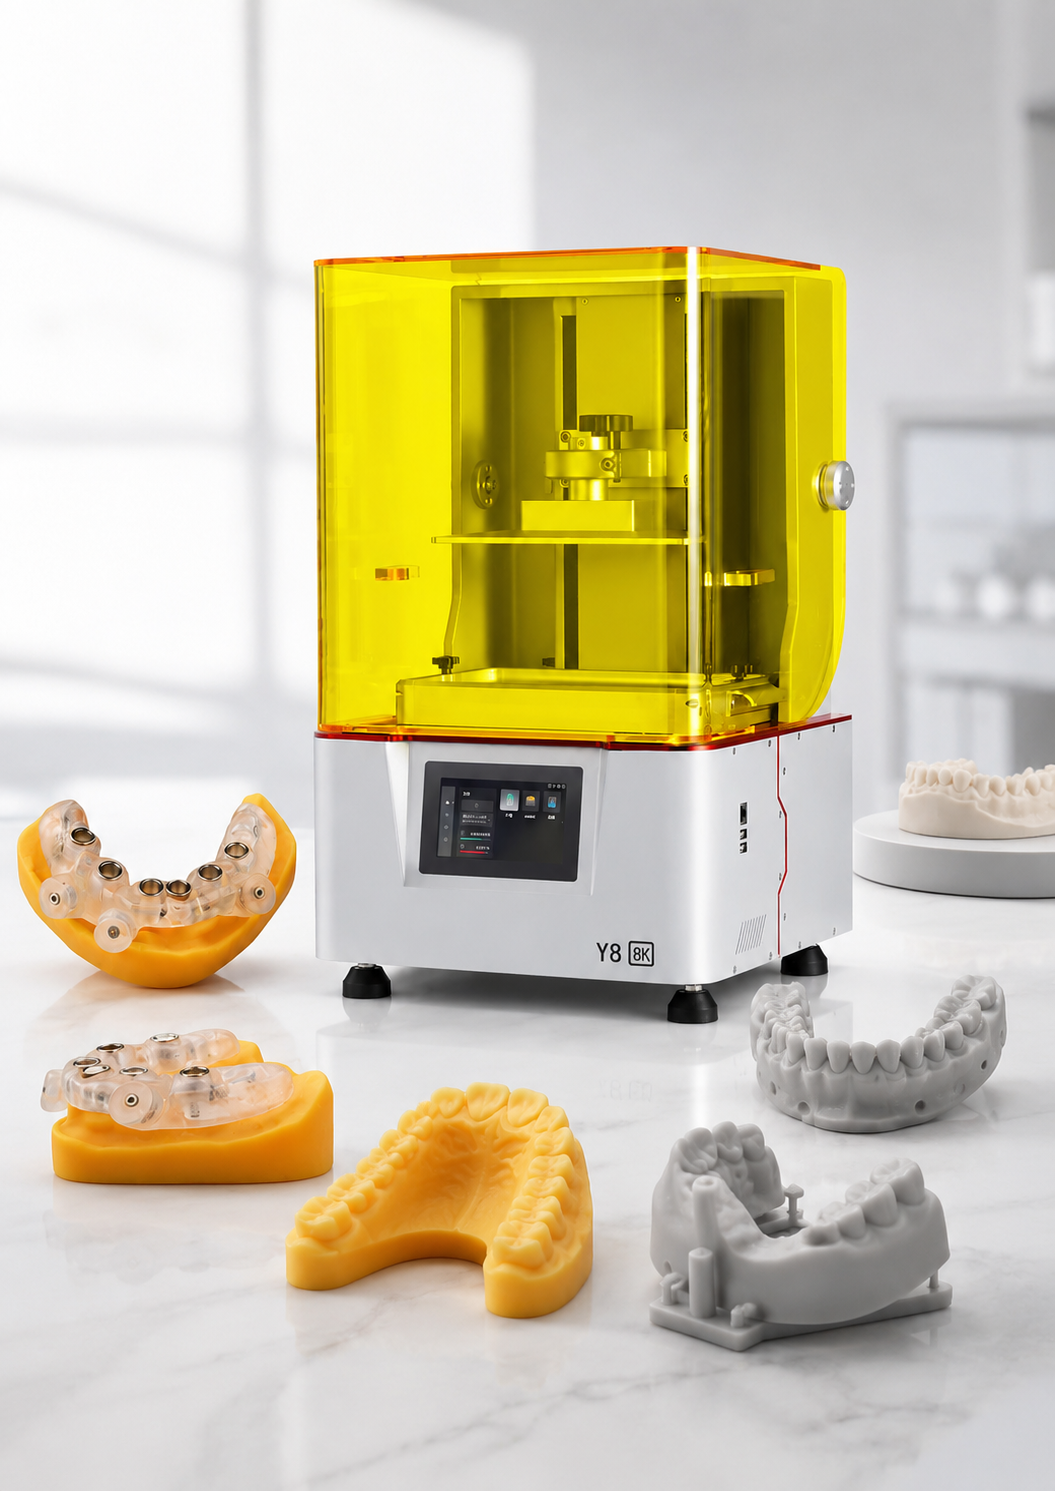
A larger X-Y area can allow more models to be placed on one platform. This may reduce the number of print cycles per day. But if the machine cannot maintain stable exposure, controlled peeling, and repeatable dimensional performance across the platform, the practical value of a larger build plate becomes limited.
Why Dental 3D Printer Build Volume Requirements Vary by Application
Different dental applications use the print area differently. A single crown model, a full-arch orthodontic model, a surgical guide, and a denture base do not require the same footprint.
Dental Models
Dental models are usually one of the most common use cases in labs and clinics. Full-arch models take more X-Y space than quadrant models. Aligner production can require many full-arch models per day, so build volume directly affects throughput.
For a clinic printing occasional diagnostic models, one or two full arches per batch may be enough. For an orthodontic lab, the requirement may be much higher because multiple aligner models need to be printed, cleaned, cured, and organized by case.
Surgical Guides
Surgical guides are often smaller than full model batches, but they may require careful orientation, support placement, cleaning, and validated post-curing depending on the resin. The build volume should allow enough spacing around guides so that details, guide sleeves, and contact surfaces are not compromised by poor layout.
Customers should confirm resin indication, post-curing process and local regulatory requirements before clinical or intraoral use.
Splints and Night Guards
Splints and occlusal guards may require enough platform space for full-arch appliances. The build area should support stable orientation and allow resin drainage. For flexible or biocompatible resins, the full workflow may need additional verification because material behavior can vary by resin, thickness, and curing process.
Temporary Restorations
Temporary crowns, bridges, and dental restorations may not require very large build volume per part. However, professional users may need to print multiple cases in one batch. The build volume requirement depends on the number of units, case urgency, and whether the printer can maintain consistent detail across the build area.
Denture Bases and Try-ins
Denture-related applications can require more platform space than small restorations. Denture bases, try-ins, and full-arch prosthetic workflows may benefit from a larger build plate, depending on the orientation strategy and resin workflow.
Custom Dental Appliances and Lab Tools
Some labs print custom trays, jigs, verification models, analog model components, or research parts. These may not be large individually, but production efficiency improves when several items can be arranged together without crowding the platform.
Practical Table: Build Volume Requirement by Dental Application
| Dental Application | Typical Build Volume Need | What to Check Before Choosing | Practical Recommendation |
|---|---|---|---|
| Single crown or small die model | Low to medium | Detail accuracy, resin compatibility, small-feature resolution | Compact or mid-size printers may be sufficient if accuracy is stable |
| Quadrant model | Medium | Model length, support layout, batch spacing | Check how many quadrant models fit without crowding |
| Full-arch model | Medium to high | X-Y platform area, model orientation, dimensional repeatability | Choose a platform that can fit at least one full arch comfortably |
| Multiple full-arch models | High | Daily case volume, nesting efficiency, post-processing capacity | Larger build area may reduce print cycles for labs |
| Aligner model production | High | Number of arches per batch, labeling, cleaning and curing capacity | Prioritize platform area, stable batch repeatability, and workflow management |
| Surgical guide | Medium | Resin indication, hole accuracy, guide sleeve fit, post-curing process | Leave enough spacing and verify the complete clinical workflow |
| Splint or occlusal guard | Medium to high | Material behavior, thickness, full-arch footprint, curing requirement | Confirm resin workflow and avoid overcrowding parts |
| Denture base or try-in | Medium to high | Part footprint, orientation, resin drainage, dimensional stability | Larger platforms may be useful for full-arch prosthetic work |
| Temporary crowns and bridges | Low to medium per unit, higher for batch production | Margin detail, shade/resin workflow, post-curing | Match build size to case count, not just single-unit size |
| Lab fixtures and custom tools | Variable | Maximum part length, mechanical requirement, resin type | Decide by the largest part and batch frequency |
How to Calculate the Right Build Volume for Your Dental Workflow
The best way to decide dental 3D printer build volume requirements is not to start with the biggest machine. Start with the real cases you need to print.
Step 1: Define Your Main Dental Applications
List the applications your team prints or plans to print:
- Dental models
- Orthodontic models
- Surgical guides
- Splints and night guards
- Temporary restorations
- Denture bases and try-ins
- Custom trays
- Lab fixtures
- Research or training models
Then separate them into daily, weekly, and occasional use cases. Daily use cases should influence the build volume decision more than rare special projects.
Step 2: Identify Your Largest Common Case
A printer does not need to be sized only for the largest object you might print once a year. It should be sized for the largest object you print regularly.
For example, a clinic may only need to print one full-arch model or one surgical guide at a time. A dental lab may need to print several full-arch models in one batch. These two workflows can require very different build areas even if the applications look similar.
Step 3: Estimate Cases Per Batch
Ask a practical question: how many cases should be completed in one print cycle?
A larger build platform may be useful when it allows you to print:
- Several full-arch models in one batch
- Multiple surgical guides for different patients
- A combination of models, guides, and appliances
- Batch production for aligner workflows
- Repeated lab models during peak order periods
However, more parts on one platform also increase layout complexity. Crowding the platform can affect resin flow, support access, peeling force, and cleaning efficiency.
Step 4: Consider Turnaround Time
A small printer may still be acceptable if your team has low case volume or flexible delivery time. A larger printer becomes more valuable when the lab must finish many cases within the same day.
Build volume affects scheduling. If one printer can print enough models in one cycle, the operator may reduce repeated setup, resin refilling, scraping, cleaning, and curing cycles. This can reduce workflow friction in a busy lab.
Step 5: Match Build Volume With Accuracy Requirements
Build volume alone does not decide dental quality. Professional dental applications need reliable dimensional behavior across the usable platform.
When comparing printers, ask:
- Is accuracy stable near the center and edges of the build area?
- Can the printer maintain fine details on multiple parts in one batch?
- Does the light source provide consistent exposure across the platform?
- Is the Z-axis stable enough for repeated dental model production?
- Does the resin shrinkage behavior match the workflow?
A large platform with poor consistency may create more rework than a smaller platform with stable performance.
Step 6: Check Resin and Post-Processing Capacity
If you print more parts per batch, you also need enough capacity after printing. Washing, drying, support removal, UV curing, inspection, and packaging must be able to handle the same volume.
A large dental printer paired with a small cleaning and curing setup may create a bottleneck. For professional users, printer size and post-processing equipment should be planned as one system.
Customers should confirm resin indication, post-curing process and local regulatory requirements before clinical or intraoral use.
Workflow or Checklist: Dental Build Volume Selection
Use this checklist before purchasing or upgrading a dental 3D printer.
Dental 3D Printer Build Volume Checklist
- Define your main applications: models, guides, splints, dentures, temporary restorations, or aligner models.
- Measure or estimate the largest regular case, not only the largest possible case.
- Decide how many cases should fit in one print batch.
- Check whether the X-Y platform area supports your preferred nesting layout.
- Confirm Z height for taller appliances or special orientations.
- Leave spacing between parts for resin flow, peeling, supports, and cleaning.
- Evaluate accuracy across the full usable platform, not only at the center.
- Match printer capacity with washing and UV curing capacity.
- Confirm resin compatibility and indication for each dental application.
- Verify post-curing requirements and local regulatory requirements before clinical or intraoral use.
- Consider future case growth, but avoid buying size that your workflow cannot use efficiently.
- Ask the supplier to review your model size, resin requirement, application, and expected workflow before final selection.
Small, Mid-Size, or Large Dental 3D Printer: Which One Fits?
There is no single correct dental printer size. The right build volume depends on your production structure.
Compact Dental Printer
A compact dental printer may fit clinics, small labs, or teams that print limited cases per day. It can support focused workflows such as single models, small batches, surgical guides, temporary restorations, or testing new digital workflows.
It may not be ideal for high-volume aligner model production or labs that need to print many full-arch models at once.
Mid-Size Dental Printer
A mid-size dental resin printer is often suitable for professional users who need a balance between daily flexibility and manageable machine size. It may support full-arch models, multiple smaller cases, surgical guides, splints, and other common dental applications.
For many clinics and labs, this category can be a practical starting point because it offers more batch flexibility without requiring a large production environment.
Large-Format Dental Printer
A large-format dental printer is useful when the lab needs higher batch capacity. It can help reduce print cycles for aligner models, multiple dental arches, denture-related parts, and mixed production batches.
However, large-format printing requires more careful planning. Users should confirm light uniformity, peeling stability, resin behavior, platform calibration, and post-processing capacity. A large platform is only productive when the whole workflow can process the output reliably.
Build Volume vs Throughput: Why Bigger Is Not Always Faster
Many buyers assume a larger printer automatically means higher productivity. This is only partly true.
A larger build area can print more parts in one cycle, but total production speed also depends on:
- Layer height
- Part height
- Orientation
- Exposure settings
- Resin viscosity
- Lift distance and lift speed
- Peeling force
- Support strategy
- Washing time
- Drying time
- UV curing time
- Inspection and labeling
For many dental parts, print time is influenced more by Z height than by how many parts are placed in the X-Y plane. This means a full platform of models may not take much longer than one model if the parts share similar height. That is one reason build area matters in dental production.
But if the platform is overcrowded, failures may increase. Operators should leave practical spacing between parts and avoid layouts that create excessive suction, poor drainage, or difficult support removal.
Accuracy Considerations Across the Build Platform
Dental applications can be sensitive to dimensional changes. Even small deviations may affect model fit, guide fit, appliance fit, or restoration workflow.
When evaluating dental 3D printer build volume requirements, do not only ask, “How many models fit?” Also ask, “How consistently can the printer produce them?”
Important factors include:
- Exposure uniformity across the screen or light field
- Pixel size or optical resolution
- Resin shrinkage behavior
- Z-axis rigidity and repeatability
- Build platform leveling
- Temperature control
- Support placement
- Cleaning and curing consistency
For production labs, it may be useful to run sample prints across different areas of the platform before finalizing a workflow. This can help operators understand how the printer behaves under real batch conditions.
Resin Compatibility and Dental Indications
Build volume should be evaluated together with resin selection. A printer may be physically large enough for a case, but the application still depends on the resin and validated workflow.
Dental resins may include model resin, surgical guide resin, temporary crown and bridge resin, denture base resin, splint resin, castable resin, or other specialized materials. Each material may have different requirements for exposure, support, washing, drying, UV curing, storage, and handling.
For dental applications, especially anything related to clinical or intraoral use, customers should confirm:
- Resin indication
- Printer compatibility
- Washing process
- Drying process
- UV post-curing wavelength and time
- Local regulatory requirements
- Safety data sheet information
- Clinical workflow requirements
Customers should confirm resin indication, post-curing process and local regulatory requirements before clinical or intraoral use.
Practical Planning Example: Clinic vs Dental Lab
Clinic Workflow Example
A dental clinic may print:
- One surgical guide
- One or two models
- A temporary restoration case
- A splint or appliance case
In this situation, the clinic may not need the largest available printer. A compact or mid-size dental printer may be more suitable if it supports the required resins, provides stable accuracy, and fits the available workspace.
Dental Lab Workflow Example
A dental lab may print:
- Several full-arch models per batch
- Multiple aligner models per day
- Surgical guides from different doctors
- Temporary restoration cases
- Denture try-ins or bases
- Custom trays and lab tools
In this case, a larger build area may reduce batching pressure and improve scheduling. The lab should also plan cleaning stations, UV curing boxes, resin handling, model sorting, and operator time.
Common Mistakes to Avoid
Mistake 1: Choosing Only by Maximum Build Volume
A large build volume is useful only if the printer can produce stable results across the usable area. For dental work, accuracy and workflow reliability matter as much as platform size.
Mistake 2: Ignoring Post-Processing Capacity
If washing and curing equipment cannot handle the printed batch, the printer will not deliver its full productivity. Plan the complete workflow, not only the printer.
Mistake 3: Overcrowding the Build Platform
Packing too many dental parts onto the platform may increase failure risk, cleaning difficulty, and support removal problems. Leave enough spacing for resin flow and part handling.
Mistake 4: Treating All Dental Applications the Same
A dental model, surgical guide, splint, denture base, and temporary restoration have different geometry, resin, support, and curing requirements. Build volume should be matched to each application.
Mistake 5: Ignoring Resin Indication and Local Requirements
For clinical or intraoral applications, resin selection and post-curing are not optional details. Customers should confirm resin indication, post-curing process and local regulatory requirements before clinical or intraoral use.
Mistake 6: Forgetting Future Case Growth
A printer that only fits today’s smallest workload may become limiting as order volume grows. At the same time, buying a very large printer without enough demand or post-processing capacity can waste space and budget.
How Yidimu Helps Professional Users Decide Build Volume
Yidimu supplies professional resin 3D printers, dental 3D printers, industrial resin 3D printers, flexible resin 3D printers, UV curing boxes, 3D printing resins, and related technical support for professional production users.
For dental labs and clinics, the recommended printer size should be based on real case files and workflow requirements. Instead of choosing only from a specification sheet, users can share:
- Typical model size
- Largest regular dental case
- Daily or weekly case volume
- Resin requirement
- Application type
- Required turnaround time
- Current post-processing equipment
- Available workspace
- Expected future production growth
Yidimu can then help customers evaluate whether a compact, mid-size, or larger dental 3D printing setup is more suitable for the intended workflow.
Conclusion: Dental 3D Printer Build Volume Requirements Should Match Real Production
Dental 3D printer build volume requirements should be decided by application, case size, batch quantity, accuracy expectations, resin workflow, and post-processing capacity. A larger printer can support higher batch output for labs, aligner model production, and full-arch workflows. A compact or mid-size printer may be more efficient for clinics or smaller daily case volumes.
The best choice is not the largest machine on paper. It is the printer size that can support your real dental applications with stable accuracy, suitable resin compatibility, manageable operation, and reliable post-processing.
If you are choosing a dental 3D printer for your lab, clinic, or production team, contact Yidimu with your model size, resin requirement, application, and expected workflow. Yidimu can help you evaluate a suitable printer, resin, and UV curing setup for your professional dental 3D printing process.
Practical Table
| Decision Factor | Why It Matters | What Professional Users Should Do |
| Largest regular case | Determines minimum platform requirement | Measure full-arch models, guides, splints, or denture parts used most often |
| Cases per batch | Affects daily throughput | Decide how many models or appliances must be printed in one cycle |
| X-Y build area | Controls how many parts can be nested | Compare real nesting layouts instead of only reading machine dimensions |
| Z height | Matters for tall parts and certain orientations | Confirm height for appliances, fixtures, and special production parts |
| Accuracy across platform | Dental fit depends on consistency | Test or verify repeatability across the usable print area |
| Resin workflow | Different dental resins require different processing | Confirm resin indication, printer compatibility, and curing process |
| Washing and curing capacity | Prevents workflow bottlenecks | Match post-processing equipment to batch size |
| Future growth | Avoids early equipment limitation | Select a size that supports realistic production expansion |
Workflow or Checklist
- List all dental applications your team plans to print.
- Identify the largest regular case, not the rarest oversized case.
- Decide how many cases should be printed per batch.
- Test or simulate nesting on the build platform.
- Check spacing for supports, resin flow, and part removal.
- Confirm X-Y area and Z height are both suitable.
- Evaluate accuracy across the platform.
- Match the printer with suitable dental resins.
- Confirm washing, drying, and UV curing capacity.
- Verify resin indication and local regulatory requirements before clinical or intraoral use.
- Review operator workflow, workspace, and case labeling.
- Contact Yidimu with model size, resin requirement, application, and expected workflow for selection support.
Common Mistakes to Avoid
- Choosing the largest build volume without checking platform accuracy.
- Buying a printer that fits models but not the required resin workflow.
- Ignoring washing and UV curing capacity.
- Overcrowding the platform to chase higher output.
- Using one build volume rule for every dental application.
- Forgetting to confirm resin indication, post-curing, and local regulatory requirements.
- Planning around peak demand only, without considering normal daily operation.
- Selecting a printer before testing real case layouts.
FAQ
What build volume do I need for a dental 3D printer?
The required build volume depends on what you print and how many cases you need per batch. A clinic may only need enough space for one or two full-arch models, surgical guides, or appliances. A dental lab may need a larger platform for multiple full-arch models, aligner models, or mixed production batches.
Is a larger dental 3D printer always better?
No. A larger printer can increase batch capacity, but only if it maintains stable accuracy, exposure uniformity, peeling performance, and workflow reliability. Larger printers also require suitable washing, curing, resin handling, and workspace planning.
Is X-Y build area more important than Z height for dental printing?
In many dental workflows, X-Y build area is more important because models, guides, splints, and restorations often have a wide footprint but limited height. Z height still matters for taller appliances, special orientations, denture-related parts, and custom lab tools.
How many dental models can fit on one build plate?
It depends on model size, orientation, spacing, support strategy, and the printer’s usable platform area. Professional users should test real nesting layouts instead of relying only on platform dimensions.
What build volume is suitable for aligner model production?
Aligner model production often benefits from a larger X-Y build area because labs may need to print many full-arch models per day. The right size depends on daily case volume, turnaround time, labeling workflow, and post-processing capacity.
Can one dental 3D printer handle models, surgical guides, and splints?
One printer may support multiple dental applications if it is compatible with the required resins and workflows. However, each application may require different resin settings, washing, curing, support strategy, and regulatory confirmation.
Why is post-curing important when choosing printer size?
A larger printer can produce more parts per batch, but those parts still need washing, drying, and UV curing. If the UV curing box is too small or the curing workflow is not suitable, the larger printer may create a bottleneck.
Should a dental clinic buy the same build volume as a dental lab?
Not necessarily. Clinics often print fewer cases and may prioritize compact workflow, ease of operation, and specific applications. Labs usually need higher batch capacity, stronger scheduling control, and more post-processing capacity.
What should I send to Yidimu for printer size recommendation?
Send your typical model size, largest regular case, daily case volume, resin requirement, dental application, expected workflow, turnaround time, and available post-processing setup. This helps Yidimu recommend a more suitable dental 3D printing solution.