For dental labs, the term surgical guide 3D printing resin workflow should not be understood as “buy a biocompatible resin and print the STL.” A printed implant guide depends on the full chain: scan quality, CBCT alignment, implant planning, sleeve library accuracy, CAD offset, printer calibration, resin handling, washing, post-curing, finishing, sterilization, and final inspection.
This matters because a surgical guide is used to transfer a digital implant plan into the clinical procedure. In practice, the guide may contact oral tissue, support drill sleeves, and guide drilling direction depending on the planned case. That means the printed part must be dimensionally stable, clean, properly cured, and suitable for its intended use.
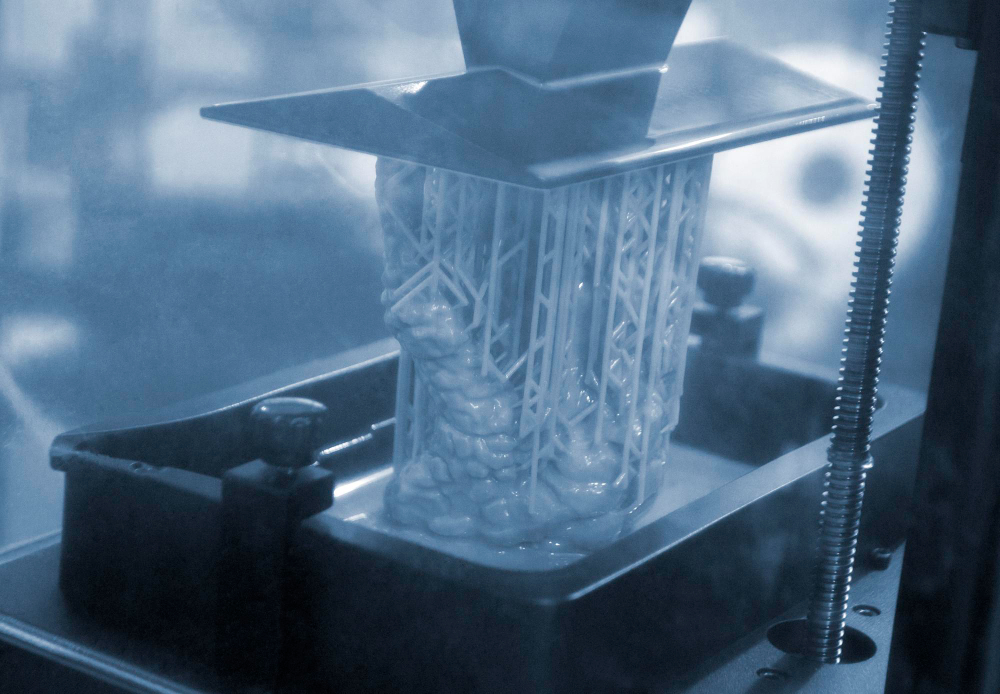
The FDA’s additive manufacturing guidance emphasizes that 3D printed medical devices require attention to the full additive manufacturing process, including design, material controls, post-processing, testing, and characterization—not only the printing step itself. Dental teams should apply the same mindset when building a repeatable dental guide workflow.
For Yidimu customers, the practical question is usually not “Can a resin printer print a surgical guide?” The better question is:
Can this printer, resin, curing equipment, software, and operator workflow consistently produce guides that meet the lab’s clinical, dimensional, and regulatory requirements?
What Equipment Is Needed for Surgical Guide Resin Printing?
A professional surgical guide workflow normally requires more than a dental 3D printer. Dental labs should evaluate the complete production cell before offering surgical guide printing as an in-house service.
Typical equipment and workflow components include:
- Intraoral scanner or desktop scanner
Used to capture dentition, impression, or model geometry. - CBCT data source
Used for implant planning and anatomical evaluation. Many guided implant workflows combine surface scan data with CBCT data. - Dental CAD / implant planning software
Used to align scan data, plan implant position, design the guide, and define sleeve position. - Dental resin 3D printer
Usually a resin-based system such as LCD, DLP, or SLA, depending on the lab’s equipment strategy. - Surgical guide resin
Resin should be selected based on manufacturer indication, printer compatibility, post-curing requirements, sterilization compatibility, and local regulatory requirements. - Washing system
Used to remove uncured surface resin before post-curing. - UV curing box
Used to complete curing according to resin-specific time, temperature, wavelength, and exposure requirements. - Finishing tools
Flush cutters, rotary tools, polishing tools, and inspection tools may be needed. - Sleeves and sleeve insertion tools
Surgical guide sleeves must match the implant planning system and guide design. - Sterilization or validated reprocessing workflow
Dental facilities should follow resin IFU, autoclave manufacturer instructions, and local clinical requirements. CDC dental sterilization guidance notes that reprocessing must be performed in the correct sequence and according to manufacturer instructions.
Practical Table: Surgical Guide Resin Workflow Overview
| Workflow Stage | Main Task | Key Requirement | Common Risk | Lab Control Point |
|---|---|---|---|---|
| Case intake | Receive scan, CBCT, prescription, implant system details | Complete clinical and design data | Missing sleeve or implant library information | Confirm case checklist before design |
| Scan and alignment | Align intraoral/desktop scan with CBCT | Accurate registration | Misalignment between surface scan and CBCT | Review alignment visually and clinically |
| Guide design | Design guide body, sleeve holes, offsets, thickness | Stable fit and sleeve support | Thin guide, poor seating, wrong sleeve offset | Use validated design parameters |
| Slicing | Orient guide and generate supports | Avoid support marks on intaglio and sleeve areas | Distorted fit surface or sleeve hole | Review support placement before printing |
| Printing | Print with compatible resin and settings | Stable exposure, clean vat, calibrated printer | Dimensional error, incomplete cure, print failure | Maintain printer and resin records |
| Washing | Remove uncured resin | Correct solvent, time, agitation, and cleanliness | Sticky surface, residue, swelling | Use fresh wash solvent and full drying |
| Post-curing | Cure according to resin IFU | Correct wavelength, time, temperature | Under-cured or over-cured guide | Use resin-specific curing settings |
| Finishing | Remove supports, smooth touchpoints | No damage to fit or sleeve area | Cracks, gouges, changed fit | Inspect after finishing |
| Sleeve insertion | Insert compatible metal sleeves | Correct sleeve type and fit | Loose sleeve or wrong angle | Verify sleeve retention and position |
| Sterilization | Prepare guide for clinical use | Follow IFU and local requirements | Warping, compromised packaging, wrong cycle | Validate process with clinic/lab policy |
| Final QC | Check fit, sleeve, surface, documentation | Repeatable release criteria | Guide released without inspection | Use a documented QC checklist |
Step-by-Step Surgical Guide 3D Printing Resin Workflow
Step 1: Confirm the Case Information Before Printing
Before opening the CAD file, the lab should confirm the case requirements. A surgical guide case is not the same as a model case. Missing information can cause remakes, delays, or guide rejection.
Confirm:
- Patient scan file is complete and usable.
- CBCT data is available when required for implant planning.
- Implant system and sleeve system are identified.
- Guide type is clear: tooth-supported, mucosa-supported, bone-supported, pilot guide, fully guided guide, or other planned design.
- Resin indication is suitable for the intended guide use.
- Clinic has confirmed sterilization and clinical use requirements.
- Local regulatory requirements are understood.
The ADA’s printer evaluation guidance notes that dental users should evaluate intended use, FDA compliance, software compatibility, resin types, build platform size, washing, curing, and workflow integration when choosing 3D printing equipment. This is especially relevant for surgical guide production.
Step 2: Scan and Align the Digital Data
A common guided surgery workflow uses surface scan data and CBCT data. The surface scan provides detailed tooth or model geometry, while CBCT supports implant planning and anatomical review. In surgical guide design workflows, the scan and CBCT data are often imported, reviewed, aligned, and used together for treatment planning.
For labs, the critical point is not just having the files. The critical point is whether the files are clean, complete, and correctly aligned.
Check:
- Are there holes, noise, or scan artifacts near the support teeth?
- Is the bite or arch data complete?
- Is the CBCT-to-scan registration reliable?
- Are critical anatomical structures reviewed by the clinician?
- Does the design software support the file formats used by the clinic?
A poor scan cannot be fixed by a high-resolution printer. If the guide design starts from inaccurate digital data, the printed guide may fit poorly even when the printer performs correctly.
Step 3: Design the Surgical Guide in Dental CAD Software
The CAD step defines the guide’s final function. The operator designs the guide body, inspection windows, sleeve holes, offsets, wall thickness, support region, and guide seating surface. The correct design parameters depend on software, implant system, sleeve system, resin, printer, and clinical preference.
Practical design considerations include:
- Guide should have enough contact area for stable seating.
- Wall thickness should be sufficient for handling and clinical use.
- Sleeve holes should match the planned sleeve system.
- The intaglio surface should remain clean and undamaged.
- Inspection windows may help the clinician confirm seating.
- Offset should be controlled; too tight may prevent seating, too loose may reduce stability.
- Guide design should consider printing orientation and support placement.
Some published surgical guide workflows recommend importing scan and CBCT data, reviewing scans, aligning data, planning implant position, designing the guide, and exporting STL or OBJ files. Labs should adapt this flow to their own software and customer requirements.
Step 4: Choose the Correct Surgical Guide Resin
Surgical guide resin should be selected by indication, not only by color or price. A translucent resin may look suitable, but appearance does not confirm clinical suitability.
Evaluate resin based on:
- Manufacturer’s intended use.
- Printer compatibility.
- Required layer thickness and print settings.
- Washing instructions.
- UV post-curing instructions.
- Sterilization compatibility.
- Biocompatibility documentation.
- Shelf life and storage conditions.
- Whether the resin is intended for mucosal contact or surgical guide use.
- Whether local regulation allows the intended use.
Some commercial surgical guide resins are described by their manufacturers as biocompatible and autoclavable for surgical guides, drilling templates, pilot drill guides, or similar applications, but each material’s indication is system-specific and region-specific. Yidimu customers should confirm resin indication, post-curing process and local regulatory requirements before clinical or intraoral use.
Step 5: Prepare the Dental 3D Printer
Before printing, the printer should be treated as production equipment, not a hobby device. Surgical guide cases are sensitive to fit, sleeve positioning, and surface integrity.
Check:
- Build platform is clean and properly calibrated.
- Resin vat film is clean and not damaged.
- Resin is mixed according to manufacturer instructions.
- Resin is within shelf life.
- Printer environment is controlled.
- Resin profile matches the material.
- Firmware and slicing software are stable.
- The build file uses validated parameters.
For dental labs printing many cases, it may be useful to separate workflows by material type. Cross-contamination between materials can affect appearance, surface quality, and possibly biocompatibility depending on the material and use case.
Step 6: Orient the Guide and Generate Supports Carefully
Orientation and support placement affect final fit. For surgical guides, support marks should not damage the intaglio surface, sleeve holes, or critical seating areas. One common best practice is to orient the guide so supports are not generated on the seating surface and to manually inspect support placement near sleeve holes.
Recommended support review points:
- No support touchpoints inside sleeve holes.
- No supports on the intaglio fit surface.
- No supports on critical seating edges.
- No supports that distort thin guide sections.
- Adequate support for long spans and curved surfaces.
- Enough spacing between multiple guides on the build platform.
For production labs, support strategy should be standardized. Operators should avoid changing support density, contact size, or orientation randomly from case to case unless there is a documented reason.
Step 7: Print With Validated Settings
The actual print process should use validated resin settings. Dental labs should avoid “guessing” exposure settings for surgical guide materials unless they have a controlled validation process. Overexposure may affect sleeve holes and fit. Underexposure may affect strength, surface finish, and dimensional stability.
Record:
- Printer model.
- Resin batch.
- Layer thickness.
- Exposure profile.
- Build platform used.
- Operator.
- Print date.
- Case ID.
- Any deviation or print issue.
For labs managing multiple printers, batch tracking and print records are practical quality controls. They help identify whether a remake was caused by scan error, CAD issue, resin handling, printer calibration, or post-processing.
Step 8: Wash the Printed Guide
Washing removes uncured surface resin. This step matters because residue can affect surface safety, fit, appearance, and post-curing. Some surgical guide resin workflows use high-concentration isopropyl alcohol and define wash times, but the exact process should follow the resin manufacturer’s IFU. Manufacturer examples also emphasize complete drying and inspection before moving to later steps.
Good washing practice:
- Use the resin manufacturer’s recommended solvent.
- Use clean solvent and replace it regularly.
- Avoid over-washing if the resin is sensitive to solvent exposure.
- Use a two-stage wash when required.
- Dry the guide completely before curing.
- Inspect the surface for uncured resin or particles.
A sticky guide is not ready for clinical handling. Do not compensate for poor washing by simply increasing cure time without confirming the resin instructions.
Step 9: Post-Cure According to the Resin IFU
Post-curing is not optional for most dental biocompatible resin workflows. It can affect mechanical properties, surface condition, and biocompatibility depending on the resin. Manufacturer instructions for surgical guide materials often specify curing equipment, wavelength, time, and sometimes temperature. Yidimu, for example, states that printed surgical guides must be exposed to light and heat to achieve biocompatibility and mechanical properties, and warns that curing outside recommended settings can affect mechanical and biocompatibility properties.
Dental labs should confirm:
- Curing wavelength.
- Curing time.
- Curing temperature.
- Whether the curing chamber is calibrated or maintained.
- Whether guides need to be flipped or spaced.
- Whether cure settings differ by printer or material version.
Do not assume that all “405 nm dental resins” use the same curing process. A resin may print on a machine but still require a specific post-curing workflow to meet its intended performance.
Step 10: Remove Supports and Finish Without Damaging Critical Areas
After curing, remove supports carefully. Do not tear supports from thin guide sections by hand if it risks cracks, divots, or deformation. Use proper tools and inspect the guide after finishing.
Focus on:
- No cracks.
- No sharp edges.
- No leftover support points on seating areas.
- No damage around sleeve holes.
- Smooth patient-contact surfaces.
- Clear visibility through inspection windows if used.
Polishing should not change the fit surface or sleeve geometry. If finishing removes material from critical surfaces, the guide may become clinically unsuitable.
Step 11: Insert and Verify Guide Sleeves
The sleeve is one of the most important functional parts of the guide. The printed resin body provides the geometry, but the metal sleeve guides the drill system.
Check:
- Sleeve matches the implant planning system.
- Sleeve size matches the CAD library.
- Sleeve insertion direction is correct.
- Sleeve is fully seated.
- Sleeve retention is stable.
- Sleeve angle and position match the digital plan.
- No resin debris blocks the sleeve channel.
A printed guide with the wrong sleeve is not a minor finishing problem; it is a case-level error.
Step 12: Sterilize or Reprocess According to IFU and Local Requirements
Sterilization is a critical part of the final workflow. Dental labs and clinics should follow the resin manufacturer’s IFU, autoclave manufacturer instructions, clinic policy, and local regulatory requirements.
CDC dental sterilization guidance states that dental health care personnel should follow manufacturer recommendations for sterilization times, temperatures, and other operating parameters. CDC steam sterilization tables list, for example, wrapped instruments in a dynamic-air-removal / prevacuum cycle at 132°C for 4 minutes with 20–30 minutes drying time, and wrapped instruments in gravity displacement at 121°C for 30 minutes with 15–30 minutes drying time.
However, a resin surgical guide is not automatically equivalent to a metal dental instrument. The lab or clinic must confirm that the specific resin guide can tolerate the planned sterilization process. Some resin manufacturers specify autoclave cycles and warn that hotter or longer cycles may affect mechanical properties or accuracy.
Workflow or Checklist: Dental Lab Surgical Guide Release Checklist
Use this checklist before releasing a printed surgical guide:
- Case ID and prescription confirmed.
- Implant system confirmed.
- Sleeve system confirmed.
- Scan file checked.
- CBCT alignment reviewed.
- CAD design approved.
- Resin indication confirmed.
- Resin batch recorded.
- Printer and settings recorded.
- Guide printed without visible failure.
- Guide washed according to resin instructions.
- Guide fully dried before curing.
- Guide post-cured according to resin IFU.
- Supports removed without damage.
- Intaglio surface inspected.
- Sleeve holes inspected.
- Sleeves inserted and verified.
- Fit checked on printed model or approved verification method.
- Surface is smooth and free of uncured resin.
- Sterilization or reprocessing instructions confirmed.
- Documentation completed.
- Case packed and labeled according to lab policy.
How to Choose a Dental Resin 3D Printer for Surgical Guide Workflows
When selecting a printer for surgical guide resin, dental labs should look beyond headline resolution. A high-resolution screen is useful, but surgical guide production depends on repeatability, resin compatibility, post-processing, and workflow control.
Key printer selection factors:
1. Resin Compatibility
The printer should support the surgical guide resin required by the lab. Confirm resin wavelength, exposure profile, material availability, and whether the resin is approved or indicated for the intended application in the customer’s market.
2. Build Volume
A larger build platform may help print multiple guides or full-arch guides in one job. For small labs, a compact dental printer may be enough. For production labs, build volume and throughput matter more.
3. Dimensional Stability
The printer should provide stable Z-axis movement, consistent light output, and repeatable exposure. For surgical guides, fit and sleeve location are more important than visual appearance alone.
4. Workflow Integration
The printer should work smoothly with dental CAD exports, slicing software, resin settings, and post-processing equipment. ADA guidance also highlights CAD compatibility, open vs. closed systems, resin type limitations, build platform size, washing, curing, and support needs as printer evaluation factors.
5. Post-Processing Support
A surgical guide workflow should include compatible washing and UV curing equipment. Without controlled post-processing, the lab may struggle to achieve consistent results.
6. Technical Support
Dental labs need support for parameter setup, print failure analysis, resin handling, curing, and production workflow. This is especially important when the lab is moving from model printing to intraoral or surgical applications.
Where Yidimu Fits in the Surgical Guide Resin Workflow
Yidimu supplies professional resin 3D printing equipment, dental 3D printers, UV curing equipment, 3D printing resins, and technical workflow support for dental and industrial users. For dental labs evaluating surgical guide production, Yidimu can help review:
- Required guide size.
- Expected daily or weekly case volume.
- Resin requirements.
- Printer build volume.
- Post-curing workflow.
- Washing and finishing process.
- Training needs.
- Whether the workflow is mainly for dental models, surgical guides, flexible resin parts, or mixed dental applications.
Yidimu does not need to overpromise “perfect accuracy” to be useful. The better value is helping customers build a controlled workflow around the actual case type, resin, printer, and post-processing process.
Common Mistakes to Avoid
Mistake 1: Choosing Resin by Color Instead of Indication
A transparent resin is not automatically suitable for surgical guides. Always confirm intended use, printer compatibility, biocompatibility documentation, post-curing requirements, and sterilization compatibility.
Mistake 2: Ignoring Scan and CBCT Alignment
If the digital plan is wrong, the printed guide will not solve the problem. Poor scan quality and poor CBCT alignment are common causes of guide issues.
Mistake 3: Placing Supports on Critical Fit Surfaces
Support marks on the intaglio surface or sleeve area may affect fit. Support placement should be reviewed manually before printing.
Mistake 4: Using Unverified Print Settings
Changing exposure, lift speed, layer height, or support settings without validation can affect dimensions and mechanical behavior.
Mistake 5: Incomplete Washing
Residual uncured resin can affect surface quality and may compromise the intended workflow. Washing should follow resin instructions and use clean solvent.
Mistake 6: Skipping Full Drying Before Post-Curing
Solvent trapped on or inside the guide can affect curing and surface quality. Drying should not be rushed.
Mistake 7: Treating Post-Curing as a Generic UV Step
Different resins may require different cure times, temperatures, and wavelengths. Follow resin-specific instructions.
Mistake 8: Over-Finishing the Guide
Aggressive polishing can change fit surfaces or sleeve holes. Finishing should remove defects without altering functional geometry.
Mistake 9: Using the Wrong Sleeve
Sleeves must match the digital design and implant system. A sleeve mismatch can make the guide unusable.
Mistake 10: Assuming Any Autoclave Cycle Is Acceptable
A resin guide may deform or lose accuracy if exposed to the wrong sterilization process. Follow the resin IFU, autoclave instructions, and local clinical requirements.
FAQ
What is the surgical guide 3D printing resin workflow?
The surgical guide 3D printing resin workflow includes scan capture, CBCT alignment, implant planning, guide CAD design, slicing, resin printing, washing, drying, UV post-curing, support removal, finishing, sleeve insertion, inspection, and sterilization or reprocessing according to resin instructions and local requirements.
Can dental labs print surgical guides in-house?
Yes, dental labs may print surgical guides in-house if they have the correct scanner data, CAD workflow, dental resin printer, indicated surgical guide resin, washing and curing equipment, trained operators, quality control process, and compliance with local requirements. The lab should confirm resin indication and clinical-use requirements before offering the service.
What resin should be used for dental surgical guides?
Dental surgical guides should use a resin indicated by the manufacturer for surgical guide or relevant intraoral use. The resin should be compatible with the printer and post-curing system. Customers should confirm resin indication, post-curing process and local regulatory requirements before clinical or intraoral use.
Is surgical guide resin the same as dental model resin?
No. Dental model resin is typically used for printed models, diagnostic models, aligner models, or restorative model work depending on the resin. Surgical guide resin is intended for guide applications only when the manufacturer indicates it for that use. The two resin types should not be treated as interchangeable.
Do surgical guides need post-curing?
In most resin workflows, yes. Post-curing is usually required to reach the intended mechanical and biocompatibility properties of the material. The exact curing time, temperature, and wavelength should follow the resin manufacturer’s instructions.
Can printed surgical guides be sterilized?
Some surgical guide resins are designed to support sterilization processes such as steam autoclaving, but this depends on the specific resin and validated workflow. Labs and clinics should follow the resin IFU, autoclave manufacturer instructions, and local regulatory requirements.
What causes poor fit in 3D printed surgical guides?
Poor fit may come from inaccurate scan data, incorrect CBCT alignment, wrong CAD offset, poor guide design, printer calibration issues, resin shrinkage, incorrect orientation, support marks on the fit surface, over-washing, under-curing, over-curing, or deformation during sterilization.
Should supports be placed on the intaglio surface?
Usually no. Supports on the intaglio surface may affect fit. The operator should orient the guide and review supports so that critical seating surfaces and sleeve holes remain clean.
What printer size is suitable for surgical guide printing?
For single guides or small clinics, a compact dental resin printer may be enough. For dental labs printing multiple guides, full-arch guides, and models in the same workflow, a larger build volume can improve throughput. The right size depends on case volume, guide size, resin type, and production schedule.
Can one printer handle models, surgical guides, and flexible resin?
Technically, some professional resin printers may support multiple material categories, but each material requires compatible settings, cleaning control, and post-processing. For clinical or intraoral applications, avoid cross-contamination and confirm material-specific workflow requirements.
Conclusion
A reliable surgical guide 3D printing resin workflow depends on controlled digital planning, suitable dental resin printing equipment, indicated surgical guide resin, proper washing, complete drying, validated UV post-curing, careful finishing, sleeve verification, and appropriate sterilization or reprocessing. Dental labs should not evaluate the workflow by printer resolution alone. Resin indication, post-processing, operator training, and quality control are equally important.
Yidimu can help dental labs, clinics, and professional production users choose suitable dental 3D printers, surgical guide resin workflows, UV curing equipment, and process parameters based on model size, resin requirement, application, and expected workflow. To evaluate your setup, contact Yidimu with your guide dimensions, case volume, resin requirements, application type, and current digital workflow.