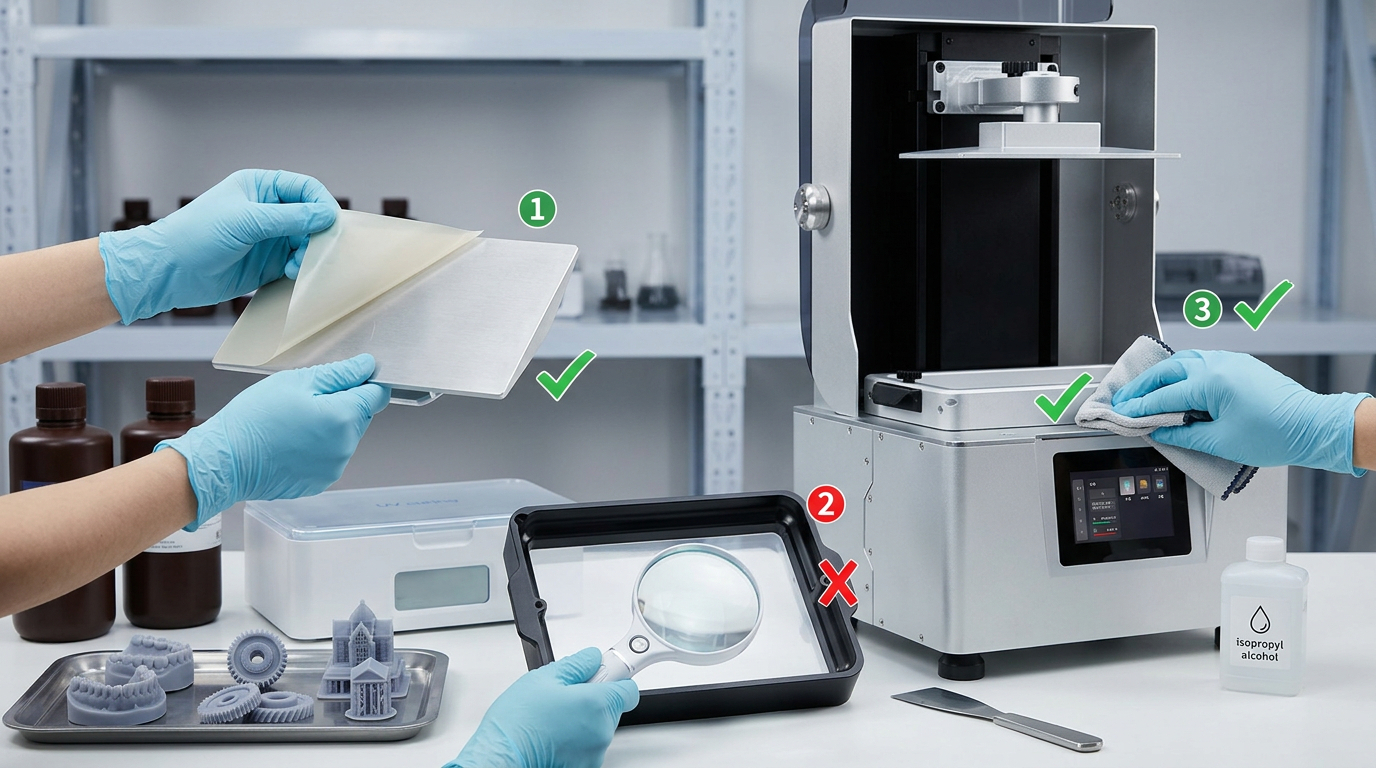
Yes, you should remove shipping protective film from the resin 3D printer build plate, screen cover, vat exterior, lid or other labeled packing surfaces before printing. However, you should not remove the functional release film at the bottom of the resin vat unless it is damaged or due for replacement. In resin 3D printing, users often call the build plate the “bed,” but the most important film is usually not on the bed itself. It is often the clear release film installed in the resin vat. Removing the wrong film can cause resin leaks, failed prints, screen damage or poor first-layer adhesion.
Resin 3D printing belongs to the broader vat photopolymerization family, where liquid photopolymer resin is cured by light layer by layer. Bottom-up resin printers cure through a transparent vat bottom, which is why the vat film is a functional part of the printing system, not just packaging.
Introduction
Many first-time resin printer users ask: do you take film off of resin 3D printer bed? The confusion is understandable. New resin printers may arrive with several clear plastic sheets, blue films, protective stickers, screen protectors, vat films and release films. Some are temporary shipping protection. Some are permanent or semi-consumable components. Some should be removed before printing. Others must stay in place.
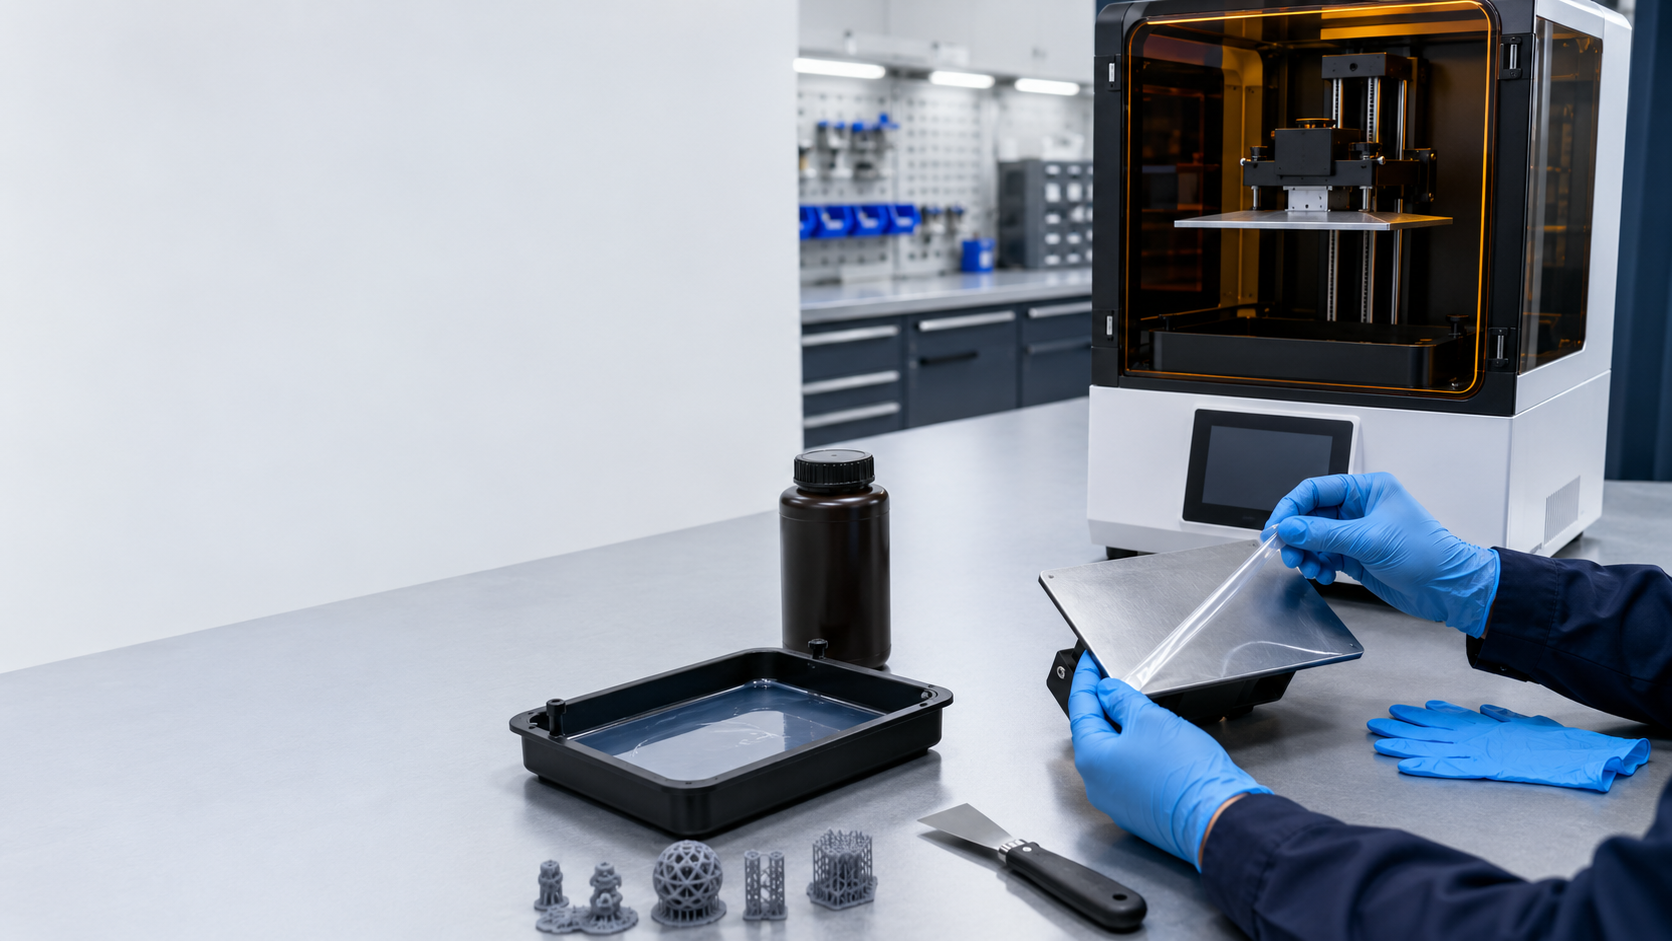
For professional users, this question is more than a beginner setup detail. In a factory, dental lab or engineering workflow, a simple film mistake can waste resin, delay sample delivery, damage the LCD screen or create inconsistent print results. If your team uses industrial resin 3D printer options or dental 3D printers for labs and clinics, film inspection should be part of the first-use checklist and routine maintenance process.
This guide explains what to remove, what to keep, how to identify each film and what to check before running the first resin print.
First, Understand What “Resin 3D Printer Bed” Means
In resin printing, the word “bed” is often used casually, but the correct part is usually called the build plate or build platform.
The build plate is the metal surface that moves down into the resin vat and holds the printed part as each cured layer attaches to it. Unlike many filament printers, a resin printer usually does not use a heated bed in the same way. Instead, adhesion depends on the build plate surface, leveling, exposure settings, resin behavior and the release process between the cured layer and the vat film.
When users ask about taking film off the “bed,” they may actually mean one of these areas:
| Area on the printer | Common user description | Should you remove the film? | Practical answer |
|---|---|---|---|
| Build plate surface | Resin printer bed, metal plate, printing platform | Usually yes, if it is shipping film | Remove packing film before leveling or printing |
| Resin vat bottom | Clear sheet, FEP film, PFA film, release film | No, unless replacing it | This is a functional release surface |
| LCD screen area | Screen protector, clear screen film | Depends on printer design | Remove only labeled shipping film; keep approved screen protector if supplied |
| Printer lid or cover | Plastic cover film | Yes | Remove cosmetic shipping protection |
| Vat exterior or packaging | Blue/clear transport film | Yes | Remove before adding resin |
| Replacement release film sheet | Spare film with protective layers | Remove protective layers during installation only | Follow the replacement process carefully |
The safest rule is simple: remove clearly labeled packaging film, but do not peel off the installed vat release film unless you are intentionally replacing it.
Which Films Should Be Removed Before Printing?
Before using a new resin printer, inspect the machine under good lighting. Remove only the temporary films that are designed to protect surfaces during shipping.
Common removable films include:
- Build plate shipping film
Some printers ship with a clear or colored plastic layer on the build plate. This must be removed before printing because the first layer needs direct contact with the build plate surface. If the shipping film stays on, the print may not attach properly, or the film may detach during the first layers. - Protective film on the printer lid
Transparent covers often have protective films to prevent scratches during shipping. These can be removed before normal use. - Protective film on the outside of the resin vat
If there is film on the exterior sidewalls or packaging surfaces of the vat, remove it. Do not confuse this with the transparent release film at the bottom of the vat. - Packing film on touchscreens or panels
Some interface screens have temporary film. Remove it if it is clearly a packing layer. If the machine has a factory-installed functional screen protector, confirm with the supplier before removing it. - Protective layers on replacement vat film
Some replacement release films come with protective liners on one or both sides. Those liners are removed only during installation. This is different from removing the installed release film from a working vat.
For production users, this inspection should be done before the machine is assigned to a dental, engineering or sample-making workflow. If your workflow includes different resin types, review Yidimu resin materials and confirm exposure, cleaning and curing requirements before starting batch work.
Which Film Should Not Be Removed?
The main film you should not remove casually is the resin vat release film.
This film is installed at the bottom of the vat. It creates a transparent, flexible interface between the LCD/light source and the liquid resin. During printing, each layer cures against this film and then separates from it as the build plate lifts. In bottom-up resin printing, the transparent vat bottom is part of how the image or light pattern reaches the resin.
Depending on printer design, this release film may be described as:
- FEP film
- PFA film
- nFEP film
- release film
- vat film
- transparent vat bottom film
- peel film
This film is a consumable, but it is not disposable packaging. It should stay installed until it becomes cloudy, scratched, punctured, loose, deformed or unsuitable for stable release. Removing it without replacing it correctly can cause resin leakage onto the LCD screen or into the machine.
Why Removing the Wrong Film Causes Problems
A resin printer depends on controlled contact and separation. The build plate must hold the part firmly, while the vat film must allow each cured layer to release cleanly.
If the wrong film is removed or left in place, several problems can occur:
| Mistake | Likely result | Why it happens | What to do |
| Leaving shipping film on the build plate | First layer does not stick | Resin bonds to the temporary film instead of the plate | Remove film, clean plate, re-level |
| Removing vat release film | Resin leak, screen damage, failed print | Vat bottom loses its sealing/release surface | Stop, clean safely, install new film |
| Scratching vat film during inspection | Streaks, failed areas, leaks over time | Scratches affect release and transparency | Replace if damage is significant |
| Removing screen protector by mistake | Higher risk of screen contamination | Screen loses protective layer | Confirm design; replace if needed |
| Printing with cloudy vat film | Weak curing or uneven release | Light transmission and release behavior may change | Inspect and replace when needed |
| Adding resin before checking film | Messy setup, harder inspection | Resin hides defects and films | Inspect dry before adding resin |
For professional teams, these problems can affect production reliability. A small setup error may become a repeated failure if the operator only adjusts exposure settings without checking the physical film condition.
Do You Take Film Off of Resin 3D Printer Bed Before Leveling?
Yes, if there is a removable shipping film on the build plate, take it off before leveling.
Leveling should be done with the actual build plate surface, not with temporary packaging material. If the shipping film remains on the plate during leveling, the build plate height may be slightly incorrect. More importantly, the first layer may not bond consistently to the metal surface.
A practical sequence is:
- Remove the build plate from the printer.
- Check whether the plate surface has any clear or colored shipping film.
- Peel off only the temporary film.
- Clean the build plate surface according to the printer supplier’s guidance.
- Install the vat only after confirming the vat release film is intact.
- Level the build plate.
- Run a small exposure or calibration test before using production files.
For a controlled production setup, especially when printing engineering prototypes or dental models, leveling should be documented as part of the machine preparation process. Resin printing often requires washing, drying and curing after printing, and these post-processing steps are part of the complete workflow.
Setup Checklist Before the First Resin Print
Use this checklist before the first print or after unpacking a new machine.
Pre-Print Film Inspection Checklist
- Confirm the printer is powered off before physical inspection.
- Wear suitable gloves when handling resin-contaminated parts or resin-contact surfaces.
- Remove visible packaging films from the lid, panels and build plate.
- Do not remove the transparent film installed at the bottom of the resin vat.
- Check the vat release film for punctures, wrinkles, dents, cloudiness or loose tension.
- Check whether the LCD screen has a removable shipping film or a functional protector.
- Install the vat securely before adding resin.
- Confirm the build plate is clean, dry and properly mounted.
- Level the build plate according to the machine workflow.
- Shake or mix resin according to resin supplier guidance.
- Pour resin only after the machine, vat and plate are ready.
- Run a small test print before committing to batch production.
This process is especially important for industrial 3D printing solutions where multiple operators may share one machine. A written checklist reduces mistakes during shift changes, resin changes and urgent sample production.
How to Tell Whether a Film Is Packaging or Functional
If you are unsure, do not pull hard. Identify the film by location, tension, labeling and purpose.
Packaging film usually has these signs:
- It is loose at the edge or has a pull tab.
- It sits on an exterior surface.
- It may have printed warning text or shipping labels.
- It protects against scratches during transport.
- It is not fixed by screws, frames or tensioned parts.
Functional vat release film usually has these signs:
- It is stretched tightly across the bottom of the resin vat.
- It is held by a frame or screws.
- It sits directly under the resin area.
- It forms the transparent bottom of the vat.
- It should not peel off easily by hand.
- Removing it would leave an open or unsealed vat bottom.
Screen protector may be one of two types:
- A temporary shipping film that should be removed.
- A working protector designed to stay on the LCD area.
Because screen protection design varies by machine, confirm the printer manual or supplier guidance before removing anything from the LCD surface. If the printer is used for professional output, a wrong assumption can lead to resin contamination and expensive downtime.
What Happens If You Already Printed With Film on the Build Plate?
If you accidentally printed with shipping film still on the build plate, stop and inspect the printer.
Possible outcomes include:
- The print failed and remained in the vat.
- The first layer stuck to the plastic film instead of the plate.
- The film detached and floated in the resin.
- Small cured resin pieces remained in the vat.
- The vat film may have been stressed by loose debris.
Do this:
- Stop printing.
- Remove the build plate carefully.
- Remove the shipping film from the plate.
- Filter the resin if loose cured pieces or film fragments entered the vat.
- Inspect the vat release film for dents or scratches.
- Clean the build plate.
- Re-level the machine.
- Run a small test print before restarting production.
Do not simply increase exposure time to force adhesion. If the physical interface is wrong, exposure changes may not solve the real issue.
What Happens If You Removed the Vat Release Film?
If you removed the vat release film by mistake, do not pour resin into the vat and do not start printing.
The vat release film is part of the vat assembly. Without it, resin may leak through the bottom of the vat and reach the LCD screen or internal machine components. If resin has already leaked, turn off the printer and clean according to the supplier’s maintenance guidance.
Correct action:
- Stop using the vat.
- Do not attempt to print with an open or damaged vat bottom.
- Install a correct replacement release film.
- Check film tension and sealing.
- Inspect the LCD screen before use.
- Run a leak test if recommended by the supplier.
- Run a small test print after replacement.
If the machine is used in a factory, dental lab or model-making department, record the incident and inspect surrounding equipment. Liquid resin should be handled with appropriate safety controls, PPE and ventilation practices. General 3D printing safety guidance emphasizes risk controls such as ventilation, training and suitable personal protective equipment.
Professional Workflow: Film Check Before Every Critical Print
For casual prints, users may only check the vat film after a failure. For professional workflows, that is not enough.
A better process is to inspect the vat before critical jobs such as:
- Dental model batch printing
- Surgical guide workflow validation
- Engineering sample delivery
- Functional resin testing
- Flexible resin lattice printing
- Small-batch production trials
- Customer sample printing
If the article involves dental applications, clinical use, intraoral parts, surgical guides, dental models or dental resins, customers should confirm resin indication, post-curing process and local regulatory requirements before clinical or intraoral use.
For dental workflows, film condition can affect surface consistency and print repeatability. For industrial workflows, it can affect dimensional consistency, part release and batch stability. If your team needs help validating a new workflow, Yidimu provides sample printing service support for application review and printer selection.
When Should You Replace the Resin Vat Release Film?
You do not replace the release film simply because it looks like a removable plastic sheet. Replace it when condition or performance indicates that it may no longer support reliable printing.
Common replacement signs include:
- Visible puncture
- Deep scratch
- Resin leak
- Strong cloudiness
- Loose or uneven tension
- Repeated failures in the same area
- Permanent dents from cured debris
- Poor release even after cleaning and parameter checks
- Noticeable marks affecting printed surface quality
Replacement frequency depends on resin type, exposure settings, part geometry, support design, lift behavior, cleaning habits and operator handling. Abrasive fillers, sharp failed parts, careless scraping and repeated large-area prints may shorten film life.
Common Mistakes to Avoid
1. Thinking every clear film is packaging
Not every clear film should be removed. The vat release film is functional. Treat it as part of the resin vat.
2. Leaving shipping film on the build plate
If a plastic layer remains on the build plate, first-layer adhesion may fail. Always inspect the plate before leveling.
3. Using sharp tools near the vat film
Metal scrapers, tweezers and sharp cured resin fragments can puncture or scratch the film. Use suitable tools and handle the vat carefully.
4. Pouring resin before inspection
Inspect the vat dry. Once resin is poured, it becomes harder to see bubbles, scratches, cloudiness or leftover protective layers.
5. Assuming all printers use the same screen protector design
Some screen films are temporary. Some are intended to stay. Confirm before removing anything near the LCD screen.
6. Ignoring dental workflow requirements
Dental applications may require controlled resin selection, cleaning, drying, UV curing and documentation. Users should confirm material indication and workflow requirements before clinical or intraoral use.
7. Solving physical setup problems with exposure settings only
If the build plate film is still attached or the vat film is damaged, changing exposure time may not fix the issue. Inspect hardware first.
Practical Table: What to Remove and What to Keep
| Film or surface | Remove before first print? | Why | Professional workflow note |
| Build plate shipping film | Yes | Prevents real plate contact and first-layer adhesion | Remove before leveling |
| Printer lid protective film | Yes | Cosmetic shipping protection | Remove for better visibility |
| Vat sidewall packing film | Yes | Not part of printing function | Remove before adding resin |
| Installed vat release film | No | Required for resin containment and layer release | Replace only when damaged or worn |
| LCD shipping film | Usually yes | Temporary protection | Confirm before removal |
| Functional screen protector | Usually no | Protects LCD from resin contamination | Confirm with supplier |
| Replacement film liner | Yes, during installation | Liner protects spare film before installation | Remove according to replacement steps |
FAQ
Do you take film off of resin 3D printer bed?
Yes, remove temporary shipping film from the resin printer build plate before leveling and printing. Do not remove the functional release film at the bottom of the resin vat unless you are replacing it.
Is the resin printer bed the same as the build plate?
In resin printing, users often say “bed,” but the correct term is usually build plate or build platform. This is the metal surface that holds the printed part during printing.
Should I remove the clear film from the resin vat?
No, not if it is the installed release film at the bottom of the vat. That film is required for printing. Only remove it when replacing it with a new release film.
What happens if I print with plastic film on the build plate?
The print may fail because the resin may not bond correctly to the build plate. The film may also detach and contaminate the resin vat. Remove the film, clean the plate, inspect the vat and re-level the machine.
Can I print without the vat release film?
No. The vat release film helps contain resin and allows cured layers to separate during printing. Printing without it can cause resin leakage and machine damage.
How do I know if my vat film is damaged?
Look for punctures, deep scratches, dents, cloudiness, loose tension, resin leakage or repeated failures in the same area of the vat.
Should I remove the screen protector on a resin printer?
Only remove it if it is clearly temporary shipping film. If it is a functional screen protector, keep it installed unless the supplier instructs otherwise.
Why does my resin print not stick to the build plate?
Possible causes include shipping film left on the build plate, poor leveling, contaminated plate surface, incorrect exposure settings, unsuitable resin temperature, weak support design or damaged vat film.
Do dental resin workflows need extra caution?
Yes. Dental applications may involve specific resin indications, post-curing requirements and local regulatory rules. Customers should confirm resin indication, post-curing process and local regulatory requirements before clinical or intraoral use.
Should I contact the printer supplier before removing an unclear film?
Yes. If the film is near the vat bottom or LCD screen and you are not sure whether it is packaging or functional, confirm before removal.
Conclusion
So, do you take film off of resin 3D printer bed? Remove temporary shipping film from the build plate, lid, panels and other packing surfaces before printing. But do not remove the functional vat release film unless you are replacing it. The safest approach is to inspect each film by location and function: packaging film comes off; release film stays installed; screen protection should be confirmed before removal.
For professional resin printing, this small setup step affects first-layer adhesion, vat safety, print reliability and workflow consistency. Before starting dental models, engineering prototypes, flexible samples or batch production, check the build plate, vat film, screen area, resin compatibility and post-processing workflow.
If you are choosing a printer or setting up a resin workflow, you can review Yidimu’s UV curing equipment for resin prints, resin materials and professional printer options. For workflow planning, resin requirements, model size, application needs or sample-making support, contact Yidimu for workflow review.