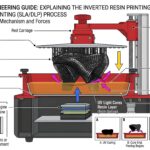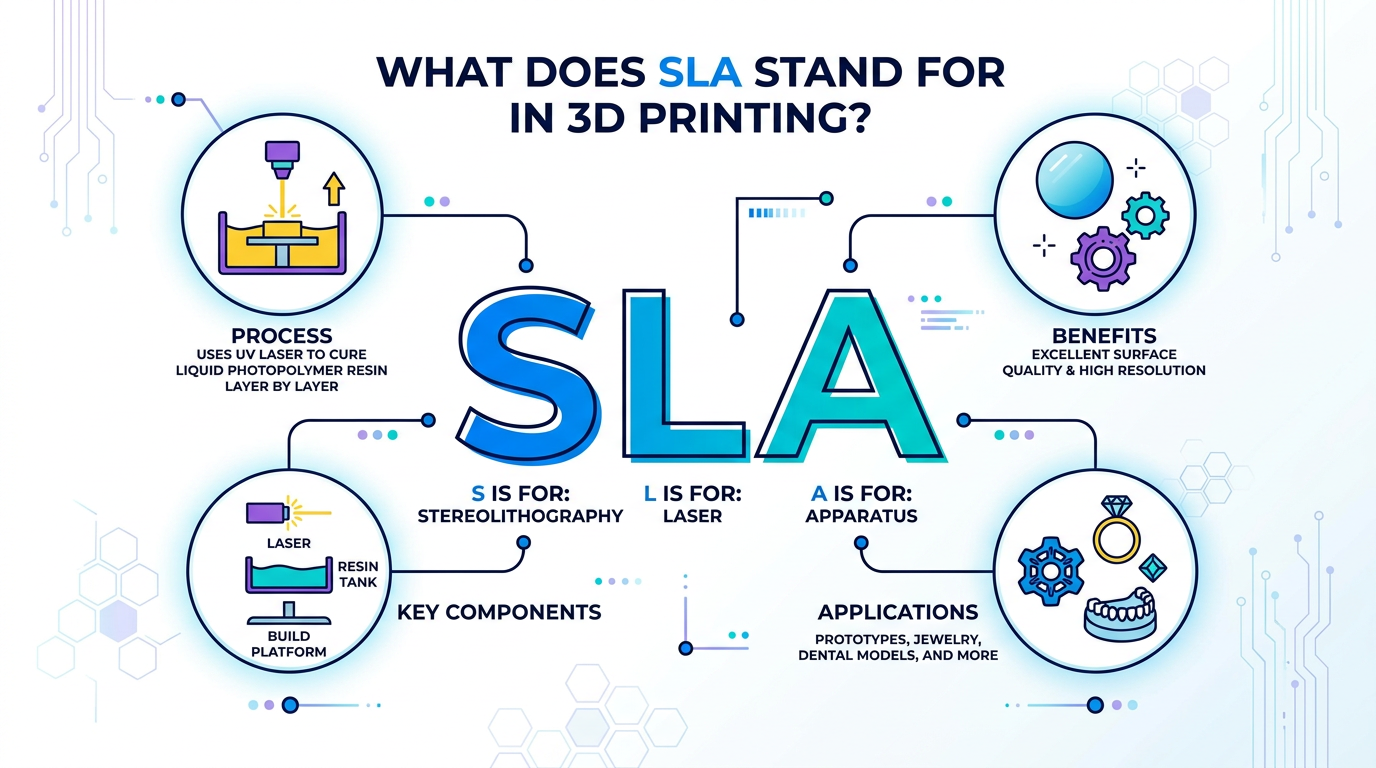
SLA stands for Stereolithography in 3D printing. It is a resin-based additive manufacturing process that uses light to cure liquid photopolymer resin layer by layer into a solid part. In professional use, people often use “SLA” broadly when talking about high-detail resin 3D printing, although modern resin printers may also use related vat photopolymerization methods. SLA is commonly discussed in dental model production, industrial prototyping, engineering samples, jewelry patterns, transparent parts and other applications where surface detail, fine features and controlled post-processing matter.
Introduction
When people ask, “what does SLA stand for in 3D printing?”, they are usually not only asking about a definition. They may also want to know whether SLA is the same as resin 3D printing, whether it is suitable for professional work, and what should be checked before buying a resin printer.
For factories, dental labs and engineering teams, the important point is this: SLA is not just a technical abbreviation. It represents a workflow that includes digital design, slicing, resin selection, exposure control, printing, cleaning, UV post-curing and final inspection. Each step can affect surface quality, fit, strength, stability and production consistency.
If you are comparing professional resin systems, you can also review Yidimu’s industrial resin 3D printer options and dental 3D printers for labs and clinics to understand how different resin workflows are used in real applications.
What Does SLA Mean?
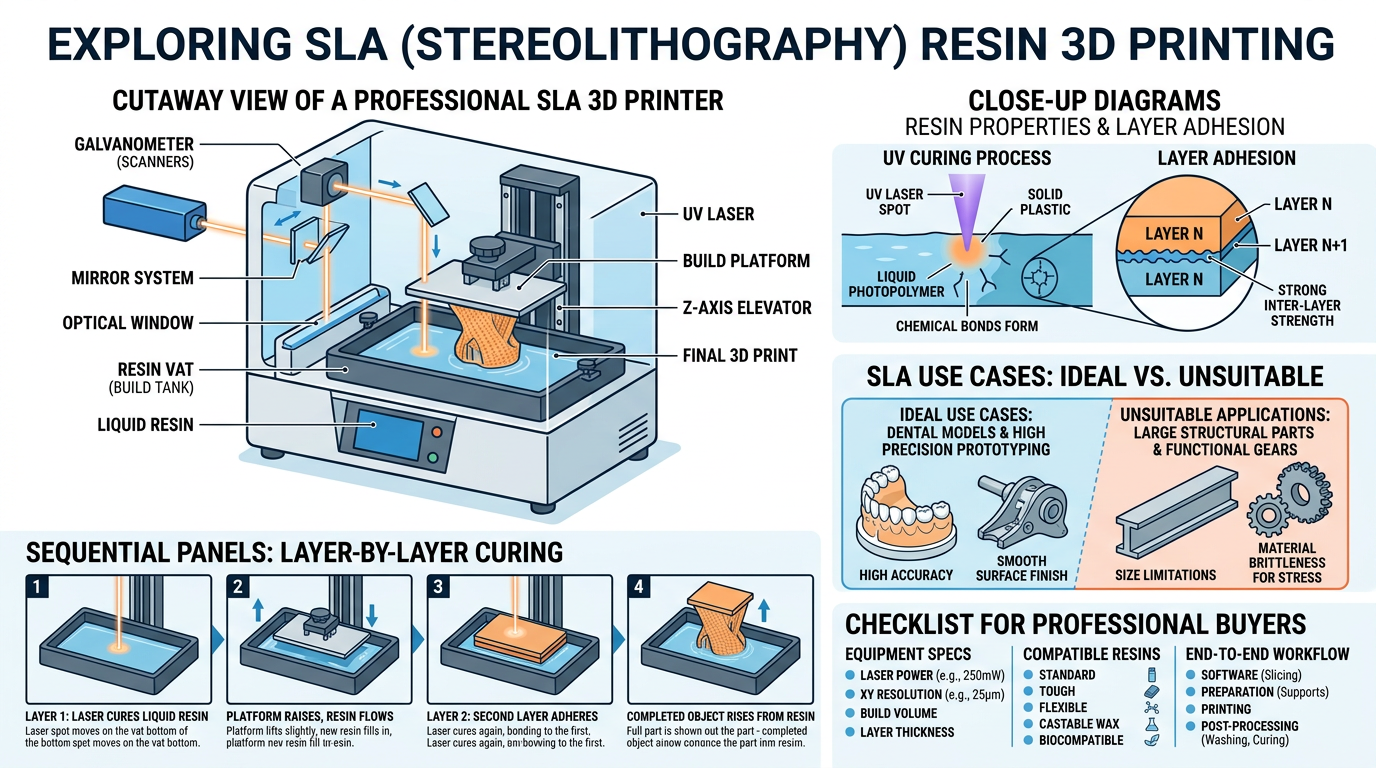
SLA means Stereolithography. The word refers to a method of creating a three-dimensional object by curing photosensitive liquid resin with light, one layer at a time. In the broader additive manufacturing classification, SLA belongs to the family of vat photopolymerization, where a liquid photopolymer in a vat is selectively cured by a light source.
In simple terms:
SLA 3D printing = liquid resin + controlled light exposure + layer-by-layer curing + post-processing.
This is different from filament-based 3D printing, where plastic filament is melted and deposited through a nozzle. In SLA-style resin printing, the material starts as liquid resin and becomes solid after light exposure and curing.
Is SLA the Same as Resin 3D Printing?
Not exactly. SLA is one type of resin 3D printing, but many users use “SLA” as a general shortcut for resin 3D printing.
In professional conversations, it is better to separate the terms:
| Term | What It Usually Means | Why It Matters |
|---|---|---|
| SLA | Stereolithography, traditionally using a focused light source to cure resin | Important for understanding the origin and core principle |
| Resin 3D printing | A broader everyday term for printing with photopolymer resin | Useful for buyers and application discussions |
| Vat photopolymerization | The broader technical category for light-curing liquid resin in a vat | Helpful for standards, technical documentation and process comparison |
| LCD resin printing | A resin printing method using an LCD mask and UV light source | Common in modern professional resin printers |
| DLP resin printing | A resin printing method using projected light patterns | Often discussed for speed and image projection workflows |
For buyers, the practical question is not only “Is it SLA?” but also:
- What resin materials can the printer support?
- What build volume is needed?
- What level of accuracy and repeatability is required?
- How will the parts be cleaned and UV cured?
- Is the workflow suitable for dental, industrial or flexible resin applications?
Yidimu’s resin materials page can help professional users compare material categories for different workflows.
How SLA 3D Printing Works
Although machine structures may vary, the basic SLA-style resin workflow follows a clear sequence.
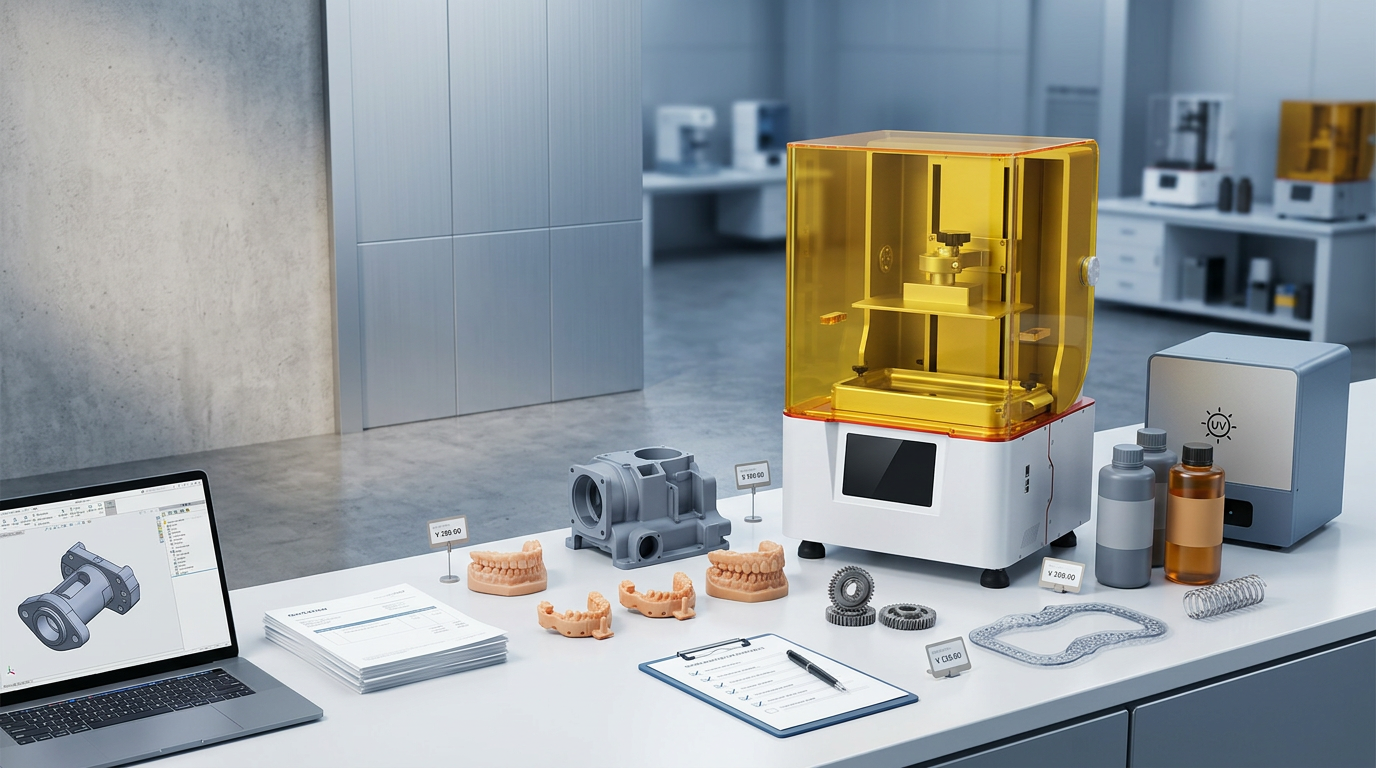
1. Prepare the 3D Model
The process starts with a digital 3D model. This may come from CAD software, dental design software, a 3D scanner or a model design file. The model must be checked for wall thickness, unsupported areas, orientation and application requirements.
2. Slice the Model
Slicing software converts the 3D model into many thin layers. Each layer tells the printer where resin should be cured. Layer thickness, support structure, exposure settings and orientation all affect the final result.
3. Select the Resin
Different applications require different resin types. A dental model resin is not the same as an engineering prototype resin or a flexible resin. Material properties may vary depending on resin formulation, exposure settings, post-curing and part geometry.
4. Print the Part
During printing, light cures the resin layer by layer. The build platform moves step by step until the part is complete. In professional workflows, stable movement, controlled exposure and consistent resin behavior are important for repeatable results.
5. Clean the Print
After printing, uncured resin must be removed from the part surface. Cleaning method, solvent choice, washing time and drying process should follow resin supplier guidance and internal workflow requirements.
6. UV Post-Cure the Part
Most resin prints require UV post-curing to reach their intended handling, mechanical or functional properties. Post-curing time, wavelength, temperature and part orientation may affect final performance. For this step, users can review UV curing equipment for resin prints.
7. Inspect the Final Part
Inspection may include visual checks, fit testing, dimensional measurement, surface review and application-specific validation. For production or dental work, users should keep a controlled process record.
Why SLA-Style Resin Printing Is Used Professionally
SLA-style resin printing is often selected when users need fine detail, smooth surface finish and controlled part geometry. It may support many professional applications, depending on printer configuration, resin selection and post-processing workflow.
| Application Area | Typical Printed Parts | Why SLA-Style Resin Printing May Be Used |
| Dental labs and clinics | Dental models, temporary models, surgical guide models depending on resin indication | Fine detail, model accuracy and digital workflow compatibility |
| Industrial prototyping | Product samples, housing prototypes, engineering models | Smooth surfaces, design verification and fast iteration |
| Model-making companies | Display models, structural mockups, small detailed parts | Surface quality and fine feature reproduction |
| R&D teams | Test samples, proof-of-concept parts, assembly checks | Fast design adjustment and repeated testing |
| Jewelry and casting workflows | Casting patterns and detailed models | Detail reproduction and pattern-making potential |
| Flexible material testing | Soft samples, lattice structures, shoe-related prototypes | Material behavior testing when matched with suitable resin and printer |
For industrial users, Yidimu’s industrial 3D printing solutions can help connect printer choice with prototyping, sample-making and workflow planning.
SLA in Dental 3D Printing
In dental applications, SLA-style resin printing is widely discussed because dental workflows often require detail, repeatability and clean post-processing. However, dental use requires careful material selection and process control.
Professional users should confirm:
- Resin indication and intended application
- Printer and resin compatibility
- Cleaning process
- UV post-curing process
- Dimensional requirements
- Local regulatory requirements
- Whether the part is for model use, guide use or intraoral use
Customers should confirm resin indication, post-curing process and local regulatory requirements before clinical or intraoral use. Dental applications vary, and no resin should be assumed suitable for every dental purpose by default.
For a more application-focused overview, see Yidimu’s dental 3D printing workflow.
SLA in Industrial Resin 3D Printing
For factories and engineering teams, SLA-style resin printing is often used before mold making, during product development or for small-batch sample validation. It can help teams test shape, assembly, appearance and design direction before committing to tooling.
Typical industrial uses include:
- Appearance prototypes
- Engineering samples
- Assembly verification models
- Transparent shell prototypes
- Fixture and checking models
- Small-batch trial parts
- Product development samples
However, resin printed parts should not automatically be treated as final production parts. Mechanical performance, heat resistance, impact resistance, aging behavior and chemical resistance depend on the resin, geometry and curing process. For demanding applications, users should test under real working conditions.
If a project is still in the sample stage, Yidimu’s sample printing service may help users evaluate part size, resin choice and workflow before choosing equipment.
SLA Workflow Checklist for Professional Users
Use this checklist before starting a resin 3D printing project:
- Define the application
- Is the part for appearance, fit testing, functional testing, dental model work or flexible material evaluation?
- Confirm part size
- Check maximum length, width, height and the number of parts needed per batch.
- Select the resin category
- Match resin to surface, strength, flexibility, heat resistance, transparency or dental workflow requirements.
- Check printer compatibility
- Confirm wavelength, exposure settings, build volume, software compatibility and resin handling requirements.
- Plan orientation and support
- Reduce deformation risk, support critical areas and protect important surfaces.
- Control cleaning
- Avoid under-cleaning, over-washing or leaving uncured resin in holes and channels.
- Use proper UV curing
- Follow resin workflow recommendations and keep curing conditions consistent.
- Inspect and record
- Measure critical dimensions, document settings and keep successful parameters for repeat jobs.
- Test before production
- For engineering or dental use, validate the part under real conditions before scaling.
Common Mistakes to Avoid
Mistake 1: Thinking SLA Only Means One Machine Type
Many buyers use “SLA” to describe all resin printers. In reality, SLA is a specific term, while resin printing includes several light-curing methods. When comparing machines, ask about the real exposure method, build volume, resin compatibility and workflow control.
Mistake 2: Choosing a Printer Without Confirming Resin Needs
A printer should not be selected only by price or resolution. The resin matters. A dental model, engineering prototype, flexible part and casting pattern may require different materials and post-processing.
Mistake 3: Ignoring Post-Curing
A resin print is not finished when it leaves the printer. Cleaning and UV post-curing can affect handling quality, stability and final performance. Professional users should treat post-processing as part of the production workflow.
Mistake 4: Expecting One Resin to Do Everything
No single resin is suitable for every dental, industrial, flexible and high-strength application. Material selection should be based on actual requirements, not only product names.
Mistake 5: Overlooking Safety
Liquid photopolymer resin should be handled carefully. Users should follow the resin safety data sheet, wear suitable gloves, maintain ventilation and avoid direct skin contact. Safety guidance for 3D printing commonly emphasizes ventilation, training and appropriate protective equipment as part of hazard control.
Mistake 6: Comparing Accuracy Without Workflow Context
Accuracy is not determined by the printer alone. It can also be affected by resin shrinkage, exposure settings, model orientation, support strategy, cleaning, curing and measurement method.
How to Choose an SLA-Style Resin 3D Printer
When choosing a professional resin 3D printer, focus on workflow fit instead of only technical buzzwords.
| Decision Factor | What to Check | Why It Matters |
| Application | Dental, industrial, flexible, casting, model-making or sample printing | Determines printer and resin requirements |
| Build volume | Largest part size and batch quantity | Affects productivity and part layout |
| Resin compatibility | Material type, wavelength and exposure requirements | Prevents workflow mismatch |
| Surface requirement | Smooth appearance, fine details or functional surface | Affects layer settings and resin choice |
| Accuracy requirement | Fit, tolerance and repeatability expectations | Requires process control, not only resolution |
| Post-processing | Cleaning and UV curing setup | Strongly affects final part quality |
| Support and service | Parameter help, troubleshooting and workflow review | Important for stable professional use |
For buyers comparing different application needs, Yidimu’s professional resin 3D printer options provide a starting point for evaluating printer categories.
FAQ
What does SLA stand for in 3D printing?
SLA stands for Stereolithography. It is a resin 3D printing process that uses light to cure liquid photopolymer resin layer by layer into a solid object.
Is SLA the same as resin 3D printing?
SLA is one type of resin 3D printing, but many people use the term broadly. Modern resin printing may also include LCD or DLP-based vat photopolymerization systems.
What material does SLA 3D printing use?
SLA-style printing uses photopolymer resin. The resin starts as a liquid and becomes solid after controlled light exposure and post-curing.
Is SLA good for dental 3D printing?
SLA-style resin printing may be suitable for dental models and some dental workflows when the printer, resin, cleaning process and UV post-curing are properly matched. For clinical or intraoral applications, users must confirm resin indication and local regulatory requirements.
Is SLA good for industrial prototypes?
Yes, SLA-style resin printing can support industrial prototypes, appearance models, engineering samples and design verification. Final suitability depends on resin properties, part geometry and workflow control.
Do SLA prints need UV curing?
In most resin workflows, printed parts require cleaning and UV post-curing. Post-curing helps the material reach its intended handling or performance condition, depending on the resin.
Is SLA stronger than filament 3D printing?
Not always. Strength depends on material formulation, part design, print settings and post-processing. SLA-style resin prints may offer fine detail and surface quality, but mechanical performance should be tested for the target application.
What should I check before buying an SLA resin printer?
Check application type, part size, resin compatibility, required accuracy, post-processing equipment, software workflow, technical support and whether sample testing is available before purchase.
Conclusion
SLA stands for Stereolithography in 3D printing. For professional users, the term is most useful when it helps explain the resin printing workflow: liquid photopolymer resin is cured by light, layer by layer, then cleaned, UV post-cured and inspected. In real production planning, printer choice should be based on application, resin requirements, part size, workflow control and post-processing capability.
If you are not sure which resin printer or material fits your project, you can contact Yidimu with your model size, resin requirement, application, expected workflow and production or sample-making needs. The Yidimu team can help review whether a dental, industrial or flexible resin 3D printing workflow is more suitable for your project.