Many buyers ask does 3d printer use a lot of electricity before investing in a professional resin printing workflow. The short answer is: usually not by itself, but the complete workflow matters.
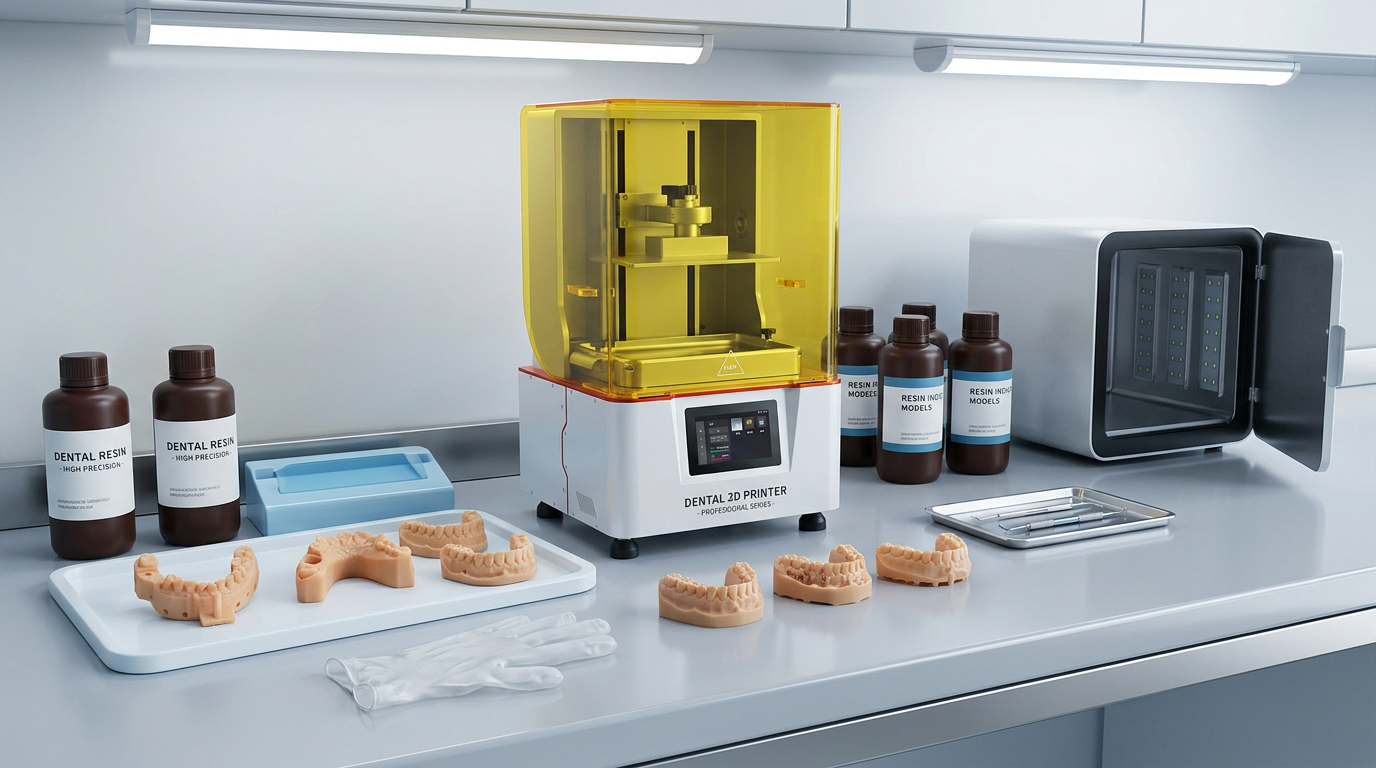
A single resin 3D printer may consume far less electricity than many industrial machines. But a dental lab, factory prototyping room or model-making workshop rarely runs only one printer in isolation. The real energy profile may include the resin printer, UV curing box, washing equipment, computer workstation, air filtration or ventilation, climate control, lighting and repeated batch production.
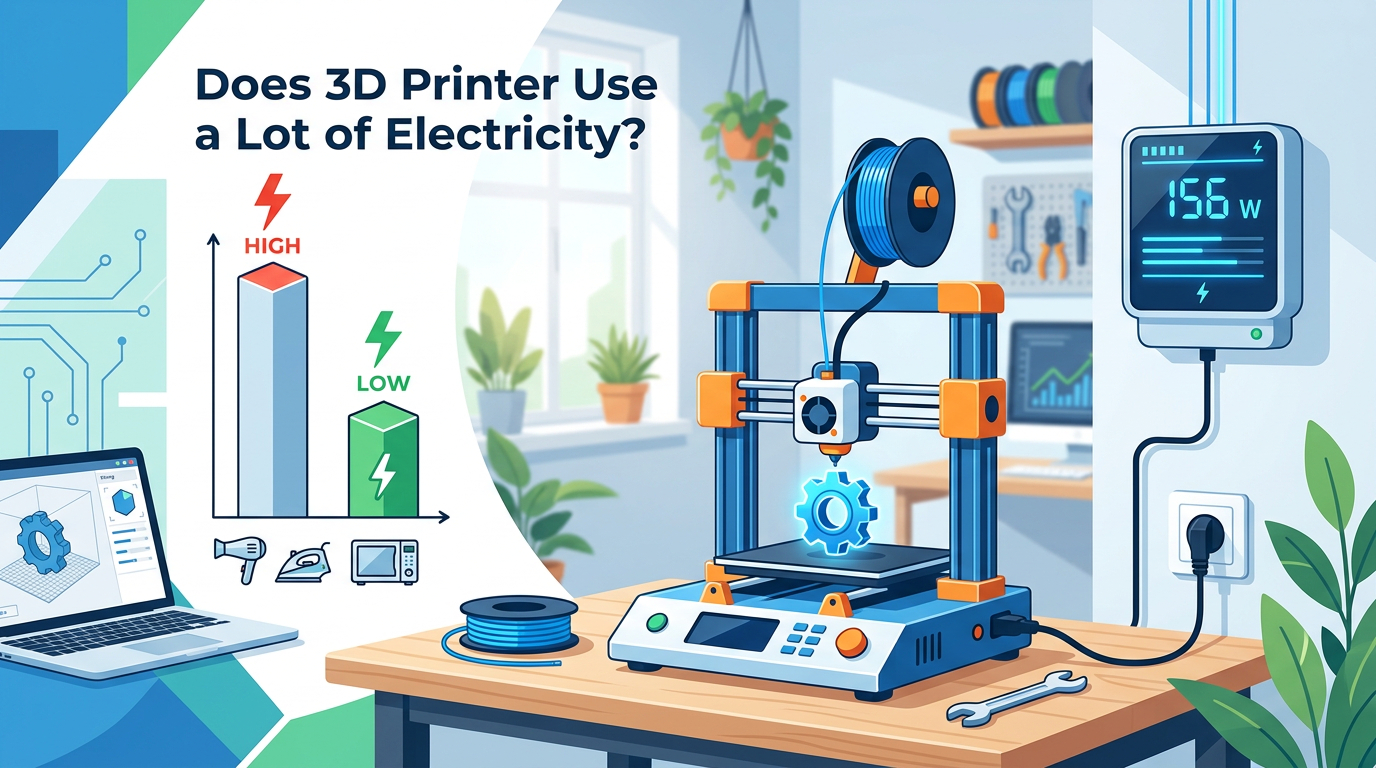
That is why professional users should avoid looking only at the printer’s rated wattage. Instead, they should estimate actual energy use based on:
- Average power draw during printing
- Total print hours per day
- Number of printers
- UV curing time
- Washing and drying process
- Ventilation or extraction requirements
- Resin handling and post-processing workflow
- Local electricity price
- Failure rate and reprint frequency
The U.S. Department of Energy explains a standard appliance energy calculation using wattage, hours of use and kWh cost. The same basic method can be used for 3D printers: daily kWh = wattage × hours used per day ÷ 1,000, and operating cost is calculated by multiplying energy use by the electricity rate.
For professional users, this article explains how to estimate electricity use correctly and how to choose a resin 3D printing setup that fits your real production environment.
Why 3D Printer Electricity Use Is Often Misunderstood
The question does 3d printer use a lot of electricity sounds simple, but the answer depends heavily on the printing technology and operating mode.
A filament printer may use more energy for nozzle and bed heating. A resin printer usually uses a UV light source, motion system, control electronics and sometimes temperature management. Large-format resin systems may need more power than compact dental model printers, but the total cost still depends on print time and batch efficiency.
For resin 3D printing, electricity use is not only about the printer. Professional workflows often include:
- File preparation workstation
- Resin printer
- Washing station or cleaning process
- UV curing box
- Drying time
- Ventilation or air handling
- Inspection and finishing tools
- Climate control for stable resin behavior
For dental labs and clinics, energy planning also connects with process control. A printed dental model, surgical guide, tray or temporary dental part may require a specific resin, cleaning method and UV post-curing process. Customers should confirm resin indication, post-curing process and local regulatory requirements before clinical or intraoral use.
For factories and product development teams, the more important question is often not “How many watts does the printer use?” but:
How much electricity is consumed per useful printed part?
A printer that uses slightly more power but prints more parts per build may have lower energy cost per model than a smaller machine running many repeated jobs.
Practical Table: What Affects 3D Printer Electricity Cost?
| Factor | Why It Matters | What Professional Users Should Check |
|---|---|---|
| Printer rated power | Shows the maximum or typical electrical demand, but may not equal real average use | Check the machine nameplate, power supply rating and supplier specifications |
| Actual print time | A long print uses more total kWh even if the printer has modest wattage | Estimate daily and monthly operating hours |
| Build volume | Larger build platforms may use more power, but can reduce the number of separate print runs | Compare energy per batch, not only watts |
| Light source and exposure settings | Resin printers use controlled light exposure to cure layers | Avoid random exposure changes; validate settings for resin and accuracy |
| Layer height | Thinner layers usually increase total print time | Balance surface detail, accuracy and production speed |
| Number of printers | A farm of printers can create meaningful cumulative power demand | Plan circuits, outlets and scheduling |
| UV curing box | Post-curing adds additional electricity use | Confirm curing time, wavelength and temperature requirements |
| Washing and drying | Cleaning equipment and drying areas may add energy and labor cost | Compare water-washable, alcohol-based and controlled cleaning workflows |
| Ventilation | Resin handling should be planned with appropriate workspace controls | Follow resin SDS, supplier instructions and workplace safety practices |
| Reprint rate | Failed prints waste electricity, resin and labor | Improve support design, resin settings, maintenance and operator training |
| Local electricity price | Electricity cost varies by country, region and commercial tariff | Use your actual utility rate for cost calculation |
Research on desktop additive manufacturing has shown that energy use varies by printing technology and operating parameters, and that vat polymerization and material extrusion systems have different energy profiles. The key lesson for buyers is that energy use should be evaluated by real workflow conditions, not only by one advertised specification.
How to Calculate 3D Printer Electricity Cost
Use this formula:
Electricity use in kWh = printer watts × print hours ÷ 1,000
Then:
Electricity cost = kWh × local electricity rate
Example:
If a resin printer averages 200 W during operation and runs for 8 hours:
200 W × 8 hours ÷ 1,000 = 1.6 kWh
If electricity costs $0.15 per kWh:
1.6 kWh × $0.15 = $0.24
That means the direct printing electricity cost for that 8-hour job would be about $0.24, before adding UV curing, washing, ventilation, labor, resin and failed print risk.
For professional purchasing, this calculation should be expanded:
Total workflow electricity = printer kWh + curing box kWh + washing equipment kWh + ventilation kWh + supporting equipment kWh
This broader view is more useful for dental labs, factories and production users.
Does a Resin 3D Printer Use More Electricity Than Other Equipment?
In many professional settings, a resin 3D printer is not the largest electricity consumer. Equipment such as air conditioning, compressed air systems, ovens, heaters, CNC machines and large drying systems may use more energy.
However, resin 3D printing can still become a noticeable electricity cost when:
- Multiple printers run daily
- Print jobs are long
- Large-format machines are used
- The UV curing process is frequent
- Ventilation runs continuously
- Failed prints cause rework
- Operators run machines overnight without batch planning
- The lab uses temperature control for resin stability
For small dental clinics, electricity cost may be a minor part of ownership. For high-volume dental labs or factory sample departments, electricity should be included in monthly operating cost planning.
Yidimu users can start with professional resin 3D printer selection support and then estimate electricity use based on machine size, daily print volume and post-processing workflow.
Industrial Resin 3D Printing: Electricity Cost Is Part of Total Cost of Ownership
For factories, model-making companies and engineering teams, printer electricity is usually not the main cost driver. The larger cost factors may include:
- Printer investment
- Resin consumption
- Operator time
- Failed print cost
- Model preparation
- Support removal
- Surface finishing
- UV curing workflow
- Maintenance parts
- Downtime
- Sample delivery time
Still, electricity matters because it affects production planning and facility setup.
For example, a factory prototyping team may run one large print overnight. The direct electricity cost may be modest, but the workflow must be stable. A failed overnight print wastes resin, labor, machine time and project schedule. In this situation, reducing reprints may save much more than reducing wattage.
This is why Yidimu normally recommends evaluating the complete application before choosing equipment. Customers considering industrial prototyping can review industrial resin 3D printers and match the printer to model size, resin type, surface detail and expected production frequency.
Dental 3D Printing: Electricity Planning for Clinics and Labs
Dental 3D printing often requires a controlled workflow. The printer may be used for dental models, orthodontic models, surgical guide workflows, trays, splints, temporary dental parts or other lab-supported applications depending on resin indication and local requirements.
For dental users, electricity cost is usually less important than repeatability, post-processing and compliance. However, the power plan should still include:
- Dental resin printer
- Washing process
- UV curing box
- Workstation or design computer
- Ventilation
- Lighting and inspection
- Optional drying or temperature-controlled area
The curing step is especially important. UV post-curing may affect final surface condition, strength, stability and application suitability depending on the resin and workflow. Customers should confirm resin indication, post-curing process and local regulatory requirements before clinical or intraoral use.
If you are choosing equipment for a dental clinic or lab, start with Yidimu dental 3D printers and evaluate printer size, resin compatibility, curing process and daily case volume together.
Large Printer vs Small Printer: Which Uses More Electricity?
A larger printer may have a higher rated power than a compact printer. But this does not automatically mean it is less efficient.
For professional users, the better comparison is:
Electricity cost per accepted part
A small printer may use less power per hour, but it may require more print runs. A larger printer may consume more power per hour, but can print more models or prototypes in one build.
Example:
- A small printer runs 3 separate jobs to complete 30 models.
- A larger printer runs 1 batch job to complete the same output.
- The larger printer may use more power per hour but less operator time and fewer repeated setup cycles.
For dental labs, orthodontic model production and industrial sample production, batch capacity can matter more than hourly wattage.
For flexible resin applications such as shoe samples, soft prototypes and elastic structures, material behavior and workflow stability may be more important than electricity alone. Yidimu customers can review flexible resin 3D printers when the application requires soft or elastic printed samples.
Workflow or Checklist: How to Estimate 3D Printer Electricity Before Buying
Use this checklist before purchasing a resin 3D printing system.
Step 1: Identify the Main Application
Define what you will print:
- Dental models
- Industrial prototypes
- Shoe samples
- Jewelry patterns
- Engineering models
- Flexible parts
- Research samples
- Small-batch production parts
Application affects printer size, resin type, layer height, support strategy and curing process.
Step 2: Confirm Printer Rated Power
Check the printer’s nameplate, power supply and supplier documentation. Rated power is useful for electrical planning, but actual power use may vary during printing.
Step 3: Estimate Average Daily Print Hours
Do not calculate only one print. Estimate real use:
- How many hours per day?
- How many days per month?
- How many printers?
- Will machines run overnight?
- Will operators batch jobs or print one model at a time?
Step 4: Add UV Curing Time
Include the curing box in your calculation. A resin printing workflow often requires UV curing after washing and drying.
Step 5: Add Washing and Ventilation
Include washing equipment, fans, extraction systems or other workspace controls where applicable. NIOSH notes that additive manufacturing can involve potential workplace safety and health hazards, and users should apply suitable controls for safe deployment.
Step 6: Use Your Local Electricity Rate
Use your actual commercial or industrial electricity price. Do not rely on a generic online number.
Step 7: Estimate Monthly Cost
Use:
Monthly cost = total daily kWh × working days per month × electricity rate
Step 8: Compare Electricity Cost With Resin and Labor
For most professional resin printing workflows, electricity may be smaller than resin, labor, support removal, finishing and reprint cost.
Step 9: Validate With a Power Meter
For accurate measurement, use a suitable power meter or facility monitoring system. Measure:
- Idle power
- Printing power
- UV curing power
- Complete workflow energy per batch
Step 10: Reduce Failed Prints
The best electricity saving is often not a lower-watt printer. It is fewer failed jobs.
How to Reduce Electricity Use in Professional Resin 3D Printing
Electricity savings should not compromise print quality, resin curing or dental workflow requirements. The goal is efficient production, not under-processing.
1. Batch Parts Correctly
Print multiple compatible parts in one build when quality and support design allow. This can reduce repeated setup time and improve energy use per part.
2. Choose the Right Build Volume
A printer that is too small may force repeated print cycles. A printer that is too large may be inefficient for occasional small models. Match build volume to your daily output.
3. Avoid Unnecessary Ultra-Thin Layers
Very thin layer settings can increase print time. Use the layer height needed for the application, not automatically the smallest possible value.
4. Use Validated Resin Settings
Incorrect exposure settings can cause failures, sticky surfaces, poor fit or weak parts. Resin settings should be adjusted carefully and tested.
5. Maintain the Printer
Dirty optics, worn release film, poor leveling or unstable supports can increase failures. Maintenance reduces wasted resin, time and electricity.
6. Control Post-Processing
Over-washing, under-washing, over-curing or insufficient drying may create quality problems. Follow resin instructions and validate your workflow.
7. Plan Ventilation Efficiently
Ventilation should support safe resin handling, but it should also be planned as part of the facility workflow. Follow resin SDS and local workplace rules.
8. Train Operators
A trained operator can reduce failed prints, unnecessary reruns and poor post-processing.
For resin selection and workflow planning, Yidimu customers can review 3D printing resins and confirm which material fits the application, printer and curing process.
Common Mistakes to Avoid
Mistake 1: Judging Electricity Cost by Rated Power Only
Rated power is not the same as average power consumption. A printer may not operate at maximum power continuously. Use real print duration and measured data where possible.
Mistake 2: Forgetting UV Curing and Washing
A resin printer is only one part of the workflow. UV curing, washing, drying and ventilation should be included in cost planning.
Mistake 3: Comparing Printers by Watts Instead of Output
A lower-watt printer is not always cheaper to operate if it requires more print runs, more labor or more failed jobs.
Mistake 4: Ignoring Failed Print Cost
A failed print wastes electricity, resin, operator time and delivery schedule. Reducing failures often saves more than reducing a few watts.
Mistake 5: Using the Wrong Resin for the Application
Do not choose resin only by price or availability. Resin should match model purpose, printer compatibility, post-processing and final-use requirements.
Mistake 6: Underestimating Ventilation and Workspace Needs
Resin workflows should be planned responsibly. NIOSH has published guidance on safe 3D printing approaches, including exposure control considerations for users in small businesses and other workplaces.
Mistake 7: Using Sunlight as the Main Production Curing Method
Sunlight curing may be inconsistent for professional workflows. A controlled UV curing box can support repeatability, depending on resin and application.
Mistake 8: Running Printers Without Production Scheduling
If every job is printed separately, electricity, labor and machine time may increase. Batch planning can improve efficiency.
Mistake 9: Not Checking Local Electrical Capacity
A single printer may be simple to power. Multiple printers, curing boxes and ventilation equipment may require better circuit planning.
Mistake 10: Treating Dental Printing as Ordinary Model Printing
Dental workflows may involve resin indication, post-curing requirements and local regulatory requirements. Customers should confirm resin indication, post-curing process and local regulatory requirements before clinical or intraoral use.
What Information Should You Prepare Before Asking for a Printer Recommendation?
To help Yidimu recommend a suitable resin printing system, prepare the following:
- Main application
- Model size
- Required surface detail
- Resin requirement
- Expected daily or monthly print volume
- Preferred layer height
- Accuracy expectations
- Post-processing workflow
- UV curing requirement
- Workspace condition
- Whether the part is for model use, prototype review, flexible testing or dental-related use
Yidimu can help customers review printer size, resin selection, UV curing equipment and practical workflow planning. For project evaluation, you can contact Yidimu through Contact Us.
Conclusion: Does 3D Printer Use a Lot of Electricity?
So, does 3d printer use a lot of electricity? In most professional resin printing workflows, the printer itself does not usually become the largest electricity consumer. The bigger issue is how the complete workflow is planned. A dental lab, factory or model-making company should calculate electricity based on printer power, print hours, UV curing, washing, ventilation, number of machines and local electricity rate.
For many professional users, electricity is a manageable cost. Resin consumption, labor, failed prints, post-processing and equipment selection often matter more. The smartest approach is to choose a printer that matches real output needs, resin requirements and workflow stability.
If you are planning a resin 3D printing setup, contact Yidimu with your model size, resin requirement, application, expected workflow and daily production volume. Yidimu can help you evaluate suitable industrial resin 3D printers, dental 3D printers, flexible resin printers, UV curing boxes and resin options for your production environment.
FAQ
Does a 3D printer use a lot of electricity overnight?
Not necessarily. A printer running overnight uses electricity based on its average wattage and total print time. For professional resin printing, the direct electricity cost may be manageable, but overnight printing should be planned carefully to reduce failed prints, resin waste and workflow risk.
How do I calculate 3D printer electricity cost?
Use this formula: watts × hours ÷ 1,000 = kWh. Then multiply kWh by your local electricity rate. For resin 3D printing, also include UV curing, washing equipment and ventilation if they are part of the workflow.
Does a resin 3D printer use more electricity than a filament printer?
It depends on printer design, size and print duration. Filament printers often use heat for the nozzle and bed, while resin printers use a light source, motion system and electronics. For professional decisions, compare total kWh per accepted part rather than technology alone.
Does a large resin 3D printer use much more electricity?
A larger printer may have higher rated power, but it can also print more parts per build. For labs and factories, the better comparison is electricity cost per finished part or per batch, not only hourly wattage.
Does UV curing add much electricity cost?
UV curing adds some electricity use, but it is usually part of a proper resin workflow. The exact cost depends on curing box power, curing time and number of batches. Users should follow resin instructions instead of reducing curing time only to save electricity.
Can I reduce electricity cost by using thicker layers?
Sometimes, thicker layers can reduce print time, but they may affect surface quality, detail and accuracy. Use the layer height that matches the application requirement. Dental and precision model workflows should validate any parameter change carefully.
Is electricity cost more important than resin cost?
For many professional resin workflows, resin cost, failed print cost, labor and post-processing may be more important than electricity. However, electricity should still be included in total cost of ownership, especially for multiple printers or high daily output.
Do dental 3D printers need special electrical planning?
A single dental printer may not require complex planning, but a dental lab with multiple printers, curing boxes and ventilation should check circuit capacity, workspace layout and workflow scheduling. Customers should also confirm resin indication, post-curing process and local regulatory requirements before clinical or intraoral use.
Can I measure my 3D printer’s actual electricity use?
Yes. Use a suitable power meter or facility monitoring system to measure idle power, printing power and post-processing equipment power. Real measurement is better than relying only on rated wattage.
What should I tell Yidimu before asking for a recommendation?
Send your model size, application, resin requirement, expected daily output, accuracy needs, post-processing workflow and whether the print is for industrial prototyping, dental lab use, flexible sample testing or another professional application.
Optional References
- U.S. Department of Energy: appliance energy calculation method using wattage, usage hours and kWh cost.
- NIOSH / CDC: additive manufacturing safety and workplace control considerations.
- Cleaner Engineering and Technology: research on energy consumption of common desktop additive manufacturing technologies.
- Yidimu technical content and workflow support information.