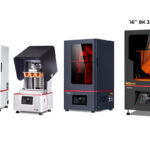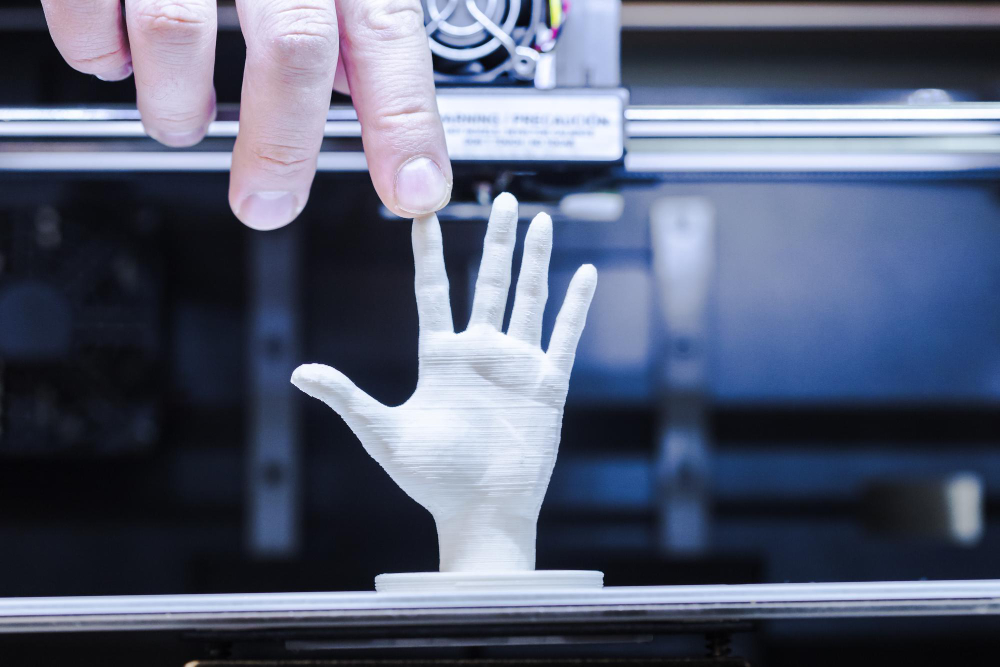
A resin 3D printer is a light-curing additive manufacturing system that builds parts from liquid photopolymer resin. Instead of melting plastic filament through a nozzle, it uses light to solidify resin in controlled layer shapes.
In professional environments, resin 3D printers are often selected when users need fine surface detail, smooth model surfaces, small feature reproduction, dental model workflows, industrial prototypes, display models, casting patterns, flexible samples or application-specific resin performance.
However, resin printing should not be judged only by visual quality. A complete professional workflow includes:
- A suitable printer
- Compatible resin
- Correct slicing settings
- Reliable support strategy
- Controlled washing
- UV post-curing
- Safe resin handling
- Inspection and documentation
- Maintenance and troubleshooting
Yidimu provides industrial resin 3D printers, dental 3D printers, flexible resin printers, UV curing equipment, 3D printing resins and workflow support for professional users such as factories, labs and product development teams.
How Does Resin 3D Printer Work in Simple Terms?
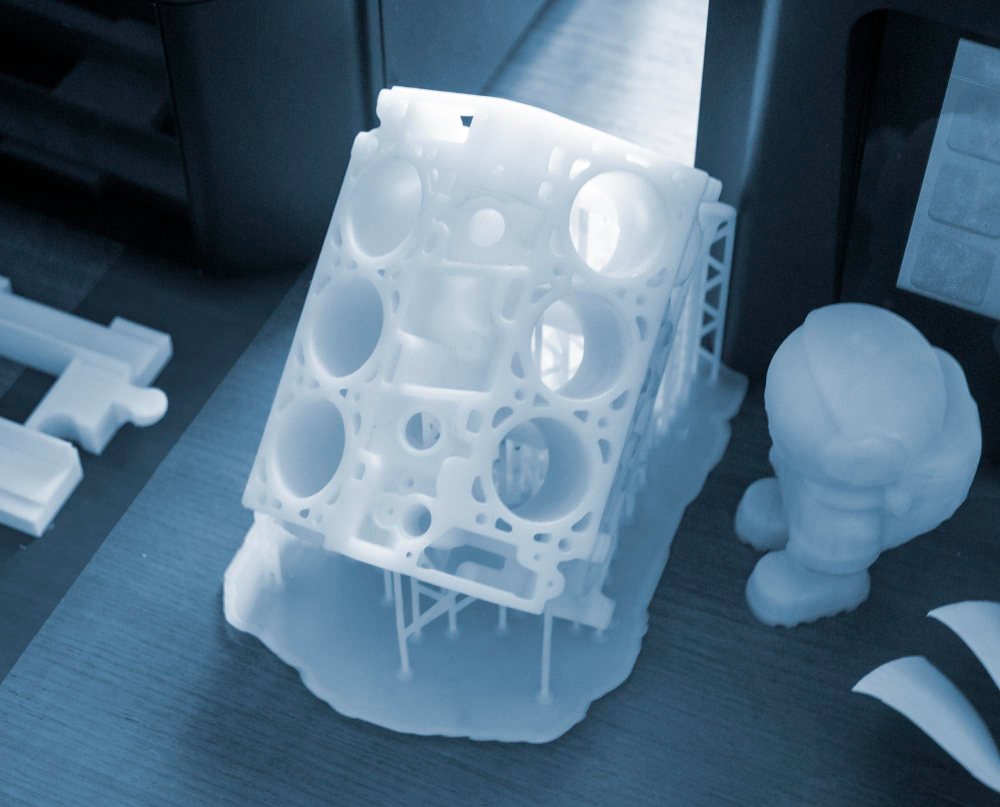
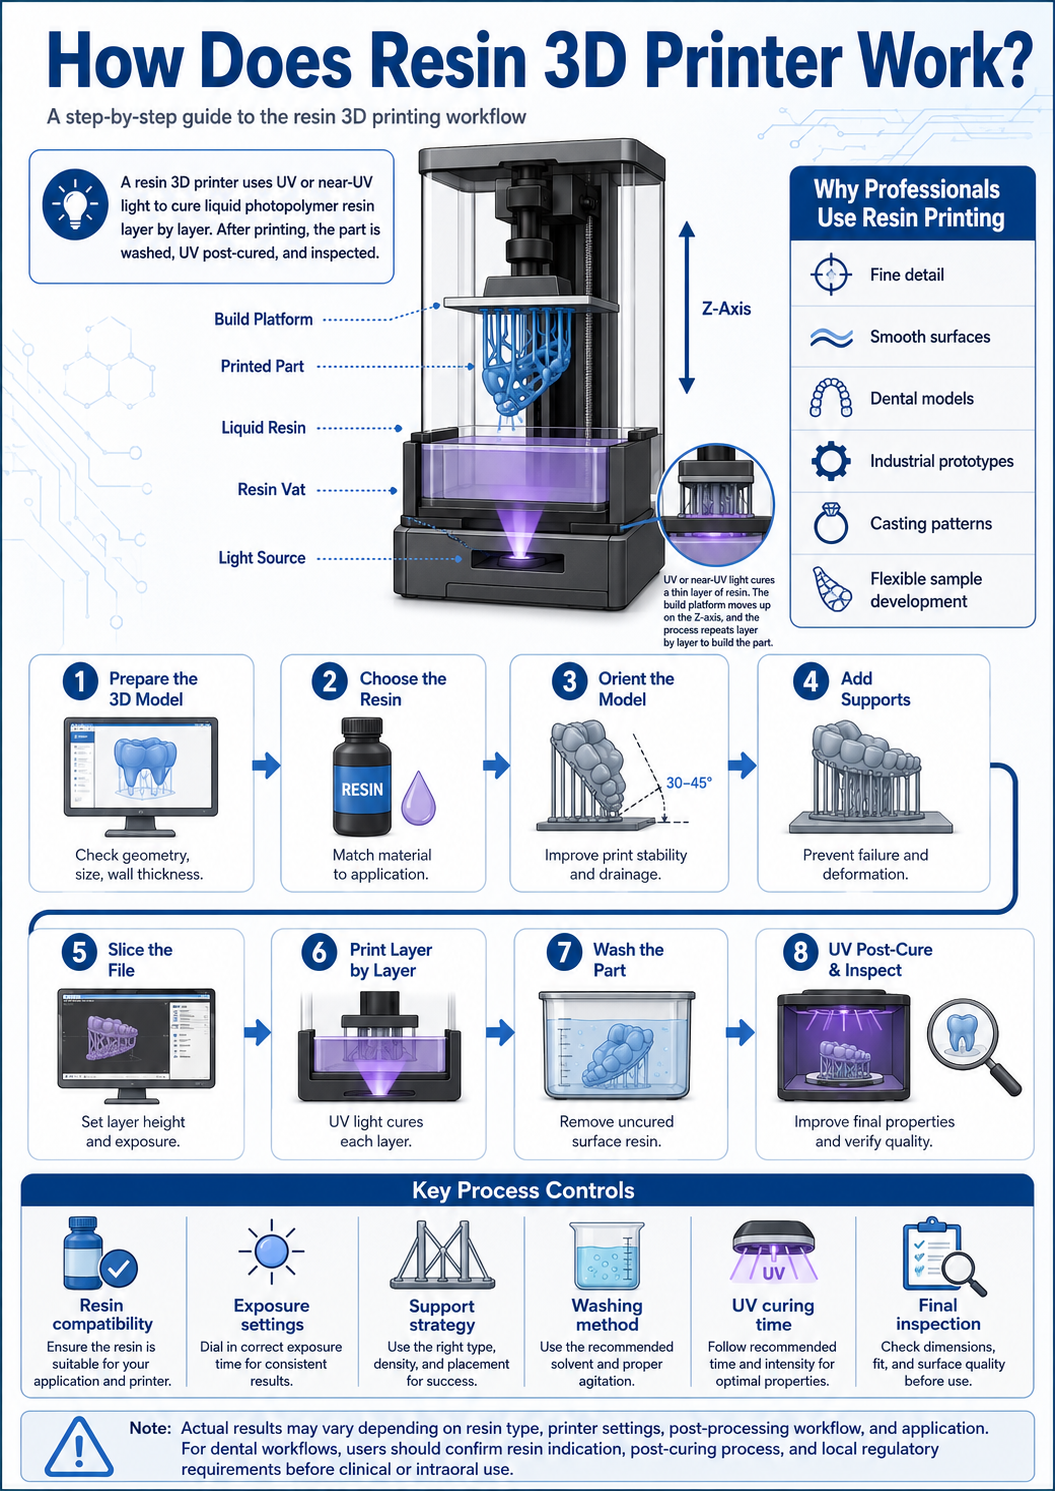
A resin 3D printer works through four core actions:
- The 3D file is sliced into thin digital layers.
- Liquid resin is exposed to light in the shape of each layer.
- The cured layer attaches to the build platform or the previous layer.
- The printer repeats the cycle until the full part is built.
After printing, the part is not usually ready for use immediately. It normally needs support removal, washing to remove uncured resin, UV post-curing and final inspection. The exact process depends on the printer type, resin formulation, part geometry and final application.
For industrial or dental users, this is why the real question is not only “how does the machine work?” A better question is:
Can this printer, resin and post-processing workflow produce the required part consistently in my production environment?
Main Components of a Resin 3D Printer
1. Resin Vat or Resin Tank
The vat holds the liquid photopolymer resin. In many bottom-up resin printers, the vat has a transparent film or window at the bottom so light can pass through and cure each layer.
Professional users should pay attention to:
- Vat size
- Film condition
- Resin compatibility
- Cleaning process
- Replacement cost
- Ease of handling during daily production
A worn or contaminated vat can cause failed prints, surface defects or repeated failures in the same area.
2. Light Source
The light source cures the resin. Depending on the machine type, the printer may use a laser, projector, LED array with LCD masking or another optical system. The resin must be compatible with the light wavelength and exposure behavior of the printer.
This is especially important for users evaluating 3D printing resins. A resin that works well in one workflow may not automatically work in another without suitable exposure settings, post-curing and testing.
3. Build Platform
The build platform is the surface where the printed part attaches during printing. The platform moves step by step as each layer is formed.
For professional buyers, platform size affects:
- Number of parts per build
- Maximum model size
- Batch printing efficiency
- Dental model nesting
- Industrial sample production
- Post-processing workload
A larger platform is not always better if the workflow only needs small high-detail parts. The correct size should match the actual model dimensions and expected daily workload.
4. Z-Axis Motion System
The Z-axis moves the build platform between layers. Stability matters because resin printing depends on thin layer formation and repeatable movement. Poor Z-axis stability may affect surface quality, layer consistency or dimensional reliability.
5. Slicing Software
Slicing software converts a 3D model into printable layers and support structures. It controls orientation, layer height, exposure parameters, lifting speed, support density and print layout.
For professional use, slicing is not just a file conversion step. It is one of the most important process-control stages.
The Resin 3D Printing Workflow Step by Step
Step 1: Prepare the 3D Model
The workflow starts with a digital 3D model, usually in STL, OBJ or another printable format. The file should be checked for errors before slicing.
Common file checks include:
- Closed mesh geometry
- Correct scale
- Wall thickness
- Hollow or solid structure
- Drain holes if needed
- Sharp edges or fragile features
- Fit requirements
For dental and industrial work, the file should be reviewed according to the intended use. A dental model, engineering prototype and flexible shoe sample may all require different design and support strategies.
Step 2: Choose the Resin
Resin selection affects surface quality, strength, flexibility, heat resistance, cleaning method, curing requirement and application suitability.
Common resin categories include:
- Dental model resin
- Surgical guide resin
- Temporary dental resin
- ABS-like resin
- Flexible resin
- Casting resin
- Water-washable resin
- General model resin
- Engineering-oriented resin
A factory making appearance prototypes may prioritize smooth finish and dimensional review. A dental lab may prioritize model stability and repeatable workflow. A footwear development team may need elastic resin behavior. Resin choice should always be connected to the final application.
For dental applications, customers should confirm resin indication, post-curing process and local regulatory requirements before clinical or intraoral use.
Step 3: Orient the Model
Model orientation affects support marks, surface quality, print success, dimensional behavior and resin drainage.
Professional users should consider:
- Which surface must remain clean
- Where supports can be placed
- Whether the model has large flat areas
- Whether suction forces may occur
- Whether the part needs drainage
- Whether critical dimensions may be affected by angle or support stress
Orientation is one reason resin 3D printing often requires trained operators. Two users can print the same file on the same printer and get different results if orientation and supports are not controlled.
Step 4: Add Supports
Supports hold the part during printing and help prevent distortion, shifting or detachment.
Support planning should balance:
- Part stability
- Surface appearance
- Ease of removal
- Risk of deformation
- Resin drainage
- Critical feature protection
Too few supports can cause failed prints. Too many supports can increase finishing labor and leave more marks. Professional users should create a repeatable support strategy for common part types.
Step 5: Slice the File
The slicer divides the model into thin layers. Important settings may include:
- Layer height
- Bottom exposure
- Normal exposure
- Lifting distance
- Lifting speed
- Rest time
- Support settings
- Anti-aliasing or smoothing options
- Resin profile
Layer height affects surface detail and print time. Exposure affects curing depth, accuracy and part stability. Incorrect exposure settings may lead to weak layers, overcured details, dimensional change or adhesion problems.
Step 6: Print the Part
During printing, the machine cures one layer at a time. In many resin printers, the build platform lifts slightly after each layer so fresh resin can flow back into the curing area.
The process repeats until the part is complete.
Print time depends on:
- Part height
- Layer height
- Exposure time
- Lifting speed
- Resin behavior
- Printer design
- Number of layers
- Support structure
- Batch layout
Unlike some other printing methods, placing more parts on the same build platform may not increase print time as much as increasing part height, depending on the printer technology and exposure method.
Step 7: Remove the Printed Part
After printing, the part is removed from the build platform. At this stage, the surface usually still contains uncured or partially cured resin.
Operators should use suitable personal protective equipment and follow resin handling instructions. NIOSH notes that 3D printer users have expressed concerns about possible exposure to ultrafine particles, chemicals and safety hazards, and its guide summarizes control recommendations for safer use.
Step 8: Wash the Part
Washing removes uncured resin from the surface. Depending on the resin, cleaning may use isopropyl alcohol, water for water-washable resin or another approved cleaning method.
Professional washing control should include:
- Correct cleaning liquid
- Controlled wash time
- Separate dirty and clean wash stages if needed
- Proper handling of contaminated liquid
- Complete drying before UV post-curing
- Avoiding over-washing or resin swelling
The wash liquid should be treated as contaminated once it contains uncured resin residue.
Step 9: UV Post-Cure the Part
Many resin parts require UV post-curing after washing. Post-curing helps the printed part reach more complete material properties, depending on resin formulation and curing conditions.
A professional post-curing process should consider:
- Wavelength compatibility
- Curing time
- Curing temperature if applicable
- Part thickness
- Part orientation
- Shadowed areas
- Resin supplier instructions
- Final application
Yidimu offers UV curing and post-processing equipment for users who need a controlled resin printing workflow rather than only a printer.
Step 10: Inspect and Finish the Part
Final inspection may include:
- Visual surface check
- Dimensional measurement
- Fit test
- Support mark review
- Warpage check
- Crack or delamination check
- Functional trial if relevant
- Documentation for repeat jobs
For production users, inspection feedback should be used to improve orientation, supports, resin settings and workflow control.
Practical Table: Resin 3D Printing Workflow and Professional Control Points
| Workflow Stage | What Happens | What Professional Users Should Check | Common Risk |
|---|---|---|---|
| 3D file preparation | The digital model is checked before slicing | Scale, mesh quality, wall thickness, drainage and application requirements | Printing a flawed file |
| Resin selection | Resin is matched to the application | Material properties, wavelength compatibility, cleaning method and post-curing requirement | Choosing resin by price only |
| Orientation | Model angle is set in slicer | Critical surfaces, support location, suction force and dimensional needs | Poor surface finish or deformation |
| Support design | Temporary structures are added | Stability, support marks, removal difficulty and fragile features | Part detachment or heavy finishing work |
| Slicing | Layers and exposure settings are generated | Layer height, exposure, lift settings and resin profile | Weak curing or overcuring |
| Printing | Light cures resin layer by layer | Vat condition, platform leveling, resin temperature and build layout | Failed print or layer defects |
| Washing | Uncured resin is removed | Wash method, time, drying and liquid handling | Sticky surface or contamination |
| UV curing | Part is post-cured | Wavelength, time, temperature and resin instructions | Under-cured or distorted parts |
| Inspection | Part quality is checked | Dimensions, fit, surface, cracks and support marks | Using parts before verification |
How Resin Printer Types Differ: SLA, DLP, LCD and MSLA
Resin 3D printers may use different light-delivery systems. The names are important, but professional buyers should avoid choosing based only on the technology label.
SLA-Type Resin Printing
SLA-type systems use a controlled light beam to cure resin point by point or path by path. They may support fine details depending on the optical system, resin and machine design.
DLP Resin Printing
DLP systems use projected light to cure an entire layer or patterned area. They may support fast layer exposure depending on the projector, resolution and build area.
LCD or MSLA Resin Printing
LCD or MSLA systems use an LED light source and masking screen to define each layer pattern. They can support practical professional workflows when the optical system, resin profile, Z-axis motion and post-processing are well controlled.
The Practical Selection Rule
For professional users, the better question is not “Which technology name is best?” It is:
- Can the printer handle my required model size?
- Is the resin compatible with my application?
- Can the workflow be repeated by my operators?
- Can the post-curing process match the resin requirement?
- Can the supplier support setup, troubleshooting and sample testing?
Users comparing equipment can start with Yidimu’s industrial 3D printing solutions or dental 3D printing solutions depending on their application.
Where Resin 3D Printing Works Well
Resin 3D printing can be useful when the project requires fine detail, smooth surfaces, small features or application-specific resin behavior.
Typical professional applications include:
- Dental study models
- Orthodontic models
- Surgical guide workflows, depending on suitable resin and local requirements
- Industrial appearance prototypes
- Product development samples
- Engineering fit-check models
- Casting patterns
- Jewelry model preparation
- Flexible shoe sample development
- Soft prototype testing
- Model-making and display parts
- Research samples
Resin 3D printing may not be suitable for every end-use part. Mechanical load, heat exposure, impact behavior, chemical exposure, biocompatibility, regulatory requirements and long-term use conditions should be reviewed before production use.
Resin 3D Printer Selection Checklist
Before buying a resin 3D printer, professional users should prepare the following information:
- Main application: dental model, industrial prototype, flexible sample, casting pattern or other use
- Maximum model size
- Expected daily or weekly output
- Required surface finish
- Required dimensional tolerance
- Resin type or material property requirement
- Whether parts are for visual review, fit check, functional testing or regulated use
- Washing method
- UV curing requirement
- Operator skill level
- Available workspace and ventilation plan
- Maintenance capacity
- Sample printing needs
- Budget for printer, resin, vat, film, curing unit and consumables
- Technical support expectation
This checklist helps avoid a common purchasing problem: choosing a printer based only on advertised resolution or price while ignoring resin, post-processing and daily workflow.
Common Mistakes to Avoid
Mistake 1: Treating the Printer as the Whole Workflow
A resin printer alone does not produce reliable professional results. Washing, curing, supports, inspection and maintenance are part of the production system.
Mistake 2: Choosing Resin Only by Name
A “dental resin,” “flexible resin” or “engineering resin” label is not enough. Users should confirm resin indication, printer compatibility, exposure profile, curing requirements and final application suitability.
Mistake 3: Ignoring Post-Curing
Skipping or guessing the UV curing process may affect final part properties. The curing process should follow resin instructions and be validated for the intended workflow.
Mistake 4: Printing Large Flat Surfaces Without Orientation Planning
Large flat surfaces can create suction forces and increase failure risk. Orientation, drainage and supports should be designed carefully.
Mistake 5: Overloading the Build Platform Without Process Control
Batch printing is efficient, but too many poorly supported parts can increase failure risk. Build layout should allow resin flow, stable supports and easy part removal.
Mistake 6: Using Printed Dental Parts Without Confirming Requirements
Dental and medical applications may involve material indications, professional evaluation and local regulations. FDA guidance for additive manufactured medical devices emphasizes technical considerations, testing and characterization for devices that include additive manufacturing steps.
Customers should confirm resin indication, post-curing process and local regulatory requirements before clinical or intraoral use.
Mistake 7: Not Requesting Sample Prints
Sample printing helps evaluate real surface quality, fit, support marks, resin behavior and post-processing effort. Yidimu provides sample printing service support for customers who want to review workflow suitability before choosing equipment.
How Does Resin 3D Printer Work for Dental Users?
In dental workflows, a resin printer usually fits into a digital process that may include scanning, CAD design, nesting, printing, washing, curing and inspection.
Typical dental resin printing applications may include:
- Study models
- Orthodontic models
- Dental model preparation
- Surgical guide workflows, depending on suitable resin and regulatory confirmation
- Temporary dental applications, depending on resin indication and validated processing
- Splint or tray workflows, depending on material and local requirements
Dental users should be careful not to assume that one printer or one resin can support every dental application. A model resin is not the same as a surgical guide resin, and a temporary resin may have different instructions from a standard model resin.
Customers should confirm resin indication, post-curing process and local regulatory requirements before clinical or intraoral use. Yidimu’s own technical content also states that dental and regulated applications should not be treated as medical advice, dental advice, regulatory approval, material certification or clinical recommendation, and that customers should confirm resin indications, material instructions, post-curing processes and local requirements before regulated use.
How Does Resin 3D Printer Work for Industrial Users?
For factories and product development teams, resin 3D printing is often used to shorten the sample-making cycle before mold making, tooling decisions or production trials.
Typical industrial uses may include:
- Product appearance prototypes
- Small structural samples
- Assembly fit checks
- Design validation models
- Jigs and fixture prototypes
- Transparent or display models, depending on resin
- Flexible samples for footwear or soft parts
- Casting patterns
- Small-batch trial parts, depending on resin and application
Industrial users should evaluate resin printing by workflow value, not only by part price. The real benefit may be faster design review, fewer outsourcing delays, faster iteration before tooling or better communication between engineering, design and purchasing teams.
For larger or more demanding projects, buyers can review Yidimu industrial resin 3D printers and provide model size, resin requirements and expected workflow before equipment selection.
Safety and Handling Notes for Resin Printing
Liquid photopolymer resin should be handled as a chemical material before it is fully processed. Professional workshops should build basic safety controls into the workflow.
Recommended controls may include:
- Review the resin safety data sheet
- Wear suitable gloves and eye protection
- Avoid skin contact with uncured resin
- Keep the printing and washing area organized
- Use appropriate ventilation based on material and workplace requirements
- Label resin containers and waste containers clearly
- Handle contaminated wash liquid properly
- Train operators before routine production
- Clean spills according to material instructions
- Keep uncured resin away from non-work surfaces
Safety requirements vary by resin, region and workplace. Users should follow resin supplier instructions and local regulations.
Conclusion: how does resin 3d printer work in a professional workflow?
A resin 3D printer works by curing liquid photopolymer resin layer by layer with controlled light. But in professional production, the real result depends on the complete workflow: 3D file quality, orientation, supports, resin selection, exposure settings, washing, UV post-curing, inspection, safety handling and technical support.
For factories, dental labs, clinics, model-making companies and product development teams, the best resin printer is not simply the highest-resolution machine. It is the system that fits the application, model size, resin requirement, production volume and post-processing workflow.
If you are evaluating resin 3D printing for professional use, contact Yidimu with your model size, resin requirement, application and expected workflow. Yidimu can help review suitable printer options, resin matching, UV curing needs, sample printing and practical setup considerations.
FAQ
1. How does resin 3D printer work?
A resin 3D printer works by using UV or near-UV light to cure liquid photopolymer resin layer by layer. The 3D model is sliced into thin layers, each layer is exposed to light, and the cured layers build up into the final part.
2. Is resin 3D printing the same as filament 3D printing?
No. Resin 3D printing cures liquid photopolymer resin with light, while filament printing usually melts and extrudes thermoplastic filament. Resin printing is often selected for fine detail and smoother surfaces, while filament printing may be selected for larger or more general-purpose plastic parts.
3. Why do resin prints need washing?
Fresh resin prints usually have uncured resin on the surface. Washing removes this residue before final UV curing. The correct washing liquid and time depend on the resin.
4. Why do resin prints need UV curing after printing?
UV post-curing helps the printed part reach more complete material properties, depending on resin formulation and curing conditions. The curing process should match the resin supplier’s instructions.
5. What resin should I choose for professional printing?
It depends on the application. Dental models, flexible samples, casting patterns, industrial prototypes and temporary dental workflows may require different resin types. Users should confirm printer compatibility, resin instructions, post-curing process and final application requirements.
6. Can a resin 3D printer print dental parts?
A resin 3D printer can support many dental workflows when paired with suitable resin, print settings, washing, UV curing and professional inspection. Customers should confirm resin indication, post-curing process and local regulatory requirements before clinical or intraoral use.
7. What causes failed resin prints?
Common causes include poor support design, incorrect exposure settings, dirty vat film, weak build platform adhesion, unsuitable resin temperature, file problems, excessive suction force or incomplete maintenance.
8. Is resin 3D printing safe?
Resin printing can be used safely with suitable controls, but uncured resin requires careful handling. Operators should review the resin SDS, wear protective equipment, avoid skin contact and follow local workplace requirements.
9. How accurate is resin 3D printing?
Accuracy depends on printer design, optical system, resin behavior, exposure settings, model orientation, support strategy, post-curing and inspection method. Professional users should evaluate sample prints with their real application files.
10. What information should I send to Yidimu for a printer recommendation?
Send your model size, application, resin requirement, expected daily output, surface finish expectation, accuracy requirement, post-processing plan and whether the part is for model review, industrial testing, dental model use or potential regulated use.