A resin 3D printer prints upside down because the part is built layer by layer from the build platform while the light source cures resin through the bottom of the vat. This is common in LCD, MSLA, DLP and many SLA-style resin systems. In this design, the first cured layer sticks to the build platform, each new layer cures between the previous layer and the vat film, and the platform gradually moves upward.
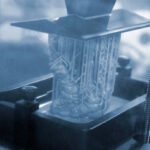
To a new operator, it may look unusual: the object is not rising from a table like an FDM print. Instead, it hangs from the build plate, with supports and the model suspended above the resin vat. But for professional resin printing, this is a practical engineering layout.
The upside-down printing structure helps reduce the amount of resin required in the vat, keeps the optical system compact, and allows high-detail layer curing. It is one reason resin printing can support applications such as dental models, industrial prototypes, fine-detail parts, flexible samples and model-making workflows.
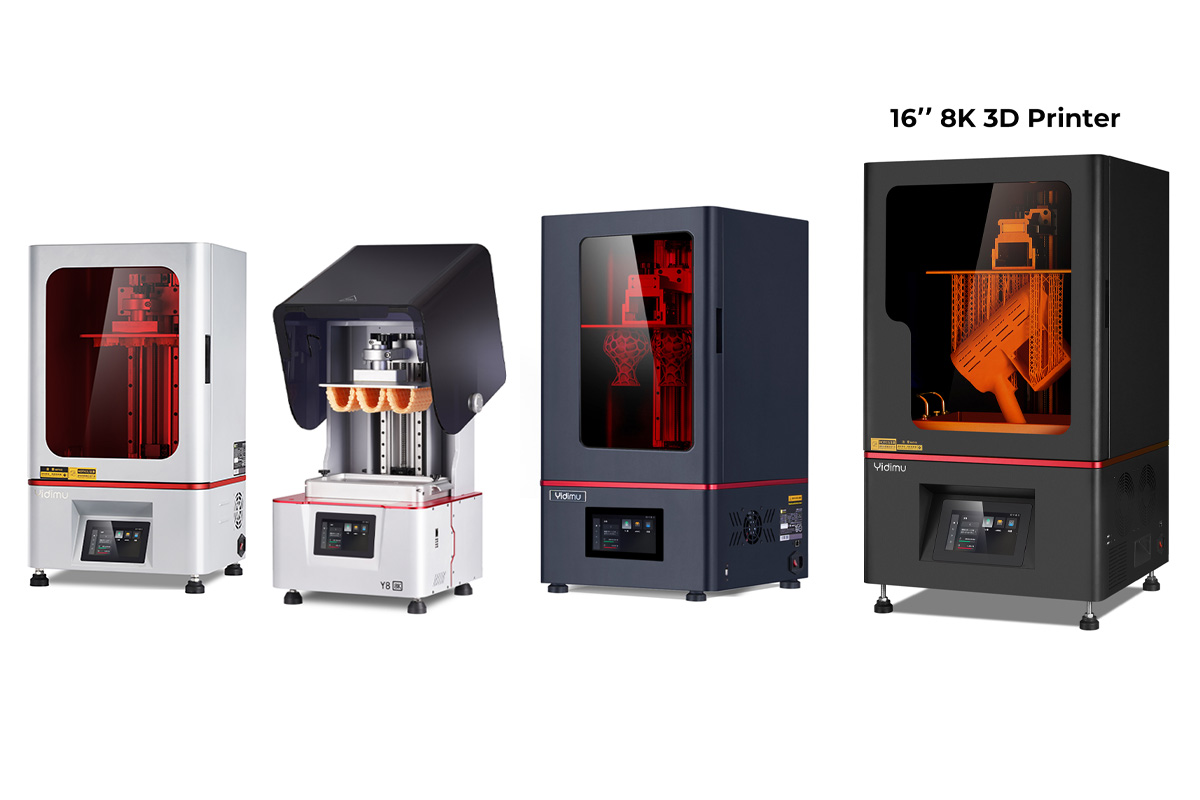
For teams comparing Yidimu industrial resin 3D printers or planning a complete resin printing workflow, understanding this structure is important. It affects how parts are oriented, how supports are generated, how failures happen, and how operators should remove, wash and cure printed parts.
The Basic Principle: Bottom-Up Resin Printing
Most professional resin printers that look like they are printing upside down use a bottom-up vat photopolymerization process.
Vat photopolymerization is an additive manufacturing process in which liquid photopolymer resin is selectively cured by light to form solid layers. ISO/ASTM 52900 defines common additive manufacturing terminology and describes the layer-by-layer principle used across AM processes.
In a bottom-up resin printer, the key components are:
- Build platform: the metal plate where the first layer attaches.
- Resin vat: the container holding liquid photopolymer resin.
- Transparent vat film or window: the bottom surface through which UV light passes.
- Light source: LCD, DLP projection or laser-based exposure system.
- Z-axis motion system: moves the platform up and down with controlled layer spacing.
- Slicing software: converts the 3D model into printable layers.
The printing cycle usually works like this:
- The build platform lowers close to the vat film.
- A thin layer of resin fills the gap between the platform and the vat bottom.
- UV light cures the first layer.
- The first layer adheres to the build platform.
- The platform lifts, separating the cured layer from the vat film.
- Fresh resin flows under the cured layer.
- The next layer is exposed and bonded to the previous layer.
- The process repeats until the model is complete.
Because the build platform moves upward while layers are added underneath the part, the final object appears upside down.
A peer-reviewed review of vat photopolymerization describes this bottom-up configuration as one where the build platform starts near the bottom of a shallow resin tank, light passes through the transparent vat bottom, and the platform moves upward after each layer is cured.
Why Bottom-Up Printing Is Used in Professional Resin Printers
The upside-down structure is not just a design habit. It solves several practical problems.
1. It Reduces Resin Volume
In a top-down vat system, the resin tank often needs to be filled deeply enough to cover the full build height. That can require a large amount of resin, especially for industrial parts or larger models.
In a bottom-up system, only a relatively shallow resin layer is needed in the vat. The part is pulled upward as it grows. This can reduce resin handling, lower material exposure during setup, and make resin changes more manageable.
For factories and dental labs using multiple resins, this is important. A lab may switch between model resin, surgical guide resin and temporary dental resin. A product development team may test standard model resin, tough resin or flexible resin. A smaller vat volume can make workflow changes more practical, depending on the printer design.
2. It Allows a Compact Optical System
Bottom-up resin printers place the exposure system under the transparent vat bottom. This makes it possible to use an LCD screen, projected light engine or laser scanning path to cure each layer from below.
For professional users, this structure can support:
- fine detail reproduction;
- smooth surface quality;
- controlled layer thickness;
- repeatable batch production;
- compact equipment footprint;
- easier integration into dental labs, R&D rooms and model workshops.
If your team is evaluating Yidimu dental 3D printers, the optical system, build platform stability, Z-axis movement and resin compatibility should be reviewed together rather than judged by resolution alone.
3. It Controls Layer Thickness
Layer thickness in resin printing is controlled by the gap between the previous cured layer and the vat film. In bottom-up printing, the printer can set this distance precisely through Z-axis motion.
This is important for dental models, engineering prototypes and detailed display models. However, actual results still depend on exposure time, resin behavior, platform leveling, support placement, temperature and post-curing. A printer specification alone cannot guarantee final part accuracy.
4. It Supports Batch Production
Professional users often care more about repeatability than about a single successful print. Dental labs may print multiple models in one job. Factories may print several prototype versions for design review. Model-making companies may produce multiple parts for assembly testing.
Bottom-up resin printing allows multiple models to be nested on the build platform. The printer cures each layer across the build area, depending on the exposure technology. This can be efficient for many small or medium-sized parts.
For example, a dental lab can use a suitable build platform to print multiple dental models in one batch. A product development team can print several design iterations at the same time. A shoe development team using flexible resin 3D printers may test different flexible sample geometries in one workflow.
Practical Table: What “Upside Down” Means in Resin Printing
| Printer behavior | What is happening | Why it matters for professional users |
|---|---|---|
| The model hangs from the build plate | The first cured layers attach to the platform and later layers build downward from that point | Build plate adhesion must be strong enough to hold the part through the full job |
| The part lifts after each layer | The cured layer separates from the vat film before the next layer is formed | Peel force affects support design, exposure settings and failure risk |
| Supports often face the build plate | Supports connect the model to the build platform and control orientation | Support placement affects surface marks, deformation and print success |
| The part may be angled, not flat | Angling reduces large cross-sections and suction force | Useful for large prototypes, dental arches, hollow models and flexible parts |
| The finished model needs washing | Uncured surface resin remains after printing | Cleaning should follow resin instructions and workplace safety rules |
| UV post-curing is often required | Final curing helps the resin reach intended properties | Curing time, wavelength and part orientation should match resin requirements |
| Failures may stick to the vat film | Layers may fail to detach or may not bond to the build plate | Operators should check leveling, exposure, vat film, supports and resin condition |
Does Upside-Down Printing Affect Accuracy?
Upside-down printing does not automatically reduce accuracy. In a well-controlled workflow, bottom-up resin printing can support high-detail models and professional surface finish. The actual accuracy depends on the complete system.
Key factors include:
- optical resolution and light uniformity;
- Z-axis stability;
- resin shrinkage and curing behavior;
- layer thickness;
- platform leveling;
- support design;
- model orientation;
- exposure settings;
- vat film condition;
- washing and UV curing process;
- temperature and resin viscosity.
For dental workflows, this is especially important. A printed dental model, surgical guide workflow or temporary dental application may have different requirements. Customers should confirm resin indication, post-curing process and local regulatory requirements before clinical or intraoral use.
The FDA notes that 3D printing of medical devices involves multiple steps, including device design, software workflow and material controls, and that printed medical devices are subject to regulatory requirements depending on device type and use.
For dental labs and clinics, the practical lesson is simple: do not judge a resin printer only by screen resolution. Evaluate the complete workflow from file preparation to post-curing and inspection. Yidimu’s guide on how to choose a dental 3D printer explains this selection logic in more detail.
Why Supports Are So Important in Upside-Down Resin Printing
Because the model is suspended during printing, supports are not optional for many geometries. Supports help connect the part to the build platform and prevent unsupported sections from forming in mid-air.
In resin printing, a support does several jobs:
- holds the model during peeling;
- prevents islands from failing;
- reduces deformation;
- controls the first contact points;
- helps distribute mechanical stress;
- protects important surfaces from direct support scars when placed correctly.
For professional users, support strategy should be decided based on the final application.
Dental Models
Dental models may be printed flat or angled depending on the printer, resin and workflow. A flat orientation may be efficient for certain model workflows, but it can increase cross-sectional area and peeling force. Angled orientation may reduce stress but can increase support removal work.
Dental teams should validate orientation with the actual model type, resin and post-processing process. Customers should confirm resin indication, post-curing process and local regulatory requirements before clinical or intraoral use.
Industrial Prototypes
Industrial prototypes often include large flat surfaces, thin walls, ribs, holes and assembly features. Printing these parts upside down requires careful orientation. A large flat area parallel to the vat film can create strong suction and increase failure risk.
Angling the part, adding drain holes for hollow models and placing supports on non-critical surfaces may improve reliability.
Flexible Resin Parts
Flexible resin parts can behave differently from rigid model resin during peeling and support removal. The material may stretch or deform depending on geometry, resin formulation and curing state. For flexible workflows, test printing is often useful before production.
Model-Making and Display Parts
For visual models, support marks are a major concern. The upside-down structure means supports often attach to the side facing the build platform. Operators should orient the part so support marks are placed on less visible or easier-to-finish surfaces.
Step-by-Step Workflow: How to Prepare a Resin Print That Builds Upside Down
Use this workflow when preparing parts for professional resin printing.
Step 1: Confirm the Application
Define what the part is for:
- dental model;
- surgical guide workflow;
- temporary dental application;
- industrial prototype;
- appearance model;
- flexible sample;
- functional test part;
- research sample;
- production trial part.
The application affects resin selection, orientation, supports, curing and inspection.
Step 2: Choose the Correct Resin
Select resin based on the required use. A model resin may be suitable for appearance prototypes or dental models, while flexible resin, castable resin, surgical guide resin or temporary dental resin may require a different workflow.
For cleaning and workflow planning, you can also review Yidimu’s guide to water-washable resin 3D printing.
Step 3: Check the 3D File
Before slicing, inspect the file for:
- open surfaces;
- thin walls;
- unsupported details;
- inverted normals;
- hollow sections without drain holes;
- tiny features below practical print limits;
- excessive part size for the build platform.
Step 4: Decide Orientation
Do not orient the model only to save height. Consider peel force, supports, surface finish and accuracy.
A good orientation usually balances:
- lower cross-sectional area per layer;
- fewer critical support marks;
- reduced suction;
- stable support contact;
- efficient nesting;
- manageable post-processing.
Step 5: Add Supports Carefully
Use stronger supports where peeling force is high and lighter supports where surface quality matters. Make sure all islands are supported. For production users, create repeatable support templates for common part types.
Step 6: Review Slicing Parameters
Check:
- layer thickness;
- bottom exposure;
- normal exposure;
- lift speed;
- retract speed;
- rest time;
- transition layers;
- anti-aliasing or smoothing settings;
- resin profile.
Do not change exposure settings casually in a validated workflow. Small changes may affect fit, strength or surface quality.
Step 7: Prepare the Printer
Before printing, check:
- build platform leveling;
- platform cleanliness;
- vat film condition;
- resin mixing;
- resin level;
- screen or optical path cleanliness;
- ambient temperature;
- printer calibration.
Step 8: Print and Monitor Early Layers
The first layers are critical because they hold the entire upside-down print. If adhesion is weak, the model may detach and stick to the vat film.
Step 9: Remove the Part Safely
After printing, let excess resin drip back into the vat if the workflow allows. Remove the build platform carefully and avoid contact with uncured resin.
Step 10: Wash, Dry and UV Cure
Most resin prints need cleaning before final curing. Follow the resin supplier’s instructions for washing method, wash time, drying and UV post-curing. The CDC/NIOSH advises risk management and safety procedures across pre-printing, printing, post-printing, post-processing, maintenance and cleaning activities.
For controlled post-processing, professional users should consider suitable UV curing boxes as part of the complete workflow.
Step 11: Inspect the Finished Part
Check:
- surface quality;
- support marks;
- warping;
- cracks;
- layer separation;
- fit areas;
- dimensional consistency;
- curing completeness;
- application-specific requirements.
Checklist: Before Printing an Upside-Down Resin Job
Use this checklist before sending a file to the printer.
- Application is clearly defined.
- Resin is suitable for the intended use.
- Dental or regulated use requirements have been reviewed if applicable.
- Model size fits the build volume.
- File has been checked for errors.
- Orientation reduces suction and large cross-sections.
- Critical surfaces are protected from support marks.
- Islands are supported.
- Hollow models have suitable drain holes.
- Layer thickness and exposure settings match the resin profile.
- Build platform is clean and leveled.
- Vat film is clean and undamaged.
- Resin is mixed and within suitable working condition.
- Washing and UV curing workflow is ready.
- Operators have PPE and handling procedures in place.
Common Mistakes to Avoid
Mistake 1: Thinking Upside-Down Printing Is a Defect
The inverted structure is normal for many resin printers. The printer is not malfunctioning simply because the part hangs from the build plate.
Mistake 2: Printing Large Flat Areas Parallel to the Vat Film
Large flat surfaces can create high peel force. This may cause warping, support failure or detachment from the build platform. Angling the part can often reduce stress.
Mistake 3: Using Too Few Supports
A model may look well-supported visually but still fail during peeling. Supports must resist repeated layer separation forces.
Mistake 4: Ignoring Drainage in Hollow Parts
Hollow parts can trap resin and create suction. Drain holes may be needed depending on geometry and application.
Mistake 5: Changing Exposure Settings Without Validation
Increasing exposure may improve adhesion but can also affect accuracy, fit, surface quality and support removal. Decreasing exposure may reduce over-curing but increase failure risk.
Mistake 6: Choosing a Printer Only by Resolution
Resolution is only one factor. Build platform stability, Z-axis movement, light uniformity, resin profiles, vat design, post-processing and technical support also matter.
Mistake 7: Treating Dental Prints Like General Models
Dental workflows may involve material indication, curing requirements and local regulatory expectations. Customers should confirm resin indication, post-curing process and local regulatory requirements before clinical or intraoral use.
Mistake 8: Skipping Post-Curing Control
Some teams focus on printing but neglect curing. Post-curing can influence final properties, dimensional stability and suitability for the intended application, depending on resin and workflow.
How Upside-Down Printing Affects Printer Selection
When choosing a resin 3D printer, the upside-down structure should lead you to ask better technical questions.
For Factories
Factories should ask:
- Can the printer handle my prototype size?
- Is the build platform large enough for batch testing?
- How stable is the Z-axis for taller parts?
- Can the workflow support repeated printing?
- What resin types are compatible?
- How easy is vat cleaning and resin changeover?
- What post-processing equipment is needed?
For industrial prototyping, Yidimu can help review model size, resin selection and production workflow through industrial resin 3D printer selection support.
For Dental Clinics
Clinics should ask:
- Which applications will be printed in-house?
- Who will operate the printer?
- Is the workflow simple enough for daily use?
- What resin indications are required?
- What curing process is required?
- How will parts be cleaned, dried and inspected?
For Dental Labs
Dental labs should ask:
- How many cases fit on one platform?
- Can the printer support daily batch production?
- Are resin profiles repeatable?
- How easy is platform removal and cleaning?
- Can multiple operators follow the same workflow?
- What documentation is needed for regulated applications?
Yidimu’s article on dental 3D printers for clinics and labs covers these selection factors from a practical workflow perspective.
For Model-Making Companies
Model-making teams should ask:
- Which surfaces must remain clean?
- Where can supports be placed?
- Can large visual models be printed in sections?
- What finishing work is acceptable?
- Is the resin suitable for painting, sanding or assembly?
For R&D Teams
Research and product development teams should ask:
- Can parameters be adjusted for material testing?
- Is the printer stable enough for repeated trials?
- Can different resins be tested safely?
- Is sample printing available before purchase?
- Can the supplier support troubleshooting?
Troubleshooting: When Upside-Down Resin Prints Fail
| Problem | Likely cause | What to check |
|---|---|---|
| Print stuck to vat film | Weak build platform adhesion, incorrect exposure, poor leveling or high peel force | Re-level platform, check bottom exposure, inspect vat film, reduce cross-section |
| Supports break during printing | Supports too weak, part too heavy, lift force too high | Increase support strength, adjust orientation, reduce suction |
| Warping near supports | Uneven stress, over-curing, poor support distribution | Reposition supports, review exposure, adjust curing workflow |
| Layer separation | Resin settings, lift speed, temperature or mechanical instability | Check resin profile, Z-axis, temperature and lift settings |
| Surface marks are too visible | Supports placed on critical surfaces | Reorient model and move supports to less visible areas |
| Hollow part cracks after curing | Trapped resin, insufficient drainage or curing stress | Add drain holes, improve cleaning and drying, review curing process |
| Poor dental model fit | Orientation, resin shrinkage, exposure, post-curing or file issue | Validate complete workflow, not only printer resolution |
Conclusion
So, why does a 3d resin printer print objects upside down? Because many resin printers use a bottom-up vat photopolymerization structure. The build platform lowers into resin, UV light cures each layer through the transparent vat bottom, and the part is lifted upward layer by layer. The object appears upside down because it is suspended from the build platform during the entire print.
For professional users, the important question is not whether upside-down printing is normal. It is normal for many resin systems. The important question is whether the printer, resin, orientation, support design, exposure settings, cleaning process and UV curing workflow are suitable for your application.
Factories, dental labs, dental clinics, model-making companies and R&D teams should evaluate resin printing as a complete workflow. Actual results may vary depending on printer structure, resin type, model geometry, slicing settings, support design, washing, curing and operator control.
Yidimu provides industrial resin 3D printers, dental 3D printers, flexible resin 3D printers, UV curing equipment, 3D printing resins and workflow support for professional users. To discuss a suitable workflow, contact Yidimu with your model size, resin requirement, application, expected workflow and daily production needs.
FAQ
Why does a 3D resin printer print upside down?
A 3D resin printer prints upside down because many resin printers use bottom-up vat photopolymerization. The build platform lowers into the resin vat, the light source cures each layer from below, and the platform lifts the cured part upward after every layer.
Is upside-down resin printing normal?
Yes. It is normal for many LCD, MSLA, DLP and SLA-style resin printers. The part hangs from the build platform because each cured layer attaches to the previous layer while the platform moves upward.
Does upside-down printing make resin prints weaker?
Not by itself. Part strength depends more on resin type, exposure settings, orientation, supports, post-curing and final application. The upside-down structure mainly affects peeling force, support strategy and build platform adhesion.
Why do resin prints need supports?
Supports hold the part while it hangs from the build platform. They also help prevent unsupported islands, reduce deformation and keep the model stable during repeated layer separation.
Why do resin prints sometimes stick to the vat instead of the build plate?
This can happen when build plate adhesion is too weak, bottom exposure is insufficient, the platform is not leveled, the vat film is damaged, the resin is not suitable for the settings, or peel force is too high.
Should resin prints be angled?
Many resin prints benefit from being angled because it can reduce cross-sectional area and peel force. However, the best orientation depends on model geometry, support marks, accuracy requirements and application.
Can dental models be printed upside down?
Yes, many dental resin printers use the same bottom-up principle. However, dental users should validate the complete workflow. Customers should confirm resin indication, post-curing process and local regulatory requirements before clinical or intraoral use.
Does upside-down printing affect surface finish?
It can affect surface finish through support placement, orientation and layer separation forces. The surface facing supports may require finishing. Critical surfaces should be oriented carefully.
Do all resin printers print upside down?
No. Some vat photopolymerization systems use different layouts, including top-down or other specialized structures. However, many compact professional resin printers use bottom-up printing because it is efficient and practical.
What should I check before buying a resin 3D printer?
Check application fit, build volume, resin compatibility, light uniformity, Z-axis stability, vat design, support workflow, software, post-processing equipment and supplier support. For dental or regulated applications, also confirm resin indication and compliance requirements.