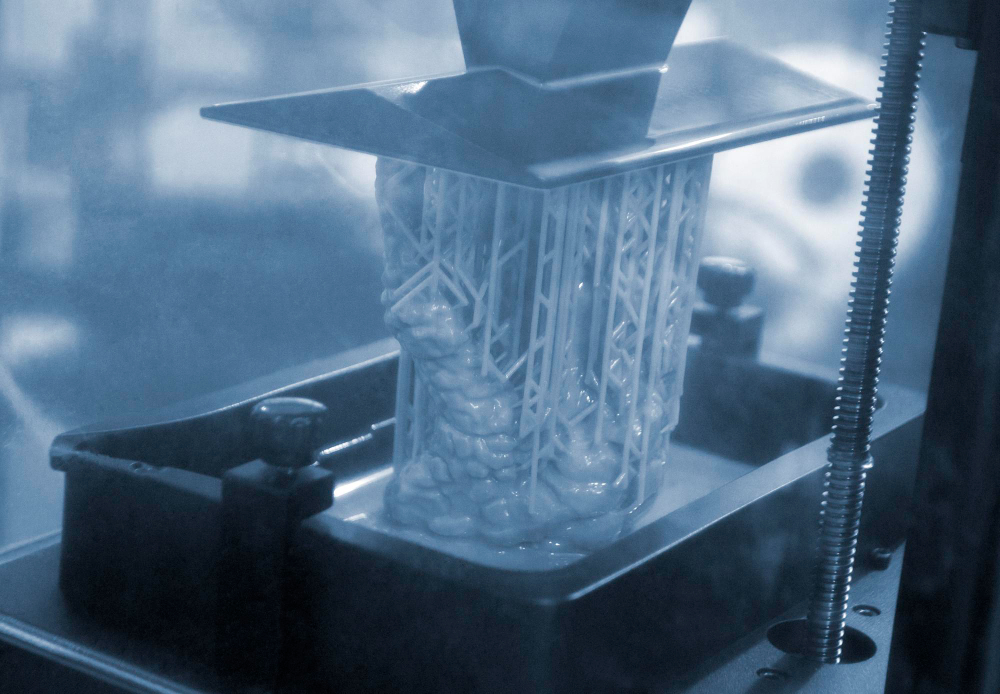
The short answer is that resin 3D printing time depends more on part height than part quantity. If a dental lab prints one model or ten models with the same Z-height on the same build platform, the machine printing time may be similar because each layer is cured as a cross-section. The total workflow time, however, increases with more parts because cleaning, support removal, curing and inspection take longer.
For professional users, it is useful to separate the process into two time categories:
- Machine print time — the time shown by slicing software or the printer before printing starts.
- Total workflow time — the full time from CAD file preparation to a washed, cured and inspected part.
This distinction matters for factories, dental labs and production teams. A printer may finish a job in three hours, but if the workflow requires resin draining, alcohol washing, drying, UV curing, support cleanup and dimensional inspection, the usable part may not be ready immediately.
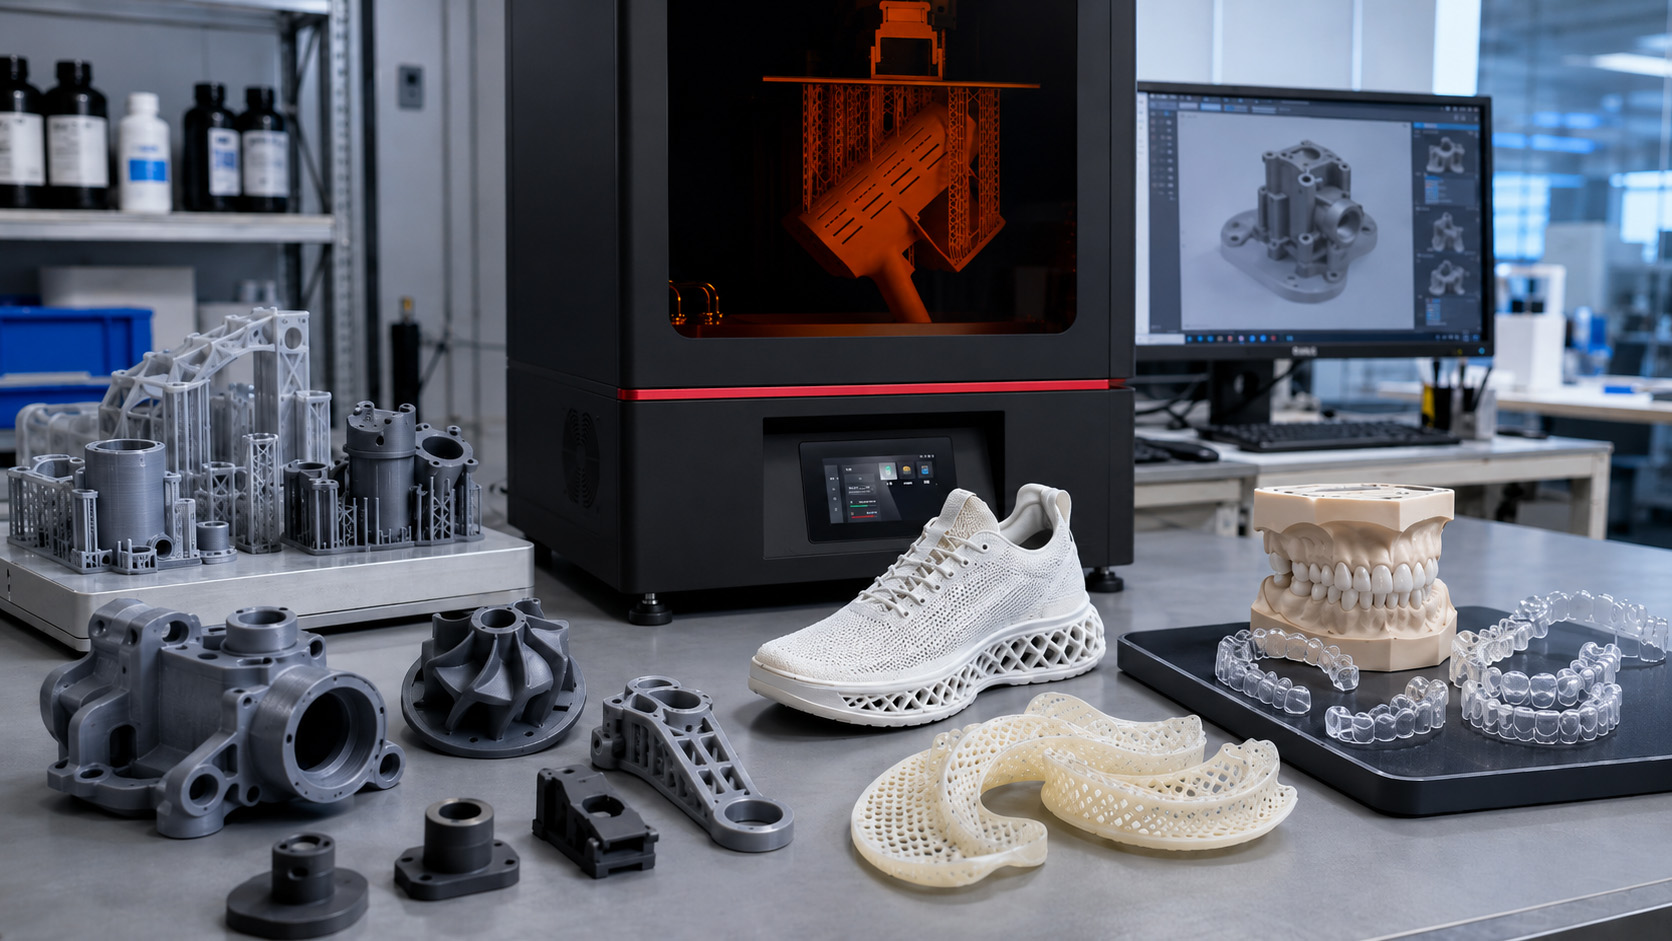
For teams comparing equipment, industrial resin 3D printers should not be evaluated only by advertised speed. A more reliable evaluation should include build volume, print stability, resin compatibility, layer accuracy, post-curing workflow and repeatability.
Typical Resin 3D Printing Time by Application
The following estimates are practical planning ranges. Actual time may vary depending on printer model, resin viscosity, layer height, geometry, orientation, support density, ambient temperature and post-processing requirements.
| Application | Typical Machine Print Time | Typical Total Workflow Time | Notes for Professional Users |
|---|---|---|---|
| Dental model | 1.5–4 hours | 2.5–6 hours | Depends on model height, number of arches, resin and post-curing process |
| Surgical guide | 1–3 hours | 2–5+ hours | Requires careful resin indication, cleaning, curing and regulatory confirmation |
| Engineering prototype | 2–8 hours | 4–12 hours | Taller parts, thick sections and detailed features may increase time |
| Miniature or detailed model | 2–6 hours | 3–8 hours | Fine layer height improves detail but increases layer count |
| Flexible resin part | 3–10+ hours | 5–14+ hours | Flexible materials may require slower, more conservative settings |
| Large industrial sample | 6–12+ hours | 8–24 hours | Height, suction force, resin drainage and curing depth all matter |
| Batch of small parts | Similar to one part if height is similar | Longer handling time | Build plate utilization improves productivity, but post-processing takes longer |
The most important point is this: a taller print usually takes longer than a wider print. For production planning, nesting more parts on the build platform can improve throughput if the parts are similar in height and can be cleaned and cured efficiently.
Why Resin 3D Printing Time Is Not Calculated Like FDM Printing
In FDM printing, print time is strongly affected by toolpath length, infill percentage, nozzle speed and the amount of material extruded. In resin 3D printing, the time calculation is different.
For LCD and DLP resin printers, each layer can be exposed as a full image. The machine does not trace every contour with a nozzle. Because of this, adding more parts across the build plate does not always increase machine time in the same way it would on an FDM printer.
However, this does not mean resin 3D printing is always fast. Each layer still needs exposure, lifting, peeling, settling and repositioning. The printer must repeat this process hundreds or thousands of times.
A simplified print time formula is:
Estimated print time = number of layers × time per layer + bottom layer time + movement and delay time
Where:
Number of layers = model height ÷ layer thickness
For example:
A 60 mm tall model printed at 0.05 mm layer height requires approximately:
60 ÷ 0.05 = 1,200 layers
If each layer cycle includes exposure, lift, retract and waiting time, the total print time can quickly become several hours.
Main Factors That Affect Resin 3D Printing Time
1. Part Height on the Z-Axis
Part height is usually the biggest factor. A 20 mm part may print much faster than an 80 mm part, even if the 80 mm part uses less resin by volume.
This is why orientation matters. If a long part is placed vertically, it may create more layers and take longer. If it is angled or laid flatter, the Z-height may be reduced, but suction force, support marks and surface quality may change.
Professional users should not simply choose the shortest orientation. The better choice is the orientation that balances:
- Lower Z-height
- Stable support structure
- Controlled suction force
- Critical surface protection
- Resin drainage
- Dimensional accuracy
- Post-processing convenience
For dental labs using dental 3D printers, model orientation should also consider occlusal surfaces, margin areas, implant analog positions and inspection requirements.
2. Layer Thickness
Layer thickness directly affects the number of layers. A smaller layer thickness usually improves vertical resolution and surface smoothness, but it increases print time.
Common layer thickness choices include:
| Layer Thickness | Time Impact | Typical Use |
|---|---|---|
| 0.1 mm | Faster | Rough prototypes, early fit checks, large parts |
| 0.05 mm | Balanced | Dental models, product samples, general precision parts |
| 0.03 mm | Slower | Fine detail, small textures, presentation models |
| 0.02 mm | Much slower | High-detail applications where surface quality matters |
Lower layer height does not automatically produce a better production result. It may increase time, increase file processing load and require more careful exposure calibration. For many professional workflows, 0.05 mm is often a practical starting point, while finer layers should be chosen only when the part actually requires them.
3. Exposure Time Per Layer
Each layer needs enough UV exposure to cure properly. Too little exposure may cause weak layers, poor adhesion or failed prints. Too much exposure may reduce fine detail, close small gaps or create dimensional deviation.
Exposure time depends on:
- Resin formulation
- Resin color and opacity
- Printer light source
- Layer thickness
- Temperature
- Part geometry
- Required mechanical properties
- Whether the layer is a bottom layer or normal layer
Yidimu notes that material properties may vary based on geometry, orientation, print settings and temperature, which is consistent with how professional users should treat resin settings: as workflow-dependent parameters, not fixed universal values.
For production use, exposure settings should be validated with the specific printer, resin, layer height and application before repeated batch production.
4. Bottom Layers and Burn-In Time
The first few layers are usually exposed longer to help the print adhere to the build platform. These are often called bottom layers, base layers or burn-in layers.
Bottom layers can add time, especially when exposure is set too conservatively. However, reducing bottom exposure too much may increase the risk of build plate adhesion failure.
Professional teams should avoid changing bottom exposure only to save a few minutes. A failed print wastes more time than a properly calibrated base layer.
5. Lift Speed, Retract Speed and Peel Distance
After each layer is cured, the build platform moves to separate the cured layer from the release film or vat surface. This step can take a significant portion of the total print time.
Fast lift settings may reduce print time, but they may also increase mechanical stress on the part, supports and film. Slow lift settings may improve stability for difficult parts, but they can extend the job by hours on tall prints.
Lift settings are especially important for:
- Large cross-section parts
- Flexible resin
- Hollow parts
- Thin-wall parts
- Tall parts
- Dense build plates
- Parts with large flat surfaces
For users printing soft or elastic parts, flexible resin 3D printers and resin-specific motion settings should be considered together. Flexible materials may need more controlled separation behavior, depending on resin and geometry.
6. Resin Type and Viscosity
Different resins behave differently during printing. Standard model resin, dental model resin, high-temperature resin, tough resin, castable resin and flexible resin may require different exposure and motion settings.
Higher-viscosity resins may need more time to flow back under the part after each layer. Some resins may also require longer post-curing to reach intended mechanical or handling properties. For production users, resin selection should consider not only the finished part property but also the workflow time.
A faster resin may reduce print time, but the final decision should include:
- Surface finish
- Dimensional stability
- Mechanical strength
- Flexibility
- Heat resistance
- Biocompatibility indication, where applicable
- Washing method
- UV post-curing process
- Shelf life and storage requirements
Yidimu users can compare application needs through 3D printing resins rather than selecting material based only on speed.
7. Print Orientation and Support Design
Orientation and support strategy affect both machine time and labor time.
A more vertical orientation may protect important surfaces but increase Z-height and print time. A flatter orientation may reduce Z-height but increase suction force or create support marks on visible areas.
Support design affects time in several ways:
- Dense supports increase preparation time.
- Heavy supports may require more cleanup.
- Poor supports may cause print failure.
- Support marks may increase finishing time.
- Incorrect orientation may trap resin inside hollow models.
In professional production, the best support strategy is not the one that uses the fewest supports. It is the one that improves success rate, protects critical surfaces and reduces total rework.
8. Build Plate Utilization
Resin printing can be efficient for batch production because multiple parts with similar height can be printed together.
For example, if one dental model takes three hours and eight models of similar height also take about three hours of machine time, the batch is more efficient. But the total workflow will still include more washing, curing, inspection and labeling time.
This is why professional resin printing productivity should be measured as:
usable parts per shift, not only machine print speed.
Factories and dental labs should plan:
- How many build plates can be processed per day
- How many parts can be washed at once
- Whether curing capacity matches printer output
- Whether operators can inspect parts without bottlenecks
- Whether resin handling is safe and repeatable
Complete Resin 3D Printing Workflow and Time Estimate
Below is a practical workflow for professional users.
| Workflow Stage | Typical Time Range | What Affects Time |
|---|---|---|
| CAD file check | 5–30 minutes | File quality, wall thickness, errors, application requirements |
| Slicing and support setup | 10–45 minutes | Orientation, support density, part complexity |
| Printer preparation | 5–20 minutes | Resin filling, platform check, vat condition, temperature |
| Machine printing | 30 minutes–12+ hours | Z-height, layer thickness, exposure, lift settings, resin |
| Resin draining | 5–20 minutes | Part shape, hollow structures, resin viscosity |
| Washing | 5–30 minutes | Resin type, part size, cleaning method, hollow areas |
| Drying | 10–60 minutes | Geometry, solvent, airflow, internal cavities |
| Support removal | 5–60 minutes | Support design, part fragility, operator skill |
| UV post-curing | 5–60+ minutes | Resin requirement, part thickness, curing box, application |
| Inspection and finishing | 10–90 minutes | Tolerance, surface requirement, support marks, documentation |
FDA information on 3D printed medical devices also emphasizes that post-processing may include cleaning, polishing, sterilization and other steps, and that process validation and verification can be necessary for defined specifications.
Step-by-Step Workflow: How to Estimate Resin 3D Printing Time Before Production
Step 1: Check the Final Application
Start with the end use. A visual model, dental model, engineering prototype and flexible functional sample do not require the same workflow.
Ask:
- Is the part for visual presentation, fit testing or functional testing?
- Does it need flexibility, heat resistance or strength?
- Is it a dental application?
- Will it contact skin, mucosa or the oral environment?
- Does the part need dimensional inspection?
For dental applications, customers should confirm resin indication, post-curing process and local regulatory requirements before clinical or intraoral use.
Step 2: Measure the Z-Height After Orientation
In resin printing, Z-height is one of the strongest time drivers. After orienting the model in the slicer, check the maximum vertical height.
Do not estimate print time from the original CAD dimensions alone. A 100 mm long part may print as 100 mm tall, 60 mm tall or 25 mm tall depending on orientation.
Step 3: Select Layer Thickness
Choose layer thickness based on the part requirement:
- Use thicker layers for early prototypes or non-critical fit checks.
- Use balanced layers for routine dental models and production samples.
- Use finer layers for small text, fine textures and high-detail presentation parts.
Avoid using the finest layer setting for every job. It can increase print time without meaningful production benefit.
Step 4: Choose Resin and Confirm Settings
Use resin settings appropriate to the printer, resin and layer height. Do not assume that settings from another machine or another resin will transfer perfectly.
For production, test and document:
- Normal exposure
- Bottom exposure
- Lift speed
- Retract speed
- Rest time
- Support strategy
- Washing method
- Curing parameters
Step 5: Calculate Machine Time
Use slicer estimates as a starting point, but confirm with real production data. Slicers may not always reflect actual delays, resin behavior or operator handling.
Track:
- Estimated print time
- Actual print time
- Failure rate
- Cleaning time
- Curing time
- Inspection time
Step 6: Add Post-Processing Time
For professional planning, add washing, drying, support removal, curing and inspection time. If the part is hollow, large, flexible or used in a dental workflow, post-processing may be a major part of the schedule.
Using a properly matched UV curing box can help standardize the curing stage, depending on resin requirements and part geometry.
Step 7: Plan the Production Batch
If multiple parts are needed, group them by:
- Similar height
- Similar resin
- Similar curing process
- Similar inspection requirement
- Similar delivery priority
This reduces changeover time and makes the workflow easier to control.
Professional Checklist: Before You Start a Resin Print
Use this checklist before estimating or starting a job.
- Confirm the part application and acceptance criteria.
- Confirm resin type and required post-curing process.
- Check whether the part has thin walls, large flat areas or hollow sections.
- Choose orientation based on accuracy, surface quality and Z-height.
- Confirm support placement does not damage critical surfaces.
- Select layer thickness based on required detail, not habit.
- Confirm exposure settings for the resin and printer.
- Check vat film condition, build platform and resin level.
- Estimate machine time in the slicer.
- Add washing, drying, curing and inspection time.
- For dental applications, confirm resin indication and local requirements.
- Record actual time after printing for future planning.
Practical Example: Why Two Prints With the Same Volume Can Take Different Time
Imagine two engineering prototypes using the same amount of resin:
- Part A: 30 mm tall and wide
- Part B: 120 mm tall and narrow
Even if the resin volume is similar, Part B may take much longer because it requires more layers. If printed at 0.05 mm layer height:
- Part A: 30 ÷ 0.05 = 600 layers
- Part B: 120 ÷ 0.05 = 2,400 layers
Part B has four times the layer count, so it may take far longer even though it does not use four times more resin.
This is why production teams should review orientation and Z-height before committing to delivery time.
How to Reduce Resin 3D Printing Time Without Sacrificing Quality
1. Use the Right Layer Height
Do not automatically print every job at the finest layer setting. For early prototypes, thicker layers may be acceptable. For dental margins or fine surface details, finer settings may be justified.
2. Batch Parts With Similar Heights
Batching similar-height parts can improve machine utilization. Mixing one very tall part with many short parts may delay the entire build plate.
3. Reduce Unnecessary Z-Height
Reorient parts when possible, but avoid creating large flat suction areas or damaging critical surfaces.
4. Optimize Support Strategy
Good supports reduce failure and cleanup time. Poor supports may look faster in the slicer but create rework later.
5. Match Resin to the Application
Some resins print faster, while others require more conservative settings. The fastest resin is not always the best resin for functional, dental or flexible applications.
6. Standardize Washing and Curing
Inconsistent post-processing can create sticky surfaces, dimensional variation or unstable mechanical performance. For medical and dental-related workflows, post-processing control is especially important. Yidimu notes that biocompatible materials require post-curing to meet safety standards determined by regulatory agencies and recommends following the material’s manufacturing guide or instructions for use.
7. Record Real Production Data
Professional teams should build an internal time database:
- Part type
- Resin
- Layer height
- Orientation
- Print time
- Wash time
- Cure time
- Failure rate
- Operator notes
Over time, this is more useful than relying only on advertised speed.
Common Mistakes to Avoid
Mistake 1: Judging Speed Only by the Printer Specification
Advertised speed may be measured under specific conditions. It may not reflect your resin, layer height, geometry, support strategy or post-processing workflow.
Mistake 2: Ignoring Post-Processing Time
A print is not production-ready when the machine stops. Washing, drying, curing, support removal and inspection can add significant time.
Mistake 3: Printing Everything at the Finest Layer Height
Fine layers increase layer count. Use them when the application requires detail, surface smoothness or vertical resolution.
Mistake 4: Overloading the Build Plate Without Considering Cleaning Capacity
A full build plate may improve machine utilization, but it can create bottlenecks during washing, curing and inspection.
Mistake 5: Using Generic Resin Settings
Settings should be confirmed for the specific resin, machine, layer height and application. Generic settings may lead to failure or inconsistent parts.
Mistake 6: Reducing Lift Time Too Aggressively
Faster lift settings may increase stress on parts and supports. This can be risky for large, flexible or thin-wall parts.
Mistake 7: Treating Dental Prints Like Ordinary Models
Dental applications may require specific resin indication, controlled post-curing and local regulatory review. Customers should confirm resin indication, post-curing process and local regulatory requirements before clinical or intraoral use.
Mistake 8: Forgetting to Track Actual Production Time
If a lab or factory does not record real print and post-processing time, it becomes difficult to quote jobs, plan capacity or evaluate new equipment.
How Long Does Resin 3D Printing Take for Dental Labs?
Dental resin 3D printing often takes a few hours per build, but the exact time depends on the indication and workflow. Dental models, surgical guides, temporary restorations, splints and other dental parts may require different resins, washing processes, curing parameters and inspection steps.
For example:
- A dental model may be planned mainly for dimensional stability and surface quality.
- A surgical guide may require validated resin, controlled post-curing and sterilization-related workflow.
- A temporary dental application may require careful confirmation of resin indication and local rules.
Dental labs should calculate both print time and chairside or lab turnaround time. A fast printer alone does not guarantee a fast dental workflow if washing, curing, sorting and inspection are not organized.
Customers should confirm resin indication, post-curing process and local regulatory requirements before clinical or intraoral use.
How Long Does Resin 3D Printing Take for Factories?
For factories, resin 3D printing time depends on whether the goal is appearance verification, assembly testing, mold development, small-batch trial production or functional testing.
A factory prototype may take several hours to print and additional time to cure and inspect. Large parts, flexible materials, deep cavities and high-detail surfaces may increase the complete workflow time.
Factories should evaluate resin 3D printing by asking:
- How many usable parts can be produced per day?
- How many printers are needed for the expected workload?
- Can the washing and curing process keep up?
- What resin properties are required?
- What tolerance and surface finish are acceptable?
- What inspection process is needed?
For professional procurement, Yidimu industrial resin 3D printer solutions can be evaluated together with resin, curing and workflow requirements.
How Long Does Resin 3D Printing Take for Flexible Parts?
Flexible resin parts may take longer than standard model resin parts because they can require more cautious settings. Soft or elastic parts may deform during peeling, support removal or cleaning if the workflow is not controlled.
Time factors for flexible parts include:
- Lower lift speed
- Stronger or denser supports
- Careful orientation
- Longer drainage time
- More careful support removal
- Resin-specific curing requirements
For applications such as shoe samples, soft product prototypes or elastic test parts, teams should test the complete workflow before promising delivery time. A flexible part that prints successfully but is damaged during support removal still counts as workflow failure.
Practical Table: What Increases or Reduces Resin 3D Printing Time?
| Factor | Usually Increases Time | May Reduce Time | Professional Note |
|---|---|---|---|
| Z-height | Taller orientation | Lower-height orientation | Balance time with surface quality and accuracy |
| Layer thickness | 0.02–0.03 mm | 0.05–0.1 mm | Choose based on detail requirement |
| Resin type | Flexible, high-viscosity or specialty resin | Standard model resin | Confirm resin-specific settings |
| Exposure | Longer exposure | Calibrated exposure | Do not under-cure just to save time |
| Lift speed | Slow lift and long rest time | Optimized motion | Too fast may increase failure risk |
| Build plate use | More handling after print | Similar-height batching | Machine time may stay similar, labor time increases |
| Supports | Dense supports | Optimized supports | Weak supports can cause failure |
| Post-curing | Thick or regulated parts | Standardized curing | Follow resin manufacturer guidance |
| Inspection | Tight tolerance parts | Visual-only models | Professional parts may need measurement |
Conclusion: How Long Does Resin 3D Printing Take?
So, how long does resin 3D printing take? In professional use, a resin print may take anywhere from 30 minutes to more than 12 hours on the machine, while the full workflow may take several hours to a full working day depending on the part, resin, post-processing and inspection requirements.
The most important time drivers are Z-height, layer thickness, exposure settings, lift movement, resin type, support strategy and post-processing. For factories, dental labs, model-making companies and engineering teams, the best approach is not simply to buy the fastest printer. The better approach is to build a controlled workflow around printer size, resin selection, washing, curing and quality inspection.
For help selecting the right resin 3D printing workflow, contact Yidimu with your model size, resin requirement, application, expected accuracy and daily production volume. Yidimu can help evaluate printer configuration, resin selection and workflow planning for professional resin 3D printing applications.
FAQ
How long does a small resin 3D print take?
A small resin 3D print may take about 30 minutes to 3 hours on the printer, depending on its height, layer thickness, resin and exposure settings. Post-processing may add another 30 minutes to several hours.
Does resin 3D printing time depend on the number of parts?
Not always. On many LCD and DLP resin printers, a full layer is cured at once, so several parts of similar height may take similar machine time as one part. However, washing, curing, sorting and inspection time increase as part quantity increases.
What affects resin 3D printing time the most?
The main factors are Z-height, layer thickness, exposure time, lift speed, resin type, support strategy and post-processing requirements.
Is resin 3D printing faster than FDM?
It depends on the part. Resin printing can be faster for batches of small, detailed parts because entire layers can be cured at once in LCD/DLP systems. FDM may be more practical for large, simple structural parts. The best choice depends on size, material requirement, surface finish and workflow.
Does lower layer height make resin printing slower?
Yes. Lower layer height increases the number of layers. For example, printing at 0.025 mm creates roughly twice as many layers as printing at 0.05 mm for the same Z-height.
How long does washing and curing resin prints take?
Washing and curing may take 10 minutes to more than 1 hour, depending on resin type, part size, geometry, cleaning method and curing requirement. Dental and specialty resins may require more controlled post-processing.
Can I reduce resin print time by increasing lift speed?
Sometimes, but it should be done carefully. Excessive lift speed may increase stress on the part, supports and release film, especially for large, flexible or thin-wall prints.
Why does my slicer estimate differ from the actual print time?
Slicer estimates may not fully account for machine delays, resin behavior, lift movement, settling time or user-defined pauses. Actual production data is more reliable for planning.
How long does dental resin 3D printing take?
Dental resin 3D printing commonly takes a few hours per build, but total workflow time depends on the dental indication, resin, washing, curing, support removal and inspection. Customers should confirm resin indication, post-curing process and local regulatory requirements before clinical or intraoral use.
Is a faster resin always better?
No. A faster resin may reduce print time, but professional users should also consider accuracy, surface finish, mechanical properties, post-curing requirements, durability and application suitability.
Optional References
- NIOSH explains that vat polymerization uses UV light from a laser or projector to cure photopolymer resin, with the build platform moving vertically between layers.
- Dassault Systèmes describes vat photopolymerization as a process where liquid photopolymer resin is selectively cured layer by layer, and notes that DLP/LCD approaches can cure a full layer at once compared with laser scanning.
- FDA information on 3D printed medical devices highlights post-processing, process validation, verification and regulatory requirements for medical-device-related additive manufacturing.
- Yidimu dental resin documentation states that biocompatible materials require post-curing and that users should follow the material manufacturing guide or instructions for use.