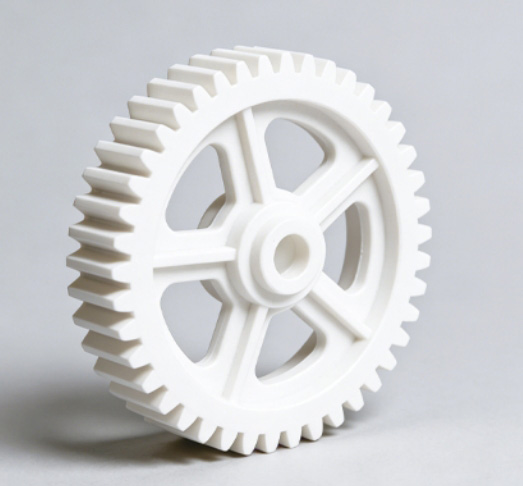
For professional users, the question “How strong are resin 3D prints?” should be answered by application, not by a single number.
A dental lab may care about model stability and surface detail. A factory may care about whether a prototype can survive handling, assembly testing, or repeated inspection. A shoe development team may need elastic deformation. A model-making company may need smooth surfaces and fine details rather than high impact resistance. An R&D team may need data that can be repeated under the same resin, printer, washing, and curing conditions.
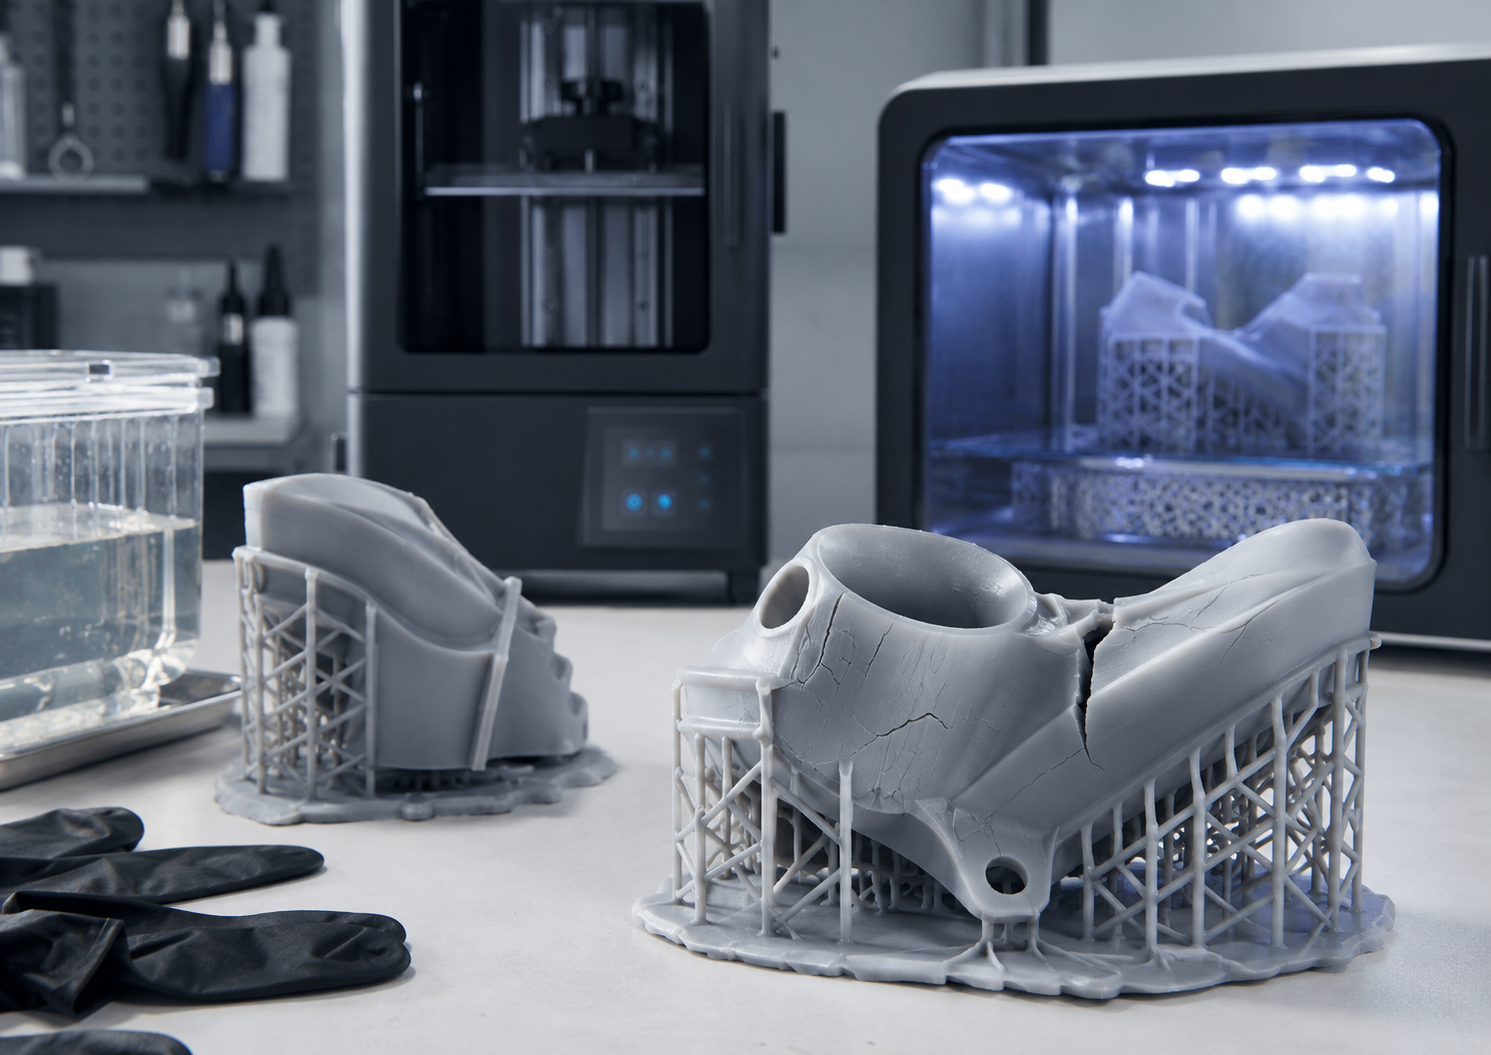
That is why resin print strength should be evaluated as a complete workflow: printer + resin + design + print parameters + post-processing + inspection + application testing.
Yidimu provides industrial resin 3D printers, dental 3D printers, flexible resin 3D printers, 3D printing resins, UV curing equipment, and workflow support for professional resin printing users.
What “Strong” Means for Resin 3D Prints
Strength is not one property. When buyers ask whether resin 3D prints are strong, they may be asking about several different performance areas.
Tensile Strength
Tensile strength describes how much pulling force a material can resist before failure. It matters for parts under tension, clips, connectors, thin arms, and functional prototypes.
ASTM D638 is a common standard used to generate tensile property data for plastics under defined conditions, but test results depend on specimen preparation, test speed, temperature, humidity, and other conditions.
Flexural Strength and Stiffness
Flexural strength describes how a material behaves under bending. Flexural modulus describes stiffness. These values matter for flat parts, model bases, brackets, housings, trays, fixtures, and components that must resist deformation.
ASTM D790 covers flexural properties of unreinforced and reinforced plastics in rectangular bars and is generally used for rigid and semirigid materials.
Impact Resistance
Impact resistance describes how well a part handles sudden force, dropping, knocking, or shock loading. A part can have high tensile strength but still crack when dropped. This is one reason general-purpose resins may work well for models but may not be suitable for rough factory handling.
ASTM D256 describes Izod pendulum impact testing for plastics, where a standardized pendulum breaks a specimen and results are reported as absorbed energy.
Elongation at Break
Elongation at break shows how much a material can stretch before breaking. A low-elongation resin is usually more rigid and brittle. A high-elongation resin is usually tougher or more flexible, depending on formulation.
For example, public material data from Yidimu shows very different behavior between rigid, tough, and flexible SLA resins: Rigid 10K Resin lists high tensile strength and very low elongation, Tough 2000 Resin lists lower tensile strength but much higher elongation, and Flexible 50A Resin lists low tensile strength but high elongation and soft hardness. These are not Yidimu specifications, but they illustrate how resin formulation changes mechanical behavior.
Heat Resistance
Some resin prints may perform well at room temperature but deform under heat. Heat deflection temperature matters for molds, fixtures, dental workflows, transportation conditions, curing processes, and parts used near warm equipment.
Dimensional Stability
For dental models, engineering prototypes, inspection samples, and assembly verification, strength is not only about breaking. The printed part must also keep its shape after washing, curing, handling, and storage.
Are Resin 3D Prints Stronger Than FDM Prints?
The answer depends on the resin, filament, printer, part design, and load direction.
Resin 3D printing often provides smoother surfaces, finer details, and better small-feature reproduction than typical FDM printing. This makes it useful for dental models, product appearance samples, small precision parts, jewelry masters, miniatures, and complex surface models.
FDM parts, especially when printed with engineering thermoplastics such as nylon, PC, PETG, ABS, or fiber-filled materials, may be more suitable for some large structural, impact, or high-temperature applications. Resin prints can be strong, but many standard resins are more brittle than common thermoplastic parts unless tough, flexible, or engineering resin is selected and validated.
For professional procurement, the better comparison is not “resin vs FDM.” It is:
Which process can meet the required accuracy, surface quality, material behavior, workflow speed, batch output, and validation requirement?
Factories should consider resin printing when detail, smooth surface finish, dimensional control, and fast model iteration are important. For heavy mechanical loads, high impact, outdoor use, long-term fatigue, or continuous load-bearing applications, users should validate the resin carefully or consider another manufacturing process.
Practical Table: Resin Print Strength by Application
| Application | Strength Requirement | Suitable Resin Direction | What to Check Before Production |
|---|---|---|---|
| Dental study models | Dimensional stability, surface detail, handling strength | Dental model resin | Model accuracy, washing process, curing process, storage behavior |
| Orthodontic models | Batch repeatability, stable bases, smooth surfaces | Dental model resin or water-washable dental model resin | Build volume, model nesting, support strategy, workflow consistency |
| Surgical guide workflow | Application-specific strength, biocompatibility, sterilization compatibility | Indicated surgical guide resin only | Resin indication, post-curing, local regulatory requirements |
| Industrial appearance prototypes | Smooth surface, enough handling strength | Standard, model, or engineering resin | Surface finish, sanding behavior, painting compatibility |
| Assembly check samples | Moderate strength, dimensional accuracy | Tough or engineering resin | Fit, wall thickness, screw points, load direction |
| Jigs and fixtures | Stiffness, impact resistance, heat resistance | Tough, rigid, or high-temperature resin | Load case, temperature, repeated use, fastener design |
| Flexible shoe samples | Elasticity, bending, rebound, tear behavior | Flexible or elastic resin | Shore hardness, elongation, tear behavior, part thickness |
| Small functional prototypes | Strength, toughness, fatigue resistance | Tough or application-specific engineering resin | Real-use test, orientation, curing, aging |
| Mold-making or tooling trials | Heat resistance, stiffness, surface quality | High-temperature or rigid resin | Heat deflection, release agent, pressure, cycle count |
| Research test parts | Repeatability and controlled variables | Resin selected by test objective | Standardized samples, process documentation, test method |
H2: How Strong Are Resin 3D Prints in Real Professional Use?
In real production environments, resin 3D print strength depends on more than the material label. A printed part can fail because of weak geometry, insufficient wall thickness, poor support placement, trapped uncured resin, incomplete post-curing, wrong resin selection, or a load direction that the part was not designed to handle.
Resin Formulation Matters Most
Different resins are designed for different behavior.
A standard model resin may provide good surface finish and shape stability, but it may crack under impact. A tough resin may absorb more stress and resist shattering. A rigid resin may provide stiffness but may not tolerate bending. A flexible resin may bend repeatedly but may not support high structural loads.
This is why professional users should avoid asking only “Which resin is strongest?” A better question is:
Which resin has the right balance of stiffness, toughness, elongation, heat resistance, detail, and post-processing requirements for this application?
Yidimu can help customers review 3D printing resins based on application, model size, required part behavior, and expected workflow.
Post-Curing Can Change Final Properties
Resin prints are not finished immediately after printing. Washing removes uncured surface resin, and UV post-curing helps the part reach its intended final properties.
NIST research on commercial photopolymers found that curing behavior can vary significantly among resins and by light wavelength, including large variations in critical exposure energy and penetration depth. This supports a practical point: resin materials should not be treated as interchangeable without testing.
Some resin datasheets also show different mechanical values after different post-curing conditions. For example, public Yidimu Draft Resin data lists different tensile strength values for green, room-temperature post-cured, and 60°C post-cured samples, illustrating how curing conditions can affect final mechanical results.
For production users, uncontrolled curing is one of the easiest ways to create inconsistent parts. A busy dental lab or factory workshop should standardize curing time, wavelength, temperature, part spacing, part rotation, and operator procedure.
Yidimu provides UV curing boxes for resin post-processing workflows where controlled curing is required.
Part Geometry Can Be More Important Than Resin Strength
Even a strong resin can break if the part is designed poorly.
Common weak points include:
- Thin walls
- Sharp internal corners
- Long unsupported arms
- Small screw bosses
- Sudden section changes
- Hollow parts without drain holes
- Heavy parts with weak support contact areas
- Load-bearing features printed too thin
For resin printing, design should match the material. Rigid resin parts may need fillets, thicker sections, and stress relief. Flexible resin parts may need controlled wall thickness to achieve the desired bending feel. Dental models may need stable bases and proper orientation to reduce distortion.
Print Orientation Affects Strength and Accuracy
Print orientation affects support marks, surface quality, dimensional accuracy, resin drainage, peeling force, and stress distribution. In some cases, orientation may also influence mechanical behavior.
For example, a thin clip printed in one direction may break more easily than the same clip printed at a better angle with improved wall thickness and fillets. A dental model printed flat may behave differently from one printed at an angle, depending on the printer, resin, and support strategy.
This is why professional users should test real parts, not only generic sample blocks.
Washing Can Affect Surface Quality and Durability
Over-washing may affect surface appearance or make thin features more fragile, depending on the resin and solvent. Under-washing may leave uncured resin on the surface, creating tackiness, poor curing, inaccurate fit, or contamination risk.
For water-washable workflows, the same principle applies: easier cleaning does not remove the need for process control. Users still need correct washing time, clean water handling, curing, PPE, and waste management. Yidimu’s guide to water-washable resin 3D printing explains the workflow benefits and limits for professional users.
Step-by-Step Workflow: How to Improve Resin 3D Print Strength
Step 1: Define the Real Load Case
Before choosing resin, define how the part will be used.
Ask:
- Will the part be pulled, bent, compressed, twisted, or dropped?
- Will it be handled once or used repeatedly?
- Will it carry screws, clips, inserts, or snap-fit features?
- Will it contact heat, water, solvents, skin, or oral tissue?
- Is the part for visual review, fit testing, functional testing, or final use?
- Does the part need stiffness, toughness, flexibility, or heat resistance?
A resin that is excellent for a dental model may be unsuitable for a flexible shoe sample. A resin that is excellent for a rigid fixture may be too brittle for a snap-fit prototype.
Step 2: Select Resin by Mechanical Behavior, Not Name
Do not choose resin only by color, price, or generic labels such as “strong.” Review the required behavior:
- High stiffness
- Impact resistance
- Elongation
- Heat resistance
- Shore hardness
- Flexural strength
- Surface finish
- Dimensional stability
- Printer compatibility
- Post-curing requirement
When available, review technical datasheets and test methods. Mechanical data should be treated as guidance, not a complete guarantee for every part geometry.
Step 3: Design for Resin Printing
Improve strength through design:
- Add fillets to sharp corners
- Increase wall thickness in load-bearing areas
- Avoid long, thin unsupported features
- Reinforce screw bosses
- Use ribs instead of simply making every wall thick
- Add drain holes for hollow models
- Avoid trapping uncured resin inside closed cavities
- Use inserts when threads need repeated use
- Split large parts when a single printed part creates excessive stress
Step 4: Choose Orientation and Supports Carefully
Orientation should balance:
- Surface finish
- Dimensional accuracy
- Support removal
- Peeling force
- Drainage
- Strength at thin features
- Production efficiency
For functional prototypes, orient the part so critical features are not weakened by support damage or stress concentration. For dental and model applications, prioritize accuracy, stable surfaces, and repeatable nesting.
Step 5: Control Washing
Use a consistent washing method. Record:
- Cleaning liquid
- Washing time
- Agitation method
- Whether the wash bath is clean or saturated
- Drying time before curing
- Part orientation during drying
Poor washing can create surface tackiness, dimensional issues, or inconsistent curing.
Step 6: Control UV Post-Curing
Set a repeatable curing process:
- Correct UV wavelength
- Proper curing time
- Suitable temperature if required
- Enough spacing between parts
- Rotation or multi-side exposure
- Matched curing process for the resin
- Documentation for repeat jobs
For dental applications, customers should confirm resin indication, post-curing process and local regulatory requirements before clinical or intraoral use.
Step 7: Test Real Parts Before Scaling
Do not approve a resin workflow only by looking at one beautiful print. Test parts under real handling conditions.
For factories and labs, sample testing may include:
- Fit check
- Drop handling
- Screw assembly
- Bending test
- Heat exposure
- Cleaning and finishing trial
- Repeated use
- Storage observation
- Batch repeatability
Yidimu can support sample printing and workflow evaluation for customers who need to confirm printer, resin, part size, and post-processing suitability before purchase.
Strength Comparison: Rigid, Tough and Flexible Resin
Standard or Model Resin
Standard and model resins are often chosen for smooth surface finish, detail, and shape reproduction. They can be strong enough for display models, dental models, fit-check parts, and handling samples, but they may crack when used for high-impact or repeated mechanical loads.
Best for:
- Dental models
- Display prototypes
- Visual samples
- Master models
- Surface-detail parts
- General model-making
Use caution for:
- Snap fits
- Thin clips
- Load-bearing parts
- Drop-prone parts
- Screw joints
- High-temperature environments
Tough Resin
Tough resins are formulated to improve impact resistance, ductility, and functional handling. They may be suitable for prototypes, enclosures, jigs, fixtures, brackets, and parts that need better resistance to cracking.
Best for:
- Functional prototypes
- Assembly tests
- Jigs and fixtures
- Protective housings
- Clips and enclosures
- Factory handling samples
Use caution for:
- Long-term structural load
- High heat
- Outdoor exposure
- Unvalidated production use
- Medical or dental contact applications
Rigid or High-Temperature Resin
Rigid resins are designed for stiffness. Some high-temperature resins may support tooling, molding trials, or heat-exposed prototypes. However, high stiffness may come with lower elongation, which means the part may crack instead of bending.
Best for:
- Stiff prototypes
- Molds and tooling trials
- Engineering models
- Heat-exposed testing
- Fixtures requiring dimensional stability
Use caution for:
- Impact loading
- Snap fits
- Thin flexible arms
- Drop-prone parts
- Applications requiring deformation
Flexible or Elastic Resin
Flexible resin is not “strong” in the same way as rigid resin. It may have lower tensile strength but much higher elongation or softness. For shoe sample development, wearable protection samples, soft grips, seals, and flexible prototypes, the ability to bend and recover may matter more than high stiffness.
Best for:
- Flexible shoe samples
- Soft product prototypes
- Wearable structures
- Elastic model testing
- Grip or cushion concepts
- Bending demonstrations
Use caution for:
- Structural brackets
- High compression load
- Thin tear-prone edges
- High-temperature use
- Long-term fatigue without testing
Yidimu’s flexible resin 3D printers are intended for professional flexible resin workflows such as shoe components, soft samples, wearable structures, and flexible prototype development.
Dental Applications: Strength Requires Extra Caution
Dental resin printing has its own requirements. Dental users may print study models, orthodontic models, surgical guide workflows, splints, trays, temporary restorations, or other application-specific parts. These applications should not be grouped together as one strength category.
A dental model resin may be suitable for printed models but not for intraoral use. A surgical guide resin may require a defined post-curing and cleaning process. A temporary dental resin may have different requirements from a model resin.
Customers should confirm resin indication, post-curing process and local regulatory requirements before clinical or intraoral use.
For clinics and labs choosing equipment, Yidimu’s guide on how to choose a dental 3D printer explains why the decision should include application type, resin compatibility, accuracy expectations, post-processing, and daily production volume.
Common Mistakes to Avoid
Mistake 1: Asking for the “Strongest Resin” Without Defining the Application
There is no single strongest resin for every job. A rigid resin may be strong in bending but brittle under impact. A flexible resin may bend well but lack stiffness. A tough resin may be better for handling but still require design validation.
Mistake 2: Using Model Resin for Functional Load Testing
Model resin is often excellent for detail and surface quality, but it may not be suitable for clips, hinges, screw bosses, brackets, or impact-prone parts. Use application-specific resin and test the part under real use conditions.
Mistake 3: Ignoring Post-Curing
Incomplete or inconsistent post-curing can affect final strength, surface feel, dimensional stability, and repeatability. Curing should match the resin supplier’s instructions and the application requirement.
Mistake 4: Making Walls Too Thin
Thin walls may print successfully but fail during support removal, washing, curing, assembly, or customer handling. Strength should be considered during CAD design, not only after printing.
Mistake 5: Over-Curing or Heating Without Checking Resin Requirements
More curing is not always better. Excessive UV exposure or heat may cause brittleness, discoloration, warping, or dimensional change, depending on resin formulation.
Mistake 6: Hollowing Parts Without Drainage
Closed hollow resin parts can trap uncured resin. This may lead to cracking, leakage, odor, contamination risk, or long-term failure. Add drain holes and confirm cleaning is complete.
Mistake 7: Comparing Datasheet Numbers Without Checking Test Conditions
Datasheet values can be useful, but they are measured under specific sample geometry, print settings, and curing conditions. ASTM and other test methods help standardize testing, but final part performance still depends on geometry, workflow, and operating environment. NIST has also highlighted the importance of testing standards and applicability for polymer additive manufacturing.
Mistake 8: Forgetting Workplace Safety
Uncured resin, washing solvents, UV curing, sanding dust, and post-processing steps should be handled carefully. NIOSH notes that additive manufacturing hazards vary by technology, material, and environment, including dermal exposure to liquid materials, VOCs, solvents, and dust during different workflow stages.
Professional Checklist: Before You Approve a Resin Print for Use
Use this checklist before moving from sample printing to regular production.
- Define the application clearly.
- Identify the load type: tension, bending, impact, compression, twisting, or repeated handling.
- Choose resin based on stiffness, toughness, elongation, heat resistance, and surface requirement.
- Confirm printer compatibility.
- Confirm layer height and exposure settings.
- Review wall thickness and weak points in CAD.
- Add fillets, ribs, and reinforcements where needed.
- Plan support placement to avoid damaging functional surfaces.
- Confirm washing method and washing time.
- Confirm UV curing wavelength, time, and temperature.
- Document the workflow.
- Test the real part, not only a generic sample.
- Check fit, strength, surface quality, and dimensional stability.
- For dental use, confirm resin indication, post-curing process, and local regulatory requirements.
- Review whether the workflow can be repeated by your operators.
Conclusion: How Strong Are Resin 3D Prints?
Resin 3D prints can be strong, but their real strength depends on resin formulation, part design, print orientation, washing, UV curing, and application testing. Standard or model resins may be suitable for dental models, appearance samples, and detailed prototypes. Tough resins may support functional prototypes, jigs, fixtures, and assembly testing. Rigid or high-temperature resins may support stiff engineering models or tooling trials. Flexible resins may support elastic samples and soft product development.
For professional use, resin strength should not be judged by one printed sample or one datasheet value. The safest approach is to define the application, choose the right resin, control the workflow, and test real parts before scaling.
If you are evaluating resin 3D printing for factory prototyping, dental lab production, flexible samples, or professional model-making, contact Yidimu with your model size, resin requirement, application, expected workflow, daily output, and post-processing needs. Yidimu can help review printer selection, resin matching, UV curing, and sample printing options.
FAQ
Are resin 3D prints strong enough for functional parts?
They can be strong enough for some functional prototypes, jigs, fixtures, housings, and assembly tests, depending on the resin and workflow. For load-bearing, impact, heat, outdoor, or long-term use, users should test the actual part under real operating conditions before approving it.
Are resin prints brittle?
Some standard or model resins can be brittle, especially in thin sections or under impact. Tough, durable, flexible, or engineering resins may reduce brittleness, but the result still depends on part geometry, curing, and usage conditions.
What resin is strongest for 3D printing?
There is no single strongest resin for every application. Rigid resin may provide high stiffness, tough resin may resist impact better, and flexible resin may bend without cracking. The right resin depends on whether the part needs stiffness, toughness, elongation, heat resistance, or surface detail.
Does UV curing make resin prints stronger?
UV post-curing can help resin prints reach their intended final properties, depending on the resin. However, the curing process should follow the resin supplier’s instructions. Too little curing may leave parts underdeveloped, while excessive curing may cause brittleness, distortion, or discoloration in some materials.
Can resin 3D prints replace injection-molded plastic parts?
Sometimes resin prints can support prototype testing, pilot samples, fixtures, and small-batch evaluation, but they should not automatically be treated as direct replacements for injection-molded parts. Injection-molded thermoplastics and printed photopolymer resins can behave differently under impact, heat, fatigue, chemicals, and long-term stress.
Are resin prints stronger than FDM prints?
Not always. Resin prints often provide finer detail and smoother surfaces, while FDM engineering materials may perform better for some structural or impact applications. The better choice depends on resin or filament type, part design, load direction, size, finish requirement, and validation process.
How can I make resin prints less likely to break?
Use a suitable resin, increase wall thickness, add fillets, avoid sharp corners, reinforce screw areas, orient parts carefully, avoid trapped resin, wash correctly, cure consistently, and test the part under real use conditions.
Are flexible resin prints strong?
Flexible resin prints are strong in a different way. They may not be stiff or high-strength like rigid engineering materials, but they can support bending, compression, and elastic deformation depending on resin type, Shore hardness, wall thickness, and curing workflow.
Can resin 3D prints be used in dental applications?
Yes, resin 3D printing can support many dental workflows, including models and application-specific dental parts. However, customers should confirm resin indication, post-curing process and local regulatory requirements before clinical or intraoral use.
Should I request sample prints before buying a resin 3D printer?
Yes. For professional users, sample printing is one of the best ways to evaluate surface quality, part strength, dimensional behavior, support marks, cleaning, curing, and workflow suitability before purchasing equipment.
Optional References
- NIST, Materials Testing Standards for Additive Manufacturing of Polymer Materials: State of the Art and Standards Applicability.
- NIST, Measuring UV Curing Parameters of Commercial Photopolymers used in Additive Manufacturing.
- ASTM D638, Standard Test Method for Tensile Properties of Plastics.
- CDC/NIOSH, 3D Printing Additive Manufacturing and Safe Desktop Vat Photopolymerization 3-D Printing.