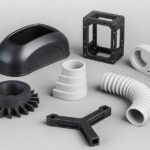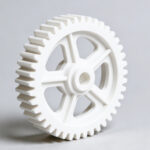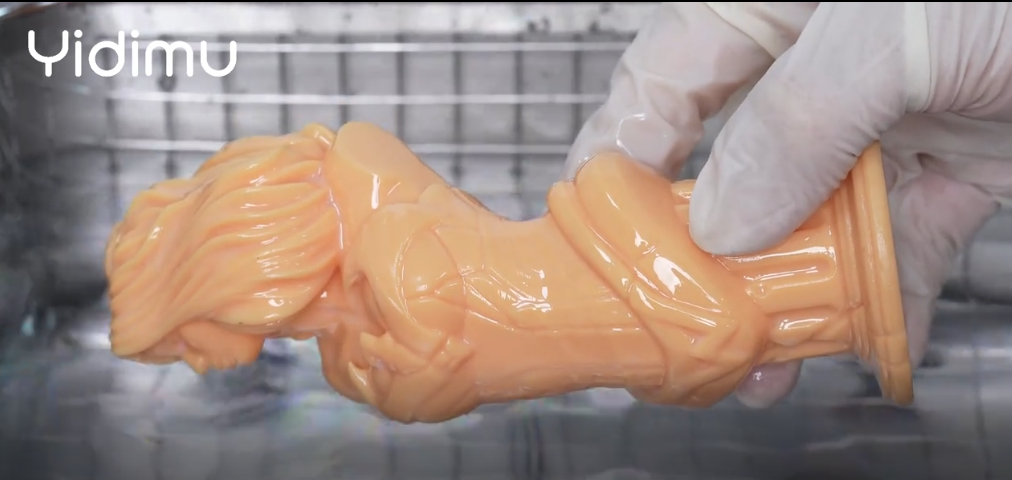
To clean, wash and cure resin 3D prints, first remove the printed part from the build platform while wearing suitable PPE, drain excess resin, wash the part in the correct cleaning liquid, dry it completely, remove supports at the proper stage, then post-cure it with controlled UV exposure according to the resin supplier’s instructions. For professional use, the key is not simply “wash with alcohol and put it under UV.” A reliable workflow controls contamination, drying, curing time, part orientation, resin type and operator safety so the final part is clean, stable and suitable for its intended application.
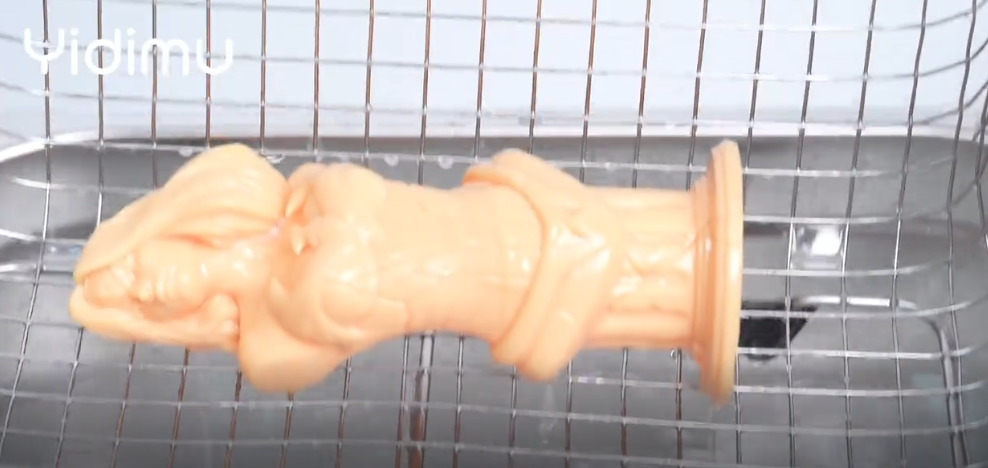
Why Post-Processing Matters in Resin 3D Printing
In resin 3D printing, the print is not finished when the build platform rises from the vat. The surface of the part usually still carries uncured or partially cured resin. If this residue is not removed properly, the part may remain sticky, lose fine detail, show white marks, smell strongly, crack after curing or fail dimensional inspection.
For factories, dental labs and professional model workshops, post-processing is part of production quality control. A stable professional resin 3D printer workflow should include printing, draining, cleaning, drying, support removal, UV curing, finishing and inspection. Skipping or rushing any step can make a good print look like a failed print.
Washing removes surface resin. Drying prevents solvent or water from interfering with curing. UV post-curing helps the material reach its intended final state, depending on resin formulation and curing conditions. Automated washing and curing systems are often used to improve consistency, especially when the same resin and part type are processed repeatedly. Yidimu describes SLA post-processing as a wash step using agitated solvent followed by UV curing, with curing using heat and 405 nm light to complete the chemical reaction started during printing.
For professional users, the goal is repeatability: the same printer, resin, cleaning liquid, drying method, curing box, curing time and inspection standard should produce comparable results from batch to batch.
Safety First: Resin, Solvent and UV Handling
Uncured photopolymer resin should be treated as a chemical material, not as ordinary plastic. Operators should avoid skin contact, splashes and unnecessary vapor exposure. CDC/NIOSH guidance for vat photopolymerization notes that uncured resin can contain acrylates and other chemicals that may cause asthma or dermatitis, and recommends ventilation, suitable PPE, frequent glove replacement and proper disposal of materials exposed to uncured resin or solvents.
A professional post-processing area should normally include:
- Nitrile or chemically suitable gloves based on the resin and solvent SDS
- Safety glasses or face protection where splashes are possible
- Lab coat, apron or protective clothing
- Ventilation or local extraction where needed
- Labeled wash containers
- Separate dirty and clean wash stations
- UV protection around curing equipment
- Spill control materials
- Waste containers for contaminated solvent, water, gloves and wipes
If isopropyl alcohol is used, remember that IPA is a flammable liquid. NIOSH lists isopropyl alcohol with a flash point of 53°F and identifies it as a Class IB flammable liquid; OSHA and NIOSH exposure limits are also listed for workplace control. For production environments, solvent storage, ventilation, ignition control and disposal should follow the SDS and local rules.
The Professional Resin Print Post-Processing Sequence
A reliable workflow usually follows this order:
- Print completion and resin drainage
- Build platform removal
- Part removal from platform
- Initial wash
- Detail wash or clean rinse
- Drying
- Support removal
- Final inspection before curing
- UV post-curing
- Final finishing and quality check
Some teams remove supports before curing; others remove them after partial washing but before final cure. The best timing depends on the resin, geometry, support contact size and required surface finish. Thin dental models, flexible parts and delicate prototypes may need different handling from thick industrial samples.
For Yidimu customers, post-processing should be considered together with printer selection, resin choice and final application. A dental lab printing models may need a different cleaning and curing setup from a shoe sample team using flexible resin or a factory printing large appearance prototypes.
Practical Table: Cleaning, Washing and Curing Workflow by Application
| Application | Common Resin Type | Washing Focus | Drying Focus | Curing Focus | Professional Notes |
|---|---|---|---|---|---|
| Dental study models | Dental model resin | Remove residue from occlusal surfaces, margins and grooves | Avoid trapped liquid in details | Follow resin instructions for stable surface and handling | Customers should confirm resin indication, post-curing process and local regulatory requirements before clinical or intraoral use. |
| Surgical guide workflow | Application-specific dental resin | Clean holes, channels and contact areas thoroughly | Ensure no solvent remains inside guide holes | Follow the resin IFU and validated curing process | Do not generalize from ordinary model resin. Confirm material indication and local requirements. |
| Industrial prototypes | Standard, tough or engineering resin | Remove surface film without damaging edges | Dry large surfaces evenly | Cure based on mechanical and dimensional requirements | Document curing settings for repeatable project comparison. |
| Appearance models | Model resin or high-detail resin | Protect fine textures and surface details | Avoid stains, water marks and cloudy areas | Avoid over-curing that may increase brittleness | Surface finish may depend more on washing and drying than printing resolution alone. |
| Flexible samples | Flexible or elastomeric resin | Wash gently to avoid deformation | Support the part during drying | Cure according to flexible resin requirements | Flexible parts may deform if handled aggressively before final cure. |
| Large-format parts | Industrial resin | Use enough wash volume and agitation | Check cavities, holes and underside surfaces | Cure all surfaces evenly | Large parts may need rotation during curing or longer controlled cycles. |
| Water-washable parts | Water-washable resin | Use controlled water washing, not uncontrolled rinsing | Dry completely before UV curing | Cure according to resin supplier guidance | Wash water becomes contaminated and should not be treated as ordinary clean water. |
Step-by-Step Workflow: How to Clean, Wash and Cure Resin 3D Prints
Step 1: Prepare the Post-Processing Area Before Printing Ends
Do not wait until the build platform is already dripping resin. Before removing the print, prepare gloves, scraper, wash containers, drying area, paper towels, support tools, curing box and waste containers.
For professional labs and factories, a clean layout reduces cross-contamination. Keep “resin-contaminated tools” separate from clean measuring tools, dental scanners, CAD workstations, packaging areas and office surfaces.
Step 2: Drain Excess Resin From the Part
After printing, let excess resin drip back into the vat for a short period if the printer workflow allows it. This reduces solvent contamination and makes the first wash more effective.
For hollow or cup-shaped parts, check whether resin is trapped inside. Drain holes, part orientation and model design can strongly affect cleaning quality. If resin remains trapped inside a hollow print, it may leak later, cause odor, create internal pressure or contribute to cracking.
Step 3: Remove the Part From the Build Platform
Use the correct removal tool and avoid hitting the platform or part aggressively. For dental models, thin edges and delicate surfaces may chip if removal force is too high. For large industrial parts, support the part with one hand while loosening it from the platform.
If several operators use the same machine, define a standard removal method. Inconsistent part removal is a common cause of surface dents, broken corners and platform scratches.
Step 4: First Wash to Remove Bulk Resin
The first wash removes most uncured resin from the part surface. This wash becomes contaminated quickly, so many professional users separate the process into a “dirty wash” and a “clean wash.”
Common washing options include:
- IPA or another resin-compatible solvent
- Dedicated resin cleaning solution
- Water for water-washable resin
- Automated wash station
- Manual sealed container with controlled agitation
The correct wash medium depends on resin type. Do not assume that every resin should be cleaned the same way. Review the resin SDS, resin instructions and application requirements. If you use Yidimu resin or need help matching resin and post-processing equipment, review 3D printing resin materials or contact the Yidimu team.
Step 5: Second Wash or Clean Rinse
A second wash is often useful for professional results. The first container removes heavy contamination; the second container removes remaining film and helps reduce sticky surfaces.
This is especially important for:
- Dental model details
- Fine lettering
- Jewelry or display models
- Engineering prototypes with grooves
- Hollow structures
- Large flat surfaces where residue is visible
Do not scrub delicate surfaces aggressively unless the resin and application allow it. A soft brush may help in some cases, but it can also damage fine features or push contaminated liquid into small channels.
Step 6: Dry Completely Before UV Curing
Drying is one of the most underestimated steps. A print should not go into UV curing while alcohol, water or cleaning solution is still pooled in holes, grooves or internal spaces.
Poor drying can cause:
- White marks
- Cloudy patches
- Sticky areas
- Uneven curing
- Surface stains
- Dimensional instability
- Odor after curing
Use air drying, controlled airflow or compressed air where appropriate. Avoid blowing contaminated solvent into the workspace. For dental and regulated workflows, drying should be controlled and documented according to the resin instructions.
Step 7: Remove Supports at the Right Time
Support removal timing affects surface quality. Many operators prefer to remove supports after washing and before final curing because the resin may still be slightly less brittle. However, very soft or thin parts may deform if supports are removed too early.
For dental models, support marks should not interfere with critical surfaces. For industrial appearance models, support placement should be planned before printing, not fixed after printing. For flexible resin prints, review the specific workflow because flexible parts may require more careful handling than rigid model resin.
Yidimu’s Flex G2 flexible resin printer workflow is designed for elastic resin applications, but cleaning and curing should still be matched to the resin and part geometry.
Step 8: Inspect the Part Before Final Curing
Before UV curing, inspect the part for:
- Remaining resin film
- Wet holes or cavities
- Broken supports
- Cracks
- Deformation
- Surface scratches
- Unclean details
- Trapped liquid
- Failed or missing features
If the part is still sticky before curing, do not simply cure it longer. A sticky surface may mean incomplete washing, contaminated wash liquid, poor drying or incompatible cleaning process. Curing resin residue onto the surface can lock in a poor finish.
Step 9: UV Post-Cure According to Resin Requirements
Post-curing time, wavelength, temperature and part orientation should be based on resin supplier guidance. Many resin workflows use 405 nm UV curing equipment, but the exact requirement depends on the resin. Some engineering or dental resins may require specific curing conditions to reach intended properties.
For biocompatible or dental-related materials, post-curing can be part of the required process. Yidimu notes that for biocompatible materials, post-curing is necessary to achieve safety standards determined by regulatory agencies and that users should follow the manufacturing guide or IFU. Customers should confirm resin indication, post-curing process and local regulatory requirements before clinical or intraoral use.
For professional users, sunlight curing is usually not the best production method because UV intensity, exposure direction, weather, temperature and time are not well controlled. A curing box can support more repeatable results, especially for dental labs, batch production and documented workflows.
Step 10: Final Finishing and Quality Check
After curing, inspect the final part again. Check:
- Surface feel
- Dimensional fit
- Warping
- Cracks
- Support marks
- Color change
- Detail retention
- Mechanical handling
- Customer application requirement
For dental labs and clinics, the printed part should be evaluated according to its intended use, resin indication and local workflow requirements. For factories and R&D teams, compare the cured part against the design file, tolerance needs and functional test plan.
Workflow Checklist: Resin Print Cleaning, Washing and Curing
Use this checklist for daily professional operation:
- Confirm resin type and post-processing instructions.
- Prepare gloves, eye protection, tools, wash containers and curing equipment.
- Drain excess resin from the build platform and part.
- Remove the part carefully from the build platform.
- Place the part into the first wash to remove bulk resin.
- Move the part to a second cleaner wash if surface quality matters.
- Check holes, cavities, grooves and fine details.
- Dry the part completely before UV curing.
- Remove supports at the correct stage for the resin and geometry.
- Inspect for residue, cracks, deformation and trapped liquid.
- Cure with controlled UV exposure according to resin instructions.
- Rotate or reposition large parts if needed for even exposure.
- Record wash time, drying method, curing time and batch notes.
- Dispose of contaminated solvent, water, gloves and wipes properly.
- Clean tools and reset the workstation for the next batch.
How Long Should You Wash Resin Prints?
There is no universal wash time that applies to every resin print. Wash time depends on resin viscosity, part size, surface detail, wash liquid condition, agitation strength, hollow structure and application.
A small dental model may need a different wash process from a large industrial prototype. A flexible resin part may need gentler handling than a rigid model resin. A water-washable resin part should follow its own cleaning guidance rather than being treated like standard resin.
As a practical rule, professional teams should validate wash time using real production models, not only test cubes. Document the wash time that produces a clean surface without damaging detail or causing dimensional issues.
For water-washable resin workflows, read Yidimu’s water-washable resin guide before building the process. Water-washable does not mean waste-water-safe or regulation-free; contaminated wash water still needs proper handling.
How Long Should You Cure Resin Prints?
Curing time depends on the resin, curing box, UV intensity, part thickness, color, geometry and final application. Over-curing may increase brittleness or cause deformation in some parts, while under-curing may leave the surface unstable or mechanically weak.
Professional users should avoid copying curing times from unrelated resins or hobby workflows. Instead:
- Start with the resin supplier’s instruction.
- Use the intended curing equipment.
- Test with real part geometry.
- Record settings and results.
- Adjust only with controlled comparison.
- Confirm requirements for dental, medical, body-contact or safety-related use.
If your team prints both dental and industrial parts, do not use one curing profile for everything. A dental model resin, surgical guide resin, tough engineering resin and flexible resin may need different workflows.
Cleaning and Curing for Dental 3D Prints
Dental resin printing often requires stricter workflow control because printed parts may relate to model accuracy, clinical planning, laboratory procedures or possible intraoral workflows depending on the resin and application.
For dental labs and clinics, the cleaning and curing workflow should be built around:
- Intended dental application
- Resin indication
- Printer compatibility
- Washing method
- Drying method
- UV curing equipment
- Curing time and temperature
- Documentation requirement
- Local regulatory requirements
- Operator training
A dental 3D printer workflow should not be evaluated by print speed alone. Washing, drying, curing and inspection time are part of real production output.
Customers should confirm resin indication, post-curing process and local regulatory requirements before clinical or intraoral use.
Cleaning and Curing for Industrial Resin Prints
Industrial resin prints may be used for product appearance review, assembly checks, engineering samples, molds, jigs, fixtures or production trial parts. The post-processing focus is often dimensional stability, surface finish and repeatability.
For industrial users, pay attention to:
- Large flat surfaces that show residue easily
- Internal cavities that trap resin
- Thick parts that may require more curing control
- Thin features that may warp if over-cured
- Engineering resins that require specific post-cure settings
- Batch consistency for repeated sample production
When choosing industrial resin 3D printers, buyers should also ask about post-processing workflow. A printer with good resolution may still produce poor final parts if washing, drying and curing are not controlled.
Practical Troubleshooting Table
| Problem | Likely Cause | What to Check | Practical Fix |
|---|---|---|---|
| Sticky surface after curing | Incomplete washing, dirty solvent, poor drying or under-curing | Wash liquid condition, drying time, cure settings | Use two-stage washing, dry fully, confirm curing profile |
| White marks on surface | Solvent residue, water residue, over-washing or curing while wet | Drying process, trapped liquid, wash time | Dry thoroughly before curing and avoid excessive soaking |
| Cracks after curing | Hollow part trapped resin, over-curing, thin walls or internal stress | Drain holes, wall thickness, support stress, curing time | Add drainage, reduce stress, validate cure settings |
| Loss of detail | Aggressive washing, overexposure, rough brushing or support damage | Wash agitation, brush use, exposure settings | Use gentler cleaning and improve print/support setup |
| Strong odor after curing | Residual uncured resin or trapped liquid | Cavities, holes, surface residue | Improve washing, drainage and drying before curing |
| Warping | Thin geometry, uneven drying, heat or over-curing | Wall thickness, part orientation, cure cycle | Support thin parts and cure with controlled exposure |
| Cloudy transparent parts | Micro-scratches, trapped solvent, poor drying or resin behavior | Cleaning method and drying | Use cleaner rinse, avoid rough handling, test polishing workflow |
| Dimensional mismatch | Resin shrinkage, over-curing, support stress or poor calibration | Printer calibration, resin profile, cure time | Validate full workflow, not only print settings |
| Surface dents from supports | Support removal too late or poor support placement | Support contact size and removal stage | Optimize support design and remove at proper stage |
| Contaminated clean tools | Poor workstation separation | Tool storage and operator behavior | Separate dirty and clean zones clearly |
Common Mistakes to Avoid
1. Curing Before the Part Is Fully Dry
This is one of the most common causes of white marks, cloudy surfaces and uneven finish. Alcohol, water or cleaning solution should not remain in grooves, holes or internal cavities before UV curing.
2. Using Dirty Solvent for Every Wash
A single container of dirty IPA or wash water can redeposit resin onto the part. For professional results, use staged washing or replace the wash liquid before contamination affects surface quality.
3. Treating Water-Washable Resin as Harmless
Water-washable resin still contains uncured resin chemistry before it is fully cleaned and cured. Contaminated wash water should be handled according to SDS, local rules and internal safety procedures.
4. Copying Cure Settings From Another Resin
Different resins may need different curing times and conditions. A setting that works for a gray model resin may not be suitable for a flexible resin, surgical guide resin or engineering resin.
5. Removing Supports Without Planning
Support removal is not only a post-processing step; it begins during file preparation. Poor support placement can damage visible surfaces or critical dental/engineering features.
6. Over-Washing Thin or Delicate Parts
Long soaking or aggressive agitation may damage fragile parts, especially thin walls, small pins, flexible structures or detailed model features.
7. Ignoring Hollow Parts
Hollow parts need drainage and cleaning access. Trapped resin can leak, smell, crack the part or create long-term quality problems.
8. Using Sunlight as a Production Curing Method
Sunlight may cure resin, but it is hard to control. Professional workflows usually need a curing box for repeatable UV exposure.
9. Forgetting Waste Handling
Contaminated solvent, water, gloves, wipes and failed prints should not be treated casually. The correct disposal method depends on the material SDS and local requirements.
10. Judging the Printer Without Controlling Post-Processing
Poor post-processing can make a capable printer look unreliable. Evaluate printer, resin, washing, drying and curing as one complete workflow.
Conclusion
How to Clean, Wash and Cure Resin 3D Prints is not only a beginner question. For factories, dental labs, dental clinics, model-making companies and R&D teams, it is a production workflow question. The finished part depends on the entire process: correct resin selection, careful part removal, staged washing, complete drying, suitable support removal, controlled UV curing and final inspection.
A good workflow should be safe, documented and repeatable. The exact settings may vary depending on resin, printer, curing equipment, model geometry and final application. Dental and regulated applications require extra caution, and customers should confirm resin indication, post-curing process and local regulatory requirements before clinical or intraoral use.
If your team is building a professional resin 3D printing workflow, Yidimu can help review the printer model, resin requirement, application, expected workflow, model size and post-processing needs. Contact Yidimu with your 3D file, sample image or application details, and the team can help evaluate suitable printer, resin, washing and curing options.
FAQ
Do resin 3D prints need to be washed before curing?
Yes. In most resin 3D printing workflows, prints should be washed before final UV curing to remove uncured surface resin. Curing a part with resin residue still on the surface may cause stickiness, poor detail, odor or surface defects.
Can I cure resin prints immediately after printing?
Usually no. The part should first be drained, washed and fully dried. Curing before cleaning can harden surface residue onto the model. Curing before drying may also cause white marks or uneven surface quality.
Should I remove supports before or after curing?
It depends on the resin and geometry. Many users remove supports after washing and before final curing because supports may be easier to cut cleanly. However, delicate, thin or flexible parts may need different handling. Test the workflow with your real part.
How long should I wash resin prints in IPA?
There is no universal time. Wash time depends on resin type, part geometry, IPA condition, agitation and surface requirement. Professional users should start with resin supplier guidance, then validate with actual production parts.
Is water-washable resin safe to rinse in the sink?
No. Water-washable resin does not mean the wastewater is clean or drain-safe. The wash water can contain uncured resin residue and should be handled according to the resin SDS, local regulations and internal waste procedures.
Why are my resin prints still sticky after washing and curing?
Sticky prints may be caused by dirty wash liquid, insufficient washing, incomplete drying, under-curing, incompatible resin settings or trapped uncured resin. Use a cleaner second wash, dry thoroughly and confirm curing settings.
Why do resin prints turn white after washing?
White marks often come from solvent or water residue, over-washing, contaminated wash liquid or curing while the part is still wet. Dry the part fully before UV curing and use clean washing liquid.
Can I use sunlight to cure resin prints?
Sunlight can cure some resin prints, but it is not ideal for professional repeatability. UV intensity, exposure angle, weather and temperature vary. A curing box is usually more suitable for controlled workflows.
Do dental resin prints need special curing?
Dental resin prints may require specific post-curing conditions depending on the resin indication and application. Customers should confirm resin indication, post-curing process and local regulatory requirements before clinical or intraoral use.
What information should I provide when asking Yidimu for workflow advice?
Provide your model size, resin requirement, application, expected workflow, daily output, required surface quality, curing equipment plan and whether the part is for dental, industrial, flexible, model-making or functional testing use.