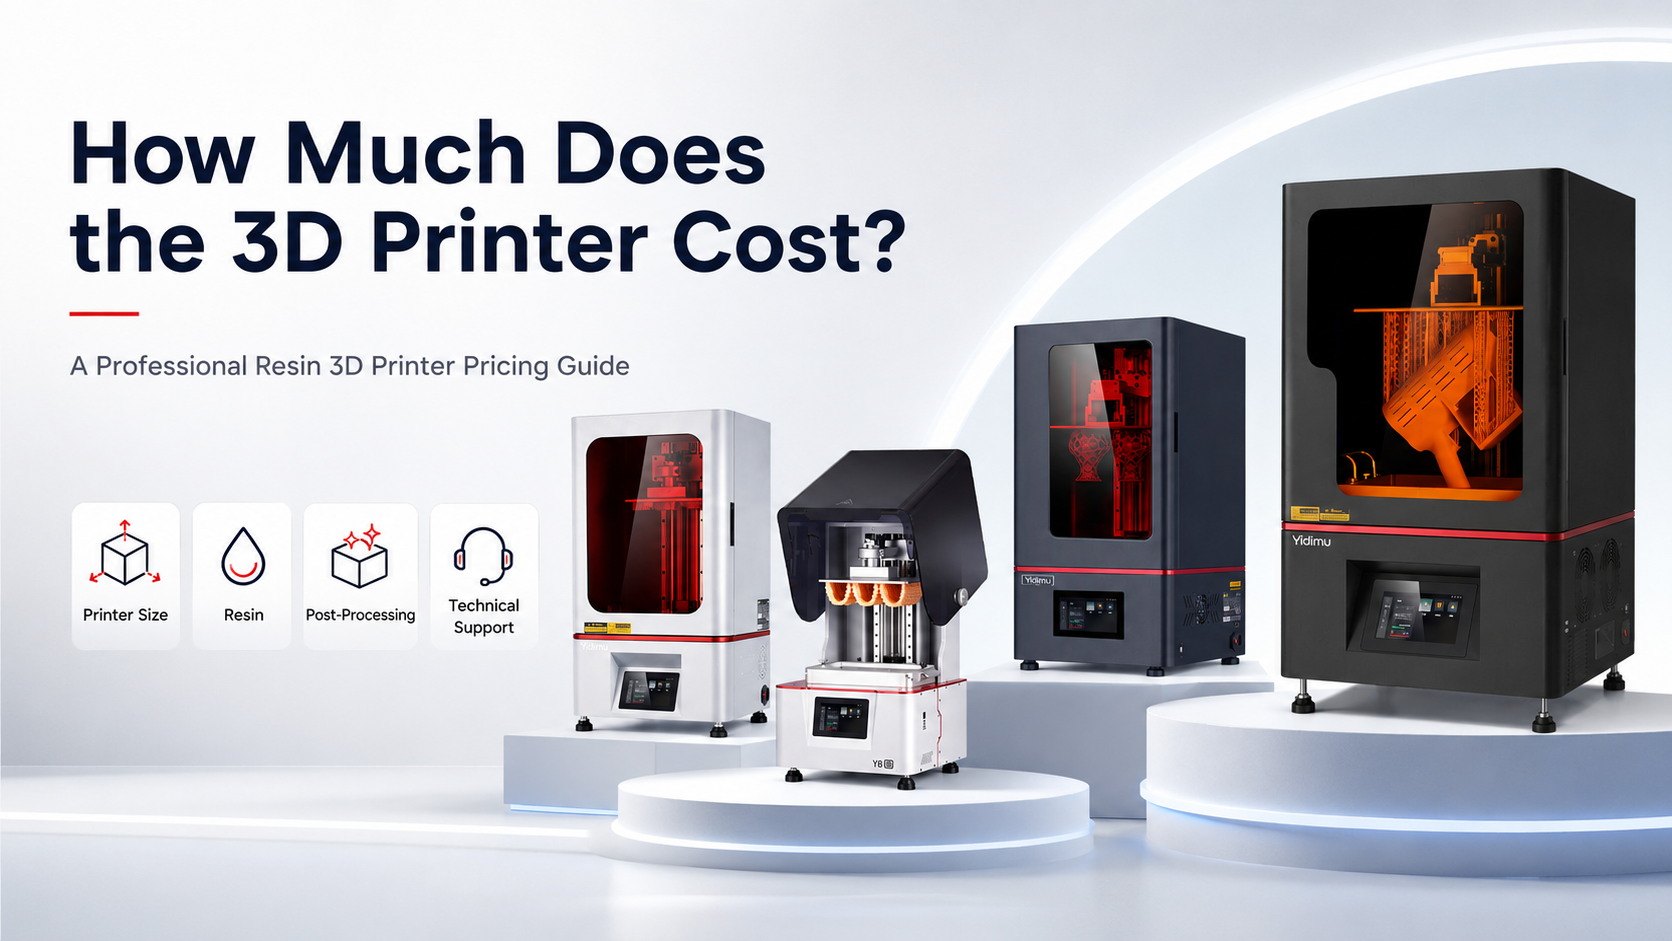
The cost of a 3D printer varies because “3D printer” is not one single type of machine. It can refer to a small desktop printer for simple models, a professional resin 3D printer for detailed prototypes, a dental 3D printer for model production, a flexible resin 3D printer for soft parts, or a large industrial resin 3D printer for factory sampling and small-batch production.
For professional users, price differences usually come from five areas: printing technology, build volume, accuracy requirements, material system, and workflow support.
A small desktop machine may be inexpensive, but it may not provide the repeatability, resin compatibility, production stability, or support required by a factory or dental laboratory. A professional resin printer costs more because it is expected to support controlled exposure, stable Z-axis movement, consistent layer formation, resin-specific parameters, and repeatable post-processing.
This is why a professional buyer should look beyond the invoice price. A low-cost printer may become expensive if it causes failed prints, slow output, unstable accuracy, resin waste, repeated calibration, or inconsistent post-curing results.
For users comparing resin systems for production or professional prototyping, Yidimu’s industrial resin 3D printers are designed for users who need stable workflow, application matching, and technical support rather than only a low purchase price.
Typical 3D Printer Cost Ranges
The following ranges are general market references, not fixed quotations. Actual cost depends on machine size, region, configuration, resin system, post-processing setup, and support package.
| 3D Printer Category | Typical Cost Range | Suitable Users | Professional Limitations |
|---|---|---|---|
| Basic desktop printer | About $100–$1,000 | Hobby users, simple concept models | Limited repeatability, small build size, weaker workflow control |
| Advanced desktop / entry professional printer | About $1,000–$5,000 | Small studios, early prototyping, education | May require more manual tuning and limited production support |
| Professional resin 3D printer | About $3,000–$15,000+ | Dental labs, model shops, product teams, R&D users | Requires resin selection, washing, UV curing and process control |
| Dental resin 3D printing workflow | Several thousand dollars to much higher depending on package | Dental clinics, dental labs, orthodontic workflows | Must confirm resin indication, post-curing process and local regulations |
| Industrial resin 3D printer | Often $10,000+ and may reach much higher | Factories, engineering teams, batch prototyping, production users | Requires application evaluation, trained operators and workflow planning |
| Large-format or specialized industrial system | Tens of thousands to six figures or more | Production centers, advanced manufacturing, special materials | Higher facility, maintenance, software and validation requirements |
Market price references should be used only as a starting point. Additive manufacturing cost effectiveness depends heavily on use case, utilization rate, production method, material, labor, and the avoided cost of tooling or outsourcing. NIST’s cost research emphasizes that additive manufacturing can be economically attractive in specific cases, but cost effectiveness depends on the production scenario rather than the machine alone.
What Determines the Cost of a Professional Resin 3D Printer?
1. Build Volume
Build volume affects both equipment cost and production efficiency. A larger printer can process bigger parts or more small parts in one build. For factories and dental labs, build volume can directly influence daily output.
A dental lab printing multiple models at once may need a different machine size than a product development team printing one large prototype. A factory making shoe molds, industrial samples, fixtures, or presentation models may need a larger resin platform to reduce splitting, assembly, and finishing time.
However, larger is not always better. A printer that is too large for the real workload may increase resin handling, cleaning time, space requirements, and idle capacity. The right build size should match typical part dimensions and weekly output.
2. Accuracy and Repeatability
A professional resin 3D printer is often purchased because the user needs fine details, smooth surfaces, and stable dimensions. These requirements are especially important for dental models, industrial prototypes, jewelry casting patterns, miniatures, precision models, and product appearance samples.
Accuracy is affected by printer mechanics, exposure control, resin behavior, support strategy, temperature stability, post-curing, and operator workflow. It should not be judged only by the advertised pixel size or layer height.
For dental users considering Yidimu dental 3D printers, the workflow should be evaluated together with scanning, CAD design, slicing, resin selection, washing, UV curing, and final inspection. Customers should confirm resin indication, post-curing process and local regulatory requirements before clinical or intraoral use.
3. Resin Compatibility
Resin cost is not only the price per bottle. Different resins are formulated for different requirements, such as model detail, toughness, flexibility, casting, water-washable use, dental model production, surgical guide workflow, or temporary dental applications.
A printer that can support the correct resin for the job may reduce reprints and improve part consistency. A cheaper printer that cannot process the required resin reliably may increase total cost.
For example, a product development team may compare standard model resin, ABS-like resin, and flexible resin. A dental lab may compare model resin, water-washable dental model resin, or application-specific dental materials. A factory may need stronger resin for functional checks or flexible resin for soft-touch components.
Yidimu provides different material options, including ABS-like resin and water-washable dental model resin, depending on application and workflow requirements.
4. Post-Processing Equipment
For resin 3D printing, the printer is only one part of the workflow. Printed parts usually require washing, support removal, drying, and UV post-curing. For professional use, post-processing needs to be controlled because it can affect surface finish, dimensional stability, mechanical performance, and material suitability.
A complete professional setup may include:
- Resin printer
- Washing station or cleaning workflow
- UV curing box
- Resin handling tools
- Gloves, goggles and protective equipment
- Filtering tools and waste containers
- Spare trays, release films or build platform accessories
- Ventilation or controlled workspace
- Resin-specific workflow documentation
For buyers evaluating a complete workflow, a UV curing box should be considered part of the investment, not an optional accessory.
5. Technical Support and Training
For factories, dental labs, and production teams, technical support can be more valuable than a small price difference. Support helps with installation, exposure parameters, resin selection, slicing settings, support strategy, maintenance, and troubleshooting.
A low-cost machine without reliable support may create hidden costs: operator downtime, failed builds, inconsistent surfaces, resin waste, delayed customer delivery, and repeated trial-and-error.
Professional purchasing should include questions such as:
- Who will help set up the first workflow?
- Are resin parameters available?
- Can the supplier review sample files?
- Is application guidance available?
- Are spare parts and maintenance guidance accessible?
- Can the supplier recommend washing and curing conditions?
Practical Cost Table: What You Are Really Paying For
| Cost Item | Why It Matters | Typical Buyer Question |
|---|---|---|
| Printer hardware | Determines build size, exposure system, motion stability and daily capacity | Can it print our typical part size and detail level? |
| Resin | Affects strength, flexibility, detail, color, dental suitability and surface finish | Which resin fits our application? |
| Washing workflow | Removes uncured resin and affects surface quality | Do we need alcohol-based or water-washable workflow? |
| UV curing box | Supports final polymerization and material performance | What curing time and wavelength are recommended? |
| Consumables | Includes gloves, filters, cleaning liquid, release film and trays | What recurring cost should we expect each month? |
| Labor | File preparation, support removal, cleaning and inspection | How many operator hours per batch? |
| Maintenance | Keeps print quality stable | Which parts need regular inspection or replacement? |
| Training | Reduces failed prints and workflow errors | Can the supplier help train our team? |
| Facility setup | Safety, storage, ventilation and workspace control | Is our current workspace suitable for resin printing? |
| Failed prints | One of the biggest hidden costs | How do we reduce failure rate through process control? |
NIOSH notes that additive manufacturing hazards vary by technology, material and environment, and vat photopolymerization may involve liquid resin, solvents, VOCs, dermal exposure and UV-related considerations.
How to Calculate the Real Cost Per Printed Part
For professional users, the most useful number is often not machine price. It is cost per usable part.
A simple cost formula is:
Cost per usable part = printer depreciation + resin used + support waste + cleaning materials + curing cost + labor + maintenance + failed print allowance
This formula is more practical than comparing printer prices alone.
Example Cost Factors
If a dental lab prints 20 models in one batch, cost per model depends on resin volume, support structure, washing time, curing time, labor, and whether the parts pass inspection.
If a factory prints one large industrial prototype, cost depends on resin consumption, support material, print time, surface finishing, dimensional inspection, and whether the part replaces CNC machining, mold making, or outsourcing.
If a model-making company prints high-detail display models, cost depends heavily on surface quality, finishing time, painting preparation, and the number of failed or damaged parts during support removal.
The key point: a printer with a higher purchase price may produce lower cost per usable part if it improves output stability, batch capacity and workflow efficiency.
Step-by-Step Workflow for Choosing a Professional 3D Printer
Step 1: Define the Application
Start with the part, not the machine. Identify whether you need dental models, industrial samples, flexible parts, appearance models, casting patterns, functional prototypes, research parts, or small-batch production.
For flexible parts, a dedicated workflow may be needed. Yidimu’s flexible resin 3D printers can support applications where elasticity, soft-touch behavior, or deformation testing may be required, depending on resin and part design.
Step 2: Confirm Part Size
Measure the largest part you expect to print. Also check whether you need to print one large part or many smaller parts in one batch.
A large build volume can reduce production cycles, but only if your workload uses that space effectively.
Step 3: Confirm Detail and Tolerance Requirements
Do not choose a printer only by layer height. Ask what surface quality, edge detail, fit, and repeatability you need in real production.
For dental and engineering applications, inspect sample prints before purchase whenever possible.
Step 4: Match the Resin
Choose the resin based on application, not only price. Model resin, ABS-like resin, casting resin, flexible resin and dental-related resin may require different exposure, washing and curing conditions.
Step 5: Plan Washing and Curing
Resin parts are not finished when printing ends. Washing and UV curing are part of the production process.
Poor post-processing can make a good printer look unreliable. Good post-processing can improve consistency, surface quality and part usability.
Step 6: Estimate Monthly Usage
Estimate how many parts or batches you expect per week. A clinic printing occasionally has different needs from a dental lab printing daily. A factory doing one-off prototypes has different needs from a model shop producing repeated batches.
Step 7: Ask for Sample Printing
Before purchasing, send representative files to the supplier. Ask for sample prints using the resin and workflow close to your real application.
Step 8: Evaluate Support
Confirm whether the supplier can help with installation, training, resin selection, slicing parameters, curing recommendations and troubleshooting.
Step 9: Compare Total Ownership Cost
Compare the complete workflow, not just the printer price. Include resin, post-processing, labor, maintenance, consumables and downtime.
Step 10: Choose the Machine That Reduces Risk
For professional users, the best 3D printer is not always the cheapest. It is the one that can produce stable, usable parts under your real workload.
Professional Buyer Checklist
Use this checklist before requesting a quotation:
- What is the main application?
- What is the largest part size?
- How many parts do you need per day or per week?
- Do you need high detail, smooth surface, mechanical strength, flexibility, or dental model accuracy?
- Which resin type is required?
- Is the part for visual review, fitting test, casting, dental model, guide workflow, or production support?
- Do you already have CAD files or scanning data?
- What software is used in your workflow?
- Do you need a UV curing box?
- Who will operate the machine?
- Do you need installation and training?
- What is your expected post-processing process?
- Are there safety, ventilation or waste handling requirements?
- For dental use, have you confirmed resin indication, post-curing process and local regulatory requirements?
- Do you want sample printing before purchase?
How Much Does the 3D Printer Cost for Dental Labs and Clinics?
For dental labs and clinics, the cost of a 3D printer depends on application and workflow. A basic setup for model printing may cost less than a larger, higher-throughput workflow for labs that print many cases every day. The total investment may also include dental model resin, washing equipment, UV curing, CAD/CAM workflow, operator training and quality checks.
Dental users should be especially careful with material claims. A resin suitable for dental models is not automatically suitable for intraoral use. A printer that can produce accurate models may not be enough for every clinical application.
The FDA’s additive manufactured medical device guidance discusses technical considerations for design, manufacturing and testing of additively manufactured medical devices. Dental buyers should treat printer selection, resin indication, post-processing and regulatory requirements as connected parts of the workflow, not separate decisions.
Customers should confirm resin indication, post-curing process and local regulatory requirements before clinical or intraoral use.
How Much Does the 3D Printer Cost for Factories?
For factories, the cost depends on whether the printer is used for prototype review, mold development, assembly testing, fixture development, small-batch parts, or production support.
A factory may pay more for a larger resin printer if it reduces outsourcing, shortens product development cycles, or allows engineers to test more designs before opening a mold. In this case, the economic value is not only the printed part itself. It may come from faster decision-making, fewer mold revisions, reduced waiting time and better communication between design and production teams.
A factory should compare the printer cost against:
- Outsourced prototype cost
- Mold revision cost
- Project delay cost
- Engineering iteration time
- Part failure cost
- Labor required for finishing and inspection
- Print success under real workload
For industrial users evaluating larger resin systems, the Eternal M2 industrial resin 3D printer may be considered for professional applications where build size, workflow stability and resin matching are important.
How Much Does the 3D Printer Cost for Flexible Resin Parts?
Flexible resin printing may require more careful evaluation than standard model printing. Flexible parts can be harder to support, clean and cure. Material behavior depends on resin formulation, wall thickness, geometry, exposure settings and post-curing.
The printer cost is only one part of the decision. Buyers should also evaluate whether the workflow can support flexible resin consistently.
Typical flexible resin applications may include:
- Soft-touch prototypes
- Wearable product samples
- Footwear development
- Elastic product testing
- Sealing or cushioning concept parts
- Model-making applications requiring deformation
For these applications, the Flex G2 flexible resin 3D printer can be reviewed as part of a complete flexible resin workflow.
Common Mistakes to Avoid
Mistake 1: Choosing Only by Lowest Price
A cheaper printer may cost more if it produces failed parts, unstable details, weak surfaces or frequent downtime. For professional use, a stable workflow is usually more important than the lowest entry price.
Mistake 2: Ignoring Post-Processing
Resin printing requires washing and UV curing. If you do not budget for post-processing equipment, the printed parts may not reach the expected quality.
PAMA’s resin handling guidance recommends consulting supplier Safety Data Sheets, using appropriate PPE such as chemical-resistant gloves and eye protection, and handling uncured resin and waste carefully.
Mistake 3: Comparing Printers Without Real Sample Files
A beautiful demo part may not represent your actual work. Always test parts similar to your real geometry, thickness, detail, support requirements and resin type.
Mistake 4: Confusing Resolution With Accuracy
Resolution is only one technical parameter. Accuracy also depends on machine stability, resin shrinkage, exposure settings, temperature, supports, cleaning and curing.
Mistake 5: Forgetting Consumables
Resin, gloves, filters, cleaning liquid, release films, resin trays, build plates and maintenance parts all affect ownership cost.
Mistake 6: Using the Wrong Resin for the Application
A resin should match the functional requirement. A model resin, flexible resin, casting resin or dental-related resin may not be interchangeable.
Mistake 7: Assuming Dental Prints Are Automatically Clinical Devices
Dental printing requires careful material and workflow control. Customers should confirm resin indication, post-curing process and local regulatory requirements before clinical or intraoral use.
Mistake 8: Ignoring Operator Training
A professional resin printer still needs trained operators. File orientation, support design, cleaning, curing and inspection can strongly affect final quality.
Conclusion
So, how much does the 3D printer cost? For simple desktop use, the cost may start from a few hundred dollars. For professional resin 3D printing, the investment is usually higher because the buyer is paying for build size, accuracy, resin compatibility, post-processing workflow, stability, technical support and lower production risk. For industrial, dental and model-making users, the better question is: what complete 3D printing workflow can produce usable parts at the required quality, speed and cost per part?
Yidimu works with factories, dental clinics, dental labs, model-making companies, product development teams and professional production users that need more than a basic printer. To get a practical recommendation, share your model size, resin requirement, application, expected workflow and daily or weekly output with Yidimu. Our team can help evaluate a suitable printer, resin, UV curing setup and sample printing workflow.
For equipment selection, resin matching or sample printing, contact the Yidimu team through Yidimu technical support and consultation.
FAQ
How much does a professional resin 3D printer cost?
A professional resin 3D printer may cost from several thousand dollars to much higher depending on build size, exposure system, accuracy requirements, resin compatibility, post-processing equipment and support. Industrial resin systems usually cost more than basic desktop machines because they are built for more stable professional workflows.
Is a cheap 3D printer enough for a factory?
Usually not for serious factory workflow. A low-cost printer may be useful for simple concept models, but factories often need larger build volume, stable repeatability, better resin compatibility, stronger support and controlled post-processing.
What is the hidden cost of resin 3D printing?
The hidden cost includes resin waste, failed prints, cleaning materials, gloves, filters, release films, resin trays, UV curing, washing equipment, maintenance, operator time and troubleshooting.
Does resin cost matter more than printer cost?
Both matter. Printer cost is a one-time investment, while resin and consumables are recurring costs. For high-volume users, resin selection, print success rate and workflow efficiency can have a major impact on long-term cost.
How much does a dental 3D printer workflow cost?
A dental 3D printer workflow can range from a basic model-printing setup to a higher-throughput lab workflow. The total cost may include printer, resin, washing, UV curing, CAD/CAM workflow, training and quality checks. Customers should confirm resin indication, post-curing process and local regulatory requirements before clinical or intraoral use.
Do I need a UV curing box for resin 3D printing?
In most professional resin workflows, yes. UV post-curing is usually needed to complete the material process after printing and washing. The curing process should follow resin supplier recommendations and application requirements.
Why do industrial 3D printers cost more?
Industrial 3D printers cost more because they may offer larger build volume, more stable mechanics, better workflow control, higher throughput, material compatibility, technical support and production-oriented design.
How can I reduce 3D printing cost per part?
You can reduce cost per part by choosing the right build size, optimizing part orientation, reducing support waste, improving print success rate, using suitable resin, batching parts efficiently, training operators and controlling washing and curing steps.
Should I buy a printer or outsource 3D printing first?
If your team is unsure about application, resin or workflow, sample printing is a practical first step. If you print frequently, need fast iteration, or want more control over production timing, buying an in-house professional printer may be more efficient.
What information should I provide before asking for a quote?
Provide part size, STL or CAD files if available, application, required resin properties, expected quantity, surface finish requirement, accuracy requirement, post-processing expectations and whether the part is for dental, industrial, flexible, model-making or research use.