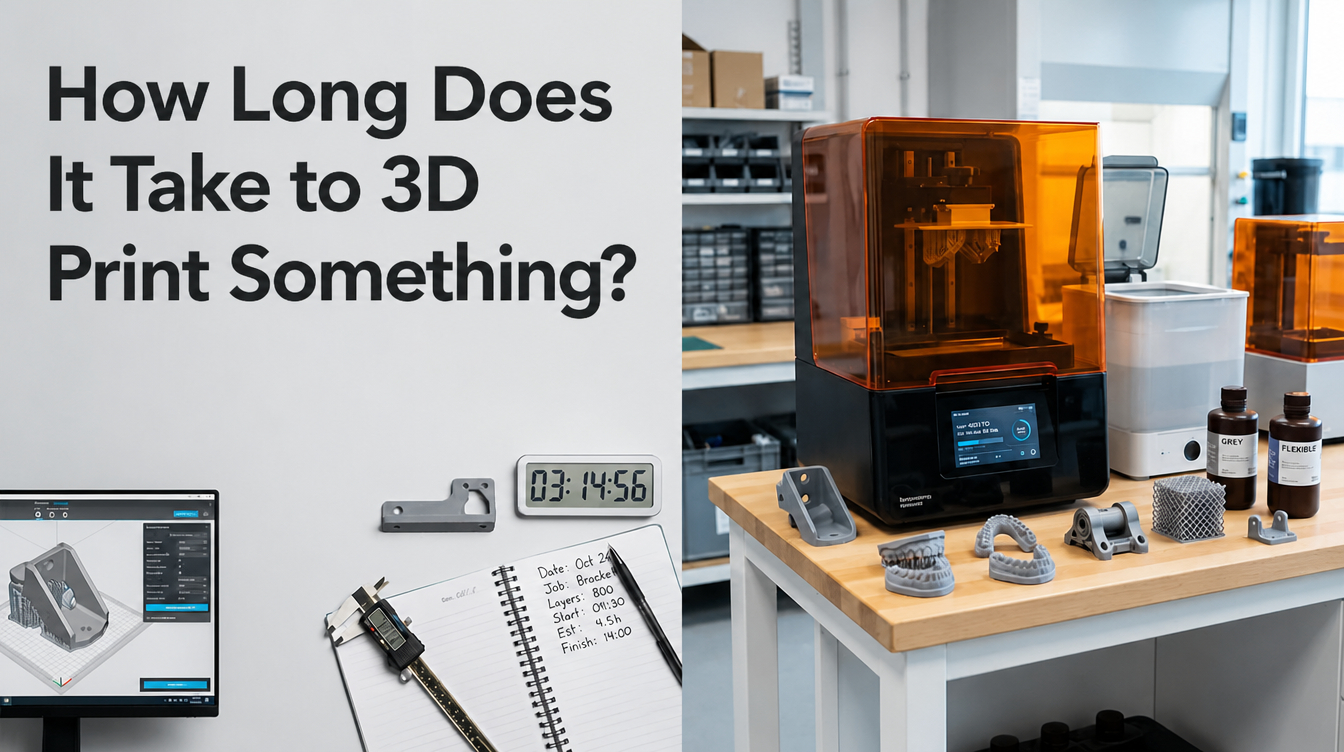
A 3D print can take anywhere from less than one hour to more than a full day, depending on the printing technology, model height, layer thickness, resin or material, support design, part quantity and post-processing workflow. In professional resin 3D printing, the actual machine print time is only one part of the schedule. You also need to consider file preparation, orientation, support generation, resin setup, cleaning, drying, UV post-curing, support removal and inspection. For factories and dental labs, the better question is not only “how long does it take to 3D print something?” but “how long does the full usable-part workflow take?”
Introduction
3D printing is often described as a fast way to move from a digital CAD model to a physical part. ISO/ASTM defines additive manufacturing as a process that builds three-dimensional geometries by the successive addition of material, and NIOSH notes that 3D printing can turn CAD models into physical parts within a few hours for concept models, functional prototypes and small production runs, depending on the case.
However, print time is not a fixed number. A small dental model, a large industrial prototype, a flexible lattice sample and a highly detailed engineering part may all require different schedules, even on the same printer. For professional users, the print time estimate should include both machine time and workflow time.
If your team is comparing industrial resin 3D printer options, evaluating dental 3D printers for labs and clinics, or planning a sample-making workflow, the following guide explains the main timing factors clearly.
Why 3D Printing Time Varies So Much
The time required to 3D print something depends on several connected variables:
| Factor | How It Affects Print Time | Why It Matters |
|---|---|---|
| Model height | Taller parts usually require more layers | In resin printing, Z-height often matters more than part width |
| Layer thickness | Thinner layers increase layer count | Better detail may require longer print time |
| Part orientation | Angled parts may reduce suction or improve accuracy but increase Z-height | Orientation affects both print success and timing |
| Support structure | More supports require more preparation and removal | Support design affects print reliability and post-processing |
| Resin type | Different resins may require different exposure and curing conditions | Engineering, dental and flexible resins may behave differently |
| Number of parts | Multiple parts can often be printed in one job if they fit the build area | Batch planning can improve total output efficiency |
| Post-processing | Cleaning, drying, UV curing and inspection add time | A printed part is not always ready when the machine stops |
| Accuracy requirement | Higher precision may require more conservative settings | Dental, fitting and engineering parts need controlled workflows |
For resin printing, the key point is this: a wider build plate may allow more parts in one print job, but the total machine time is strongly affected by the number of layers. A full plate of short parts may finish faster than one tall part.
Typical Time Ranges for Professional Resin 3D Printing
The following estimates are general planning ranges, not guaranteed times. Actual results depend on printer model, resin, layer height, part geometry, exposure settings, support strategy and post-processing requirements.
| Application | Typical Machine Print Time | Additional Workflow Time | Notes |
|---|---|---|---|
| Small test part | 30 minutes–2 hours | 20–60 minutes | Good for checking fit, resin behavior or design direction |
| Dental model | 1–4 hours | 30–90 minutes | Depends on model height, batch size and post-curing process |
| Surgical guide model or dental workflow part | 1.5–5 hours | 45–120 minutes | Customers should confirm resin indication, post-curing process and local regulatory requirements before clinical or intraoral use |
| Engineering prototype | 2–8 hours | 45–180 minutes | Supports, cleaning and dimensional inspection may add time |
| Large resin model | 6–20+ hours | 1–4 hours | Height, wall thickness and support design become critical |
| Flexible resin lattice or shoe-related sample | 3–12+ hours | 1–3 hours | Flexible materials may require careful support removal and curing control |
| Small-batch production tray | 3–12+ hours | 1–4+ hours | Batch layout and inspection process matter as much as print speed |
If you are unsure whether your part is suitable for resin printing, Yidimu’s sample printing service can be useful before equipment selection or production planning.
Machine Print Time vs. Total Finished-Part Time
Many users only look at the slicer estimate. That is useful, but it is not the full schedule.
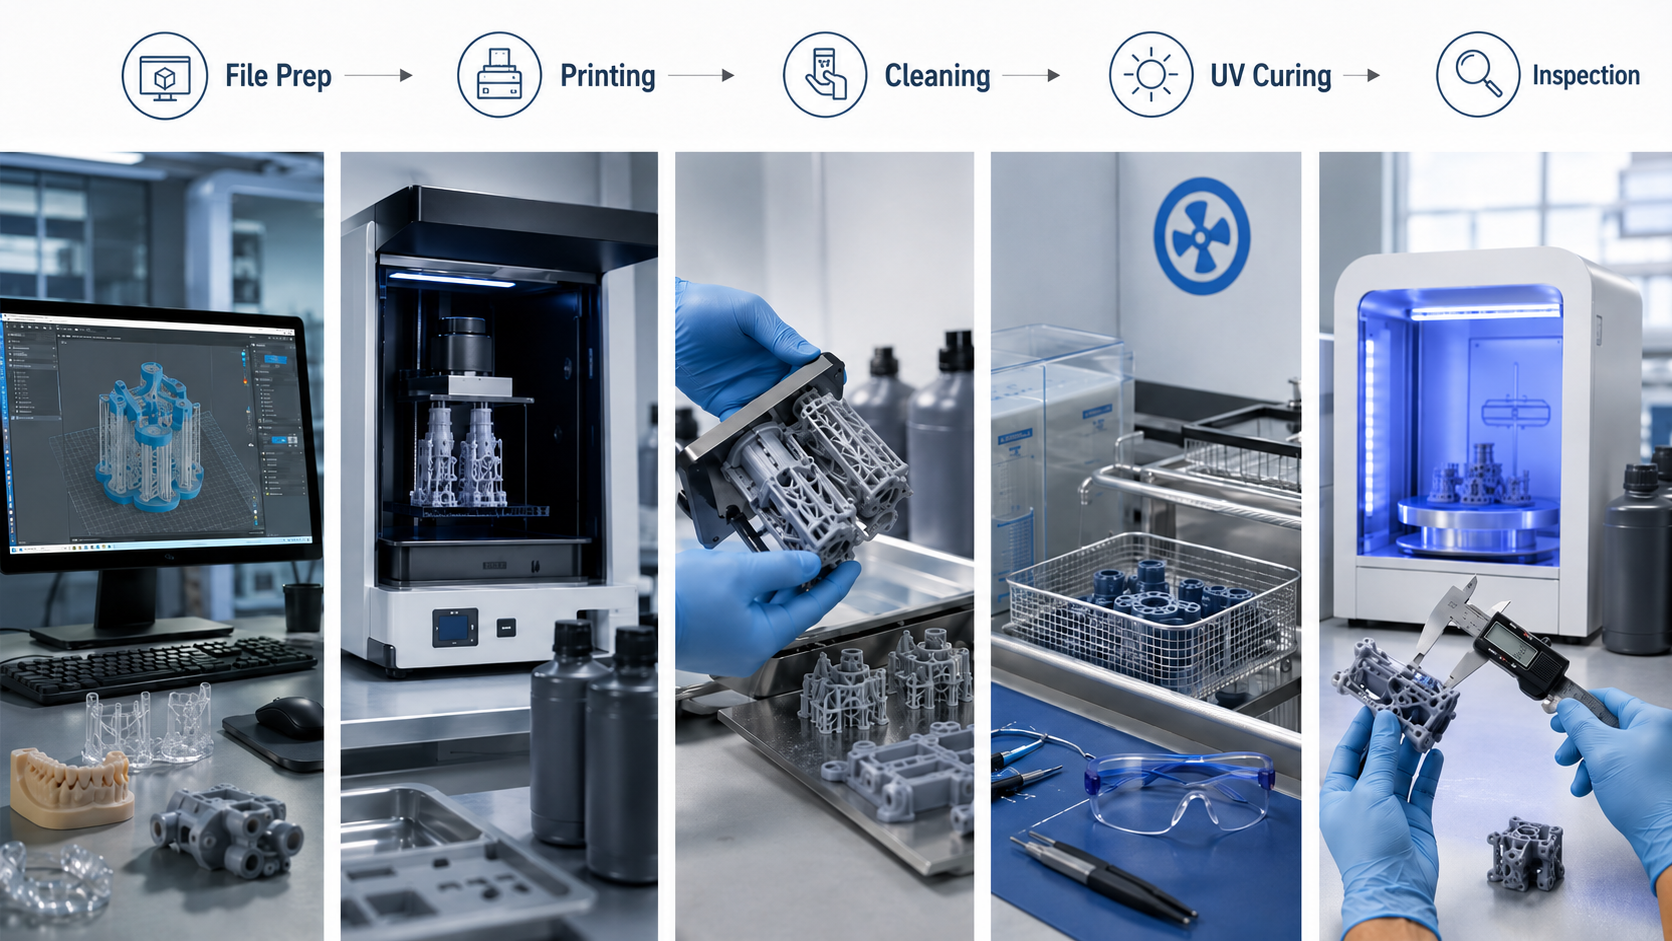
A professional resin printing workflow normally includes:
- File check and repair
- Orientation and support setup
- Slicing and parameter confirmation
- Printer and resin preparation
- Machine printing
- Part removal from platform
- Cleaning excess resin
- Drying
- UV post-curing
- Support removal
- Surface finishing if required
- Dimensional inspection or application testing
NIOSH describes vat photopolymerization as a process where liquid photopolymer resin is cured by UV or laser light layer by layer; after printing, parts commonly require cleaning to remove excess resin and UV post-curing to improve stability.
For professional teams, total turnaround time should include all these steps. A job that prints in 3 hours may still require 4–6 hours before it is inspected, packed or used.
Main Factors That Decide How Long a Resin 3D Print Takes
1. Model Height in the Z Direction
In many resin printing workflows, the number of layers is determined by the height of the part in the Z direction. A part that is 20 mm tall may finish much faster than a part that is 120 mm tall, even if both parts occupy similar space on the build plate.
This is why orientation matters. Tilting a part can improve support contact, reduce suction force or improve surface quality, but it may also increase Z-height and print time.
Professional advice: do not orient only for speed. Balance print time with accuracy, surface finish, support marks and failure risk.
2. Layer Thickness
Layer thickness is one of the most direct time controls.
A 50-micron layer setting usually creates twice as many layers as a 100-micron setting for the same Z-height. Thinner layers can improve surface detail and reduce visible layer stepping, but they also increase print time.
For dental models, engineering parts and high-detail prototypes, the right layer thickness depends on the required accuracy, surface quality and resin behavior. Faster is not always better if the part must fit, assemble or pass inspection.
3. Resin Type and Exposure Settings
Different resins may require different exposure times, lift speeds, settling times and post-curing conditions. A standard model resin, engineering resin, castable resin, water-washable dental model resin and flexible resin should not be assumed to use the same settings.
For example, a flexible resin may need more conservative support and removal handling. A dental workflow resin may require a validated post-curing process. A tough engineering resin may require workflow checks before being used for functional testing.
Yidimu users can review Yidimu resin materials when matching a resin to model function, surface requirement, flexibility, strength or dental application.
4. Support Design
Supports affect both print success and total workflow time.
Too few supports can cause failed prints, deformation or weak contact points. Too many supports can increase resin use, cleaning effort, support marks and removal time.
In production, one failed 6-hour print wastes more time than adding 10–15 minutes to support planning. Professional users should prioritize stable support strategy over aggressive speed settings.
5. Number of Parts in One Job
One advantage of resin 3D printing is batch printing. If several parts fit on the build platform and share similar height, they can often be printed together without multiplying machine time by the number of parts.
For example, printing one dental model may take 2 hours. Printing several dental models of similar height on the same platform may still take roughly the same machine time, although cleaning, sorting and inspection will take longer.
This is important for labs, factories and model-making companies. The productivity question is often not “How fast can one part print?” but “How many usable parts can be produced per day with a stable workflow?”
6. Post-Processing Requirements
Post-processing may include washing, drying, UV curing, support removal, sanding, polishing, painting, assembly or inspection.
NIOSH notes that post-printing and post-processing activities can involve chemical or manual work, and recommends risk management planning for pre-printing, printing, post-printing, post-processing, maintenance and cleaning.
For resin printing, the machine stopping is not the end of the job. A part must be properly cleaned and cured before many functional, dental or production evaluations.
Yidimu also provides UV curing equipment for resin prints for users who need a controlled post-curing workflow.
Example: How to Estimate Resin 3D Printing Time Before Printing
Use this simple workflow before quoting a job or scheduling production.
Step-by-Step Time Estimate Checklist
- Measure the final Z-height after orientation
Do not estimate only from the original CAD model height. - Choose the layer thickness
Decide whether the job needs speed, surface quality, detail or dimensional reliability. - Check resin requirements
Confirm exposure, cleaning, drying and UV curing requirements for the resin. - Estimate support and setup time
Include orientation, support editing, slicing and file review. - Check batch layout
See whether multiple parts can be printed together without increasing Z-height too much. - Add post-processing time
Include washing, drying, UV curing, support removal and inspection. - Add safety margin
For professional work, add buffer time for reprint risk, QC checks and customer review. - Record the actual result
Build a timing database for future quotes and internal planning.
This method is more reliable than quoting from a generic online estimate.
How Long Does It Take to 3D Print Something for Dental Use?
Dental resin printing time depends on the object type, resin, model height, tray layout and post-curing workflow. A dental model may take a few hours from slicing to post-curing, while a full tray of models may be more efficient than printing them one by one.
Dental labs and clinics should not judge the workflow only by machine speed. They should also evaluate repeatability, resin compatibility, cleaning, curing, accuracy control and operator training.
Customers should confirm resin indication, post-curing process and local regulatory requirements before clinical or intraoral use.
For dental workflow planning, see Yidimu’s dental 3D printing workflow and dental printer category pages.
How Long Does It Take to 3D Print Industrial Prototypes?
Industrial resin prototypes can take a few hours to more than a day, depending on part size, wall thickness, height, support design and finishing requirements.
A small enclosure part, fixture component or appearance model may be printed in a few hours. A large prototype, transparent functional sample, complex assembly part or flexible structure may need longer printing and more careful post-processing.
Factories should also consider:
- whether the part is only for appearance review or functional testing;
- whether the part needs screw fitting, assembly or dimensional inspection;
- whether the resin must simulate flexibility, toughness or heat resistance;
- whether the part is for one-time validation or repeated small-batch use.
For production planning, Yidimu’s industrial 3D printing solutions can help teams evaluate printer size, resin selection and workflow design.
How to Reduce 3D Printing Time Without Sacrificing Quality
You can reduce total 3D printing time by improving workflow, not only by increasing machine speed.
Practical options include:
- reduce unnecessary Z-height through smarter orientation;
- use a suitable layer thickness instead of always choosing the finest setting;
- batch parts with similar heights on the same platform;
- avoid excessive supports while maintaining print stability;
- choose resin settings based on tested parameters;
- standardize cleaning and UV curing steps;
- use templates for repeated dental or industrial jobs;
- maintain the printer, vat, platform and optical path properly;
- record print results and build an internal parameter library.
In professional environments, workflow repeatability often matters more than maximum advertised speed.
Common Mistakes to Avoid
Mistake 1: Only Looking at the Slicer Time
The slicer estimate usually focuses on machine print time. It may not include preparation, cleaning, curing, support removal, inspection or possible reprint time.
Mistake 2: Choosing the Thinnest Layer for Every Job
Very fine layers may improve detail, but they can also increase print time. For many industrial prototypes or dental models, the best setting is a balance between accuracy, surface quality and efficiency.
Mistake 3: Printing Too Many Different Heights Together
A tray with one very tall part and several short parts may force the entire job to run based on the tallest part. Grouping parts by height can improve throughput.
Mistake 4: Ignoring Resin-Specific Workflow
Different resins may need different exposure, cleaning and UV curing conditions. Do not assume one setting works for every material.
Mistake 5: Removing Supports Too Quickly
Rushing support removal can damage fine features, flexible structures or dental model edges. This may save minutes but cause a failed part.
Mistake 6: Not Planning Safety and Ventilation
Resin printing involves liquid resin, cleaning agents and UV curing. NIOSH recommends risk management planning, appropriate controls and PPE for 3D printing activities, including resin, solvent and post-processing work.
Mistake 7: Buying a Printer Based Only on Speed
A fast printer is useful only if it also matches the required build size, resin system, accuracy needs, support workflow, post-processing process and service support.
Professional buyers can compare professional resin 3D printer options before selecting a system.
FAQ
How long does it take to 3D print a small object?
A small object may take less than one hour to a few hours, depending on its height, layer thickness, resin settings and support structure. In resin printing, a small but tall part can take longer than a wider but shorter part.
Why does my 3D print take so long?
Your print may take a long time because the model is tall, the layer thickness is very fine, the lift speed is conservative, the resin requires longer exposure, or the support structure increases workflow time. Post-processing also adds time after the machine finishes.
Does resin 3D printing take less time than filament printing?
It depends on the part, machine and workflow. Resin printing can be efficient for detailed parts and batch trays, especially when multiple parts of similar height are printed together. However, resin parts usually require cleaning and UV post-curing, so total workflow time should be considered.
Does increasing print speed reduce quality?
It may. Faster settings can sometimes affect surface finish, dimensional consistency, support reliability or resin curing. Professional users should test speed changes with the actual resin, model geometry and application requirement.
How long does it take to 3D print a dental model?
A dental model may take a few hours including printing and post-processing, depending on the printer, resin, layer thickness, model height and batch layout. Dental users should also confirm resin indication, post-curing process and local regulatory requirements before clinical or intraoral use.
Can multiple resin parts print at the same time?
Yes, if they fit on the build platform and are arranged properly. For resin printing, printing multiple parts of similar height can improve output efficiency because print time is often strongly related to layer count.
How can I estimate print time before buying a resin 3D printer?
Prepare sample files, confirm part dimensions, identify the required resin, define accuracy and surface requirements, then ask the supplier to review model height, layer thickness, build capacity, post-processing and expected batch workflow.
Conclusion
So, how long does it take to 3D print something? The realistic answer is: from less than one hour to more than a day, depending on model height, layer thickness, resin type, support design, part quantity and post-processing requirements. For professional resin 3D printing, the most important number is not only machine print time. It is the total time needed to produce a usable, cleaned, cured and inspected part.
For factories, dental labs, clinics, engineers and product development teams, a reliable workflow should balance speed, accuracy, resin compatibility, post-processing and repeatability.
To get a more accurate estimate, send Yidimu your model size, resin requirement, application, expected workflow and production or sample-making needs. The team can help review whether your project is better suited for dental resin printing, industrial prototyping, flexible resin testing, sample printing or a complete resin 3D printing workflow. You can contact Yidimu for workflow review.