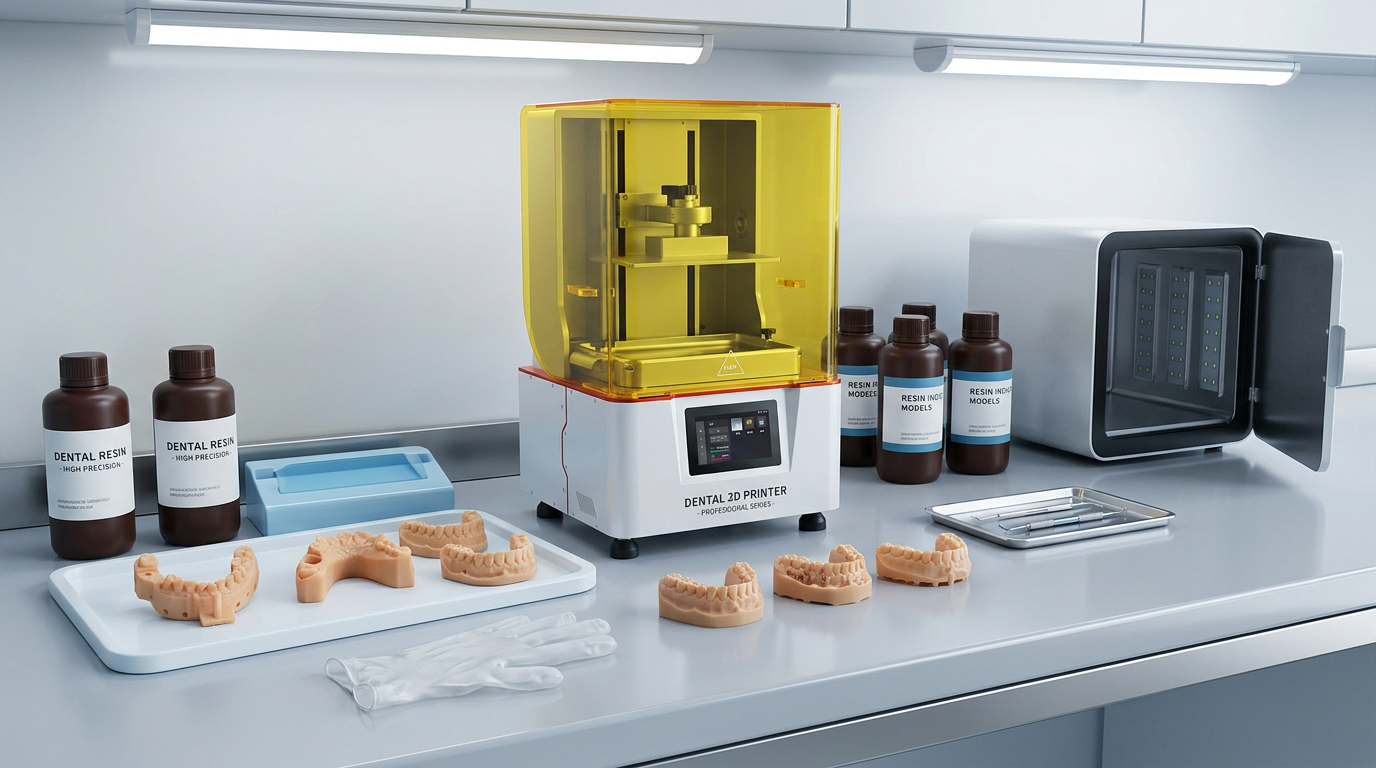
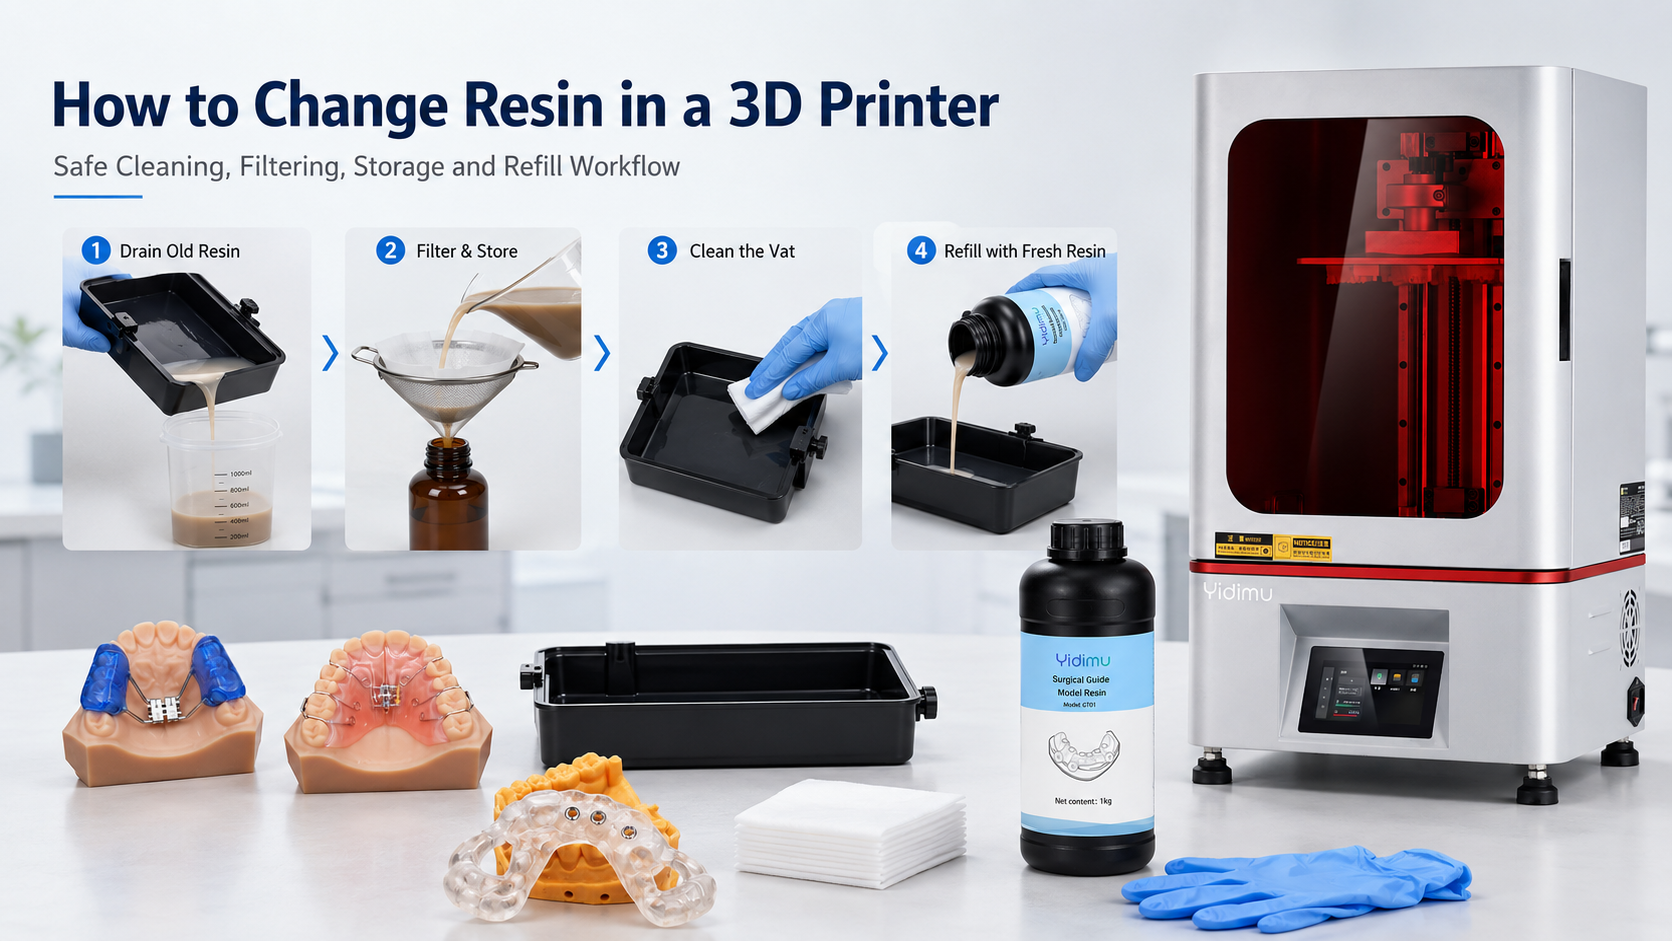
To change resin in a 3D printer, first finish or stop the print, remove the build plate, wear gloves and eye protection, then carefully pour the remaining resin from the vat through a filter into a clean, labeled resin bottle. Inspect the vat film for cured debris, scratches, clouding or punctures. If you are switching resin type, color, dental material or flexible resin, clean the vat and build platform before adding the new resin. After refilling, update the print profile, confirm exposure settings and run a small test print if the resin has changed.
Introduction
Knowing how to change resin in 3D printer systems is important for print reliability, material control and clean production workflow. In professional resin 3D printing, resin is not just “liquid material.” It affects exposure time, surface finish, shrinkage behavior, support strategy, post-curing and final part performance.
For factories, dental labs, clinics and engineering teams, poor resin handling can cause failed prints, color contamination, cured particles in the vat, surface defects, inaccurate parts or unnecessary material waste. A clean resin change process helps keep the printing workflow more stable, especially when switching between dental model resin, surgical guide resin, ABS-like resin, flexible resin or engineering sample materials.
Operators should always check the resin safety data sheet, printer instructions and internal workshop procedures before handling resin. Safety data sheets are used to communicate handling, storage, hazard and emergency information for chemical products, and GHS-style SDS documents commonly follow a structured 16-section format.
When Should You Change Resin in a 3D Printer?
You may need to change resin when:
- Switching from one resin type to another
- Changing from one color to another
- Moving from standard model printing to dental, flexible or engineering applications
- Resin has been sitting in the vat for too long
- Resin contains cured particles, dust or failed print debris
- A print failure may have left cured fragments on the release film
- You need to validate a new material profile
- You are preparing for a clean production batch
For professional users, resin change should be treated as part of workflow control. It is not only a cleaning task. It is also a material traceability, print quality and production reliability step.
If you are still selecting materials for different applications, you can review Yidimu resin materials before planning your resin workflow.
Tools and Materials You Need Before Changing Resin
Prepare the workspace before opening the printer cover or removing the resin vat.
| Tool or Material | Purpose | Professional Workflow Note |
|---|---|---|
| Nitrile gloves | Protect hands from uncured resin | Change gloves if contaminated |
| Safety glasses or goggles | Reduce splash risk | Especially important when pouring resin |
| Clean resin bottle | Store filtered reusable resin | Use a labeled, light-blocking container |
| Resin filter or fine mesh filter | Remove cured particles and debris | Important after failed prints |
| Funnel | Helps pour resin cleanly | Use a resin-safe funnel |
| Plastic scraper or silicone spatula | Help guide resin out of vat | Avoid sharp metal tools on vat film |
| Lint-free wipes | Clean vat edge and work area | Avoid paper fibers entering resin |
| Cleaning liquid recommended for the resin | Remove residue when needed | Follow resin supplier instructions |
| Waste container | Collect contaminated wipes and resin waste | Dispose according to local rules |
| Tray or mat | Protect the workbench | Useful for dental and production labs |
Safe 3D printing guidance generally emphasizes practical controls such as ventilation, training, appropriate PPE and correct material handling, especially when chemicals and post-processing steps are involved.
How to Change Resin in 3D Printer Step by Step
1. Finish the Print and Let Resin Drain
After printing, allow excess resin to drip from the build platform back into the vat. This reduces waste and makes the next steps cleaner.
If the print failed, do not immediately pour the resin back into the bottle. First, assume there may be cured debris in the vat.
2. Wear Gloves and Eye Protection
Before touching the vat, build platform, resin bottle or printed parts, put on nitrile gloves and eye protection. Uncured photopolymer resin should not contact skin or eyes. Work in a clean, ventilated area and avoid eating or drinking near the resin handling station.
If your team uses resin daily, create a fixed resin handling station with gloves, filters, wipes, waste containers and labels nearby.
3. Remove the Build Plate
Take the build plate out first. Keep it over the vat for a short time so excess resin can drip down. Then move the build plate to the post-processing area.
Do not place a resin-covered build plate directly on a clean workbench. Use a tray or dedicated resin mat.
For users working with dental models or clinical workflows, Yidimu provides dental 3D printer options for labs and clinics and workflow support for professional dental printing environments.
4. Remove the Resin Vat Carefully
Loosen the vat according to the printer’s normal operating process. Hold the vat level and avoid tilting it too quickly.
Before pouring, inspect the resin surface. Look for:
- Floating cured particles
- Dust
- Broken support fragments
- Color streaks
- Unusual thickening
- Sediment at the bottom
- Resin separation
Some resins may need mixing before printing, but if resin contains cured debris, filtering is required.
5. Pour the Resin Through a Filter
Place a funnel and resin filter on a clean, labeled bottle. Slowly pour the resin from the vat into the bottle.
Filtering is especially important when:
- A print failed
- The resin has been exposed in the vat for a long time
- You see cured particles
- You are preparing a production batch
- The resin will be reused later
Do not pour contaminated resin directly back into the original bottle unless it has been filtered and the bottle is clearly marked. In professional workflows, some teams keep a separate “filtered used resin” bottle to avoid mixing uncertain material with fresh resin.
6. Inspect the Vat Film
After emptying the vat, inspect the release film carefully. Do not press hard with sharp tools.
Check for:
- Small cured resin spots
- Scratches
- Cloudy areas
- Punctures
- Wrinkles
- Loss of tension
- Residue near the vat corners
If cured resin is stuck to the film, remove it gently according to the printer and vat instructions. A damaged film may cause leaks, failed prints or surface defects.
7. Decide Whether the Vat Needs Cleaning
You do not always need deep cleaning every time. The level of cleaning depends on the resin change situation.
| Resin Change Situation | Is Full Vat Cleaning Needed? | Recommended Action |
| Same resin, same color, clean vat | Usually no | Filter if needed, refill and continue |
| Same resin, different color | Yes, often recommended | Clean vat to avoid color contamination |
| Different resin type | Yes | Clean vat and platform before switching |
| Dental resin to non-dental resin | Yes | Keep workflow separated and documented |
| Standard resin to flexible resin | Yes | Clean vat and review support/exposure settings |
| Failed print in vat | Yes | Filter resin and inspect film carefully |
| Resin left unused for a long time | Usually yes | Check condition, filter and clean if uncertain |
| Transparent or light-color resin | Yes, if contamination matters | Clean thoroughly to avoid tint and particles |
For professional users, the safest rule is simple: if resin type, color, indication or production batch changes, clean the vat.
8. Clean the Vat When Required
When cleaning the vat, follow the resin supplier’s recommended cleaning method. Avoid harsh scraping and avoid tools that may damage the film.
A practical cleaning workflow:
- Empty resin through a filter.
- Wipe the vat walls gently.
- Remove residue from corners.
- Clean the vat film gently.
- Let the vat dry fully if a cleaning liquid was used.
- Inspect the film under good lighting.
- Confirm there is no lint, dust or cured resin left inside.
Do not refill the vat while cleaning liquid remains inside. Residual liquid can change resin behavior and affect adhesion, surface finish and curing.
9. Clean or Wipe the Build Platform
The build platform can carry residue from the previous resin. If you are changing material type or color, clean the build platform before the next print.
Pay special attention to:
- Platform grooves
- Screw areas
- Edges
- Residue under removable plates
- Old resin near the platform holder
For industrial prototyping and engineering sample production, clean platform handling can reduce batch-to-batch variation. Users planning repeatable sample workflows can also review Yidimu’s industrial 3D printing solutions.
10. Shake or Mix the New Resin Properly
Before adding new resin, mix the resin bottle according to the supplier’s instructions. Some filled or pigmented resins may settle during storage.
After mixing, pour resin slowly into the vat. Do not overfill. Keep the resin level within the recommended range.
If the new resin is thick, flexible, highly filled or temperature-sensitive, make sure the printing environment is suitable. Resin viscosity and temperature may affect flow, recoating and print stability.
11. Update the Print Profile
Changing resin without changing the print settings is a common cause of failure.
Check:
- Layer height
- Bottom exposure
- Normal exposure
- Lift speed
- Retract speed
- Rest time
- Support density
- Orientation
- Post-curing time
- Cleaning process
A dental model resin, ABS-like resin, flexible resin and surgical guide material may require different settings. If the resin is used for dental applications, customers should confirm resin indication, post-curing process and local regulatory requirements before clinical or intraoral use.
For post-processing control, Yidimu also provides UV curing equipment for resin prints to support more consistent curing workflows.
12. Run a Small Test Print When Changing Material
For production users, a test print is often more efficient than risking a full build failure.
Use a small test model to check:
- Platform adhesion
- Surface finish
- Fine details
- Support removal
- Dimensional behavior
- Flexibility or brittleness
- Post-curing result
- Color consistency
When using a new resin for industrial samples, dental models or flexible parts, test printing helps confirm whether the workflow is suitable before batch production.
If you are unsure whether a resin fits your application, Yidimu’s sample printing service can help evaluate model size, resin type and post-processing requirements before equipment or material decisions.
Professional Resin Change Workflow Checklist
Use this checklist before every resin switch:
- Confirm the new resin type and application.
- Check the resin label, batch and expiration or storage condition.
- Read the resin safety and handling instructions.
- Wear gloves and eye protection.
- Prepare filter, funnel, clean bottle and waste container.
- Remove the build platform and let resin drain.
- Pour old resin through a filter.
- Label stored resin clearly.
- Inspect the vat film for debris or damage.
- Clean the vat if changing resin type, color or application.
- Clean the build platform if needed.
- Mix the new resin before pouring.
- Fill the vat to the correct level.
- Select the correct print profile.
- Run a small test print if material settings changed.
- Record resin, settings and result for future production control.
Resin Change Considerations by Application
| Application | Resin Change Priority | Key Concern |
| Dental model printing | High | Clean color, surface detail, workflow repeatability |
| Surgical guide workflow | Very high | Resin indication, post-curing and local requirements |
| Industrial prototypes | Medium to high | Material performance and dimensional behavior |
| Flexible resin parts | High | Viscosity, supports and cleaning difficulty |
| Transparent parts | High | Avoid color contamination and particles |
| Casting models | High | Clean burnout behavior and surface finish |
| Small-batch samples | High | Batch consistency and material traceability |
Professional users should not treat all resins the same. Resin formulation, pigment, filler, flexibility and intended use may all affect how carefully the vat should be cleaned before switching.
For engineering teams evaluating printer options, Yidimu’s industrial resin 3D printer options can be reviewed together with resin workflow requirements.
Common Mistakes to Avoid
Pouring Unfiltered Resin Back Into the Bottle
This is one of the most common mistakes. Small cured particles can cause scratches, failed layers or defects in future prints. Always filter resin if there is any chance of contamination.
Using Sharp Metal Tools on the Vat Film
The release film is sensitive. Scratches, dents or punctures can lead to failed prints or resin leaks. Use gentle tools and avoid unnecessary pressure.
Mixing Different Resin Types Without Validation
Different resins may have different exposure requirements, viscosity, shrinkage and post-curing behavior. Mixing unknown resins may produce unstable results and should not be part of a controlled production workflow.
Forgetting to Change the Print Profile
Even if two resins look similar, they may not print the same way. Always confirm exposure settings and support strategy.
Leaving Resin in the Vat Too Long Without Inspection
Some resins may separate, collect dust or form cured particles after exposure to light. If resin has been left in the vat, inspect and mix or filter it before printing.
Cleaning the Vat but Leaving Residue Behind
Cleaning liquid, lint, dust or old resin residue can affect the next print. Let the vat dry fully and inspect it before refilling.
Ignoring Dental Resin Requirements
Dental workflows require extra care. Customers should confirm resin indication, post-curing process and local regulatory requirements before clinical or intraoral use.
Troubleshooting After Changing Resin
| Problem After Resin Change | Possible Cause | Practical Fix |
| Print does not stick to platform | Wrong exposure settings, dirty platform, resin not mixed | Recheck profile, clean platform, mix resin |
| Layers separate | Resin profile mismatch, temperature issue, weak supports | Adjust exposure, review support strategy |
| Surface has particles | Resin was not filtered, vat had debris | Filter resin and clean vat |
| Color looks contaminated | Previous resin remained in vat | Clean vat more thoroughly |
| Parts feel sticky after curing | Cleaning or curing process not suitable | Review washing and UV curing workflow |
| Flexible resin fails repeatedly | Wrong supports, viscosity or lift settings | Use suitable settings and test smaller parts |
| Transparent resin looks cloudy | Contamination, over-curing, residue or dirty vat film | Clean vat, review curing process |
| Dental model accuracy changes | Resin, exposure, shrinkage or curing changed | Validate workflow and material settings |
Safety Notes for Resin Handling
Uncured resin should be handled carefully. Operators should avoid direct skin contact, splashes, poor ventilation and uncontrolled waste handling. If cleaning solvents are used, follow the solvent SDS and local storage rules. Some cleaning liquids used in resin workflows may be flammable, so they should be kept away from ignition sources and handled according to workplace safety requirements. Isopropyl alcohol, for example, is commonly classified as a flammable liquid.
For professional teams, resin handling should include:
- Material labels
- SDS availability
- PPE rules
- Ventilation plan
- Spill response procedure
- Waste handling procedure
- Separate clean and dirty work zones
- Operator training
- Batch record or workflow notes
This is especially important when the same workspace handles industrial prototypes, dental materials, flexible resins and sample production.
FAQ
How often should I change resin in a 3D printer?
You should change resin when switching material type, color, application or production batch. You should also change or filter resin after a failed print, when debris is visible, or when resin has been left in the vat for too long.
Can I leave resin in the vat overnight?
In many workflows, resin may be left in the vat for a short period if the printer is covered and the environment is controlled. However, before printing again, inspect the resin, mix it gently if needed and check for cured debris or separation. For production work, follow your internal material control procedure.
Do I need to clean the vat every time I change resin?
If you are using the same resin and same color, full cleaning may not always be necessary. If you are changing resin type, color, dental indication, flexible resin or transparent material, cleaning is strongly recommended to reduce contamination risk.
Can I pour resin back into the original bottle?
You can pour reusable resin back only after filtering it and confirming it is not contaminated. For professional workflows, it may be better to store filtered used resin in a separate labeled bottle.
What should I do after a failed resin print?
Remove the build platform, filter the resin, inspect the vat film and remove cured debris carefully. Do not start another print until the vat film is clean and undamaged.
Can different resins be mixed?
Mixing different resins is not recommended unless the material supplier provides a validated process. Unknown mixing can change exposure behavior, mechanical properties, curing and post-processing results.
Why did my print fail after changing resin?
The most common reasons are wrong exposure settings, resin not mixed properly, contaminated vat, dirty build platform, old resin residue, incorrect supports or resin temperature issues.
Is resin changing different for dental 3D printing?
Yes. Dental workflows require stricter material control. Customers should confirm resin indication, post-curing process and local regulatory requirements before clinical or intraoral use.
Should I run a test print after changing resin?
Yes, especially when changing resin type, brand, color, batch or application. A small test print can help confirm exposure, adhesion, surface finish and post-curing behavior before larger production jobs.
Conclusion
Learning how to change resin in 3D printer workflows is essential for clean, stable and professional resin printing. The key steps are simple: protect the operator, filter old resin, inspect the vat, clean when needed, refill with properly mixed resin, update the print profile and validate the result before production.
For factories, dental labs, clinics, model-making companies and R&D teams, resin changing should be part of a controlled workflow, not a casual maintenance step. A clean resin change process can help reduce contamination, avoid preventable failures and improve repeatability across dental, industrial, flexible and sample printing applications.
If you are not sure which resin, printer size or workflow is suitable for your application, you can contact Yidimu with your model size, resin requirement, application, expected workflow and production or sample-making needs. Yidimu can help review professional resin 3D printer options and provide printer selection support based on your actual printing requirements.
References
- NIOSH safe 3D printing guidance on ventilation, PPE, training and hazard control concepts for 3D printing environments.
- GHS / SDS structure and chemical hazard communication information for workplace chemical handling.
- General safe 3D printing hazard control principles, including ventilation, PPE and post-processing chemical considerations.
- Isopropyl alcohol flammability information for cleaning solvent safety awareness.