Stringing in 3D printing is usually caused by unwanted material flow during non-printing movement. In filament printing, it often happens when molten plastic leaks from the nozzle while the print head travels between two areas. Common causes include insufficient retraction, high nozzle temperature, wet filament, slow travel speed, excess nozzle pressure, poor slicer travel paths, and material behavior. In resin 3D printing, “stringing” is not the same nozzle-oozing problem. Similar thin strands or sheets may come from semi-cured resin, low exposure, peel-force instability, support flex, vat contamination, optical issues, or incorrect cleaning and UV curing workflow.
Why Stringing Matters in Professional 3D Printing
For factories, dental labs, clinics, model workshops, and R&D teams, stringing is not only a visual problem. It can affect surface quality, fitting areas, edge definition, cleaning time, inspection time, and downstream finishing. A printed part covered with fine strings or semi-cured strands may require trimming, sanding, washing, post-curing review, or even reprinting.
In professional additive manufacturing, print defects are also process-control signals. Additive manufacturing standards distinguish between different process families, including material extrusion and vat photopolymerization, which means the same visible defect may have different causes depending on the printing technology.
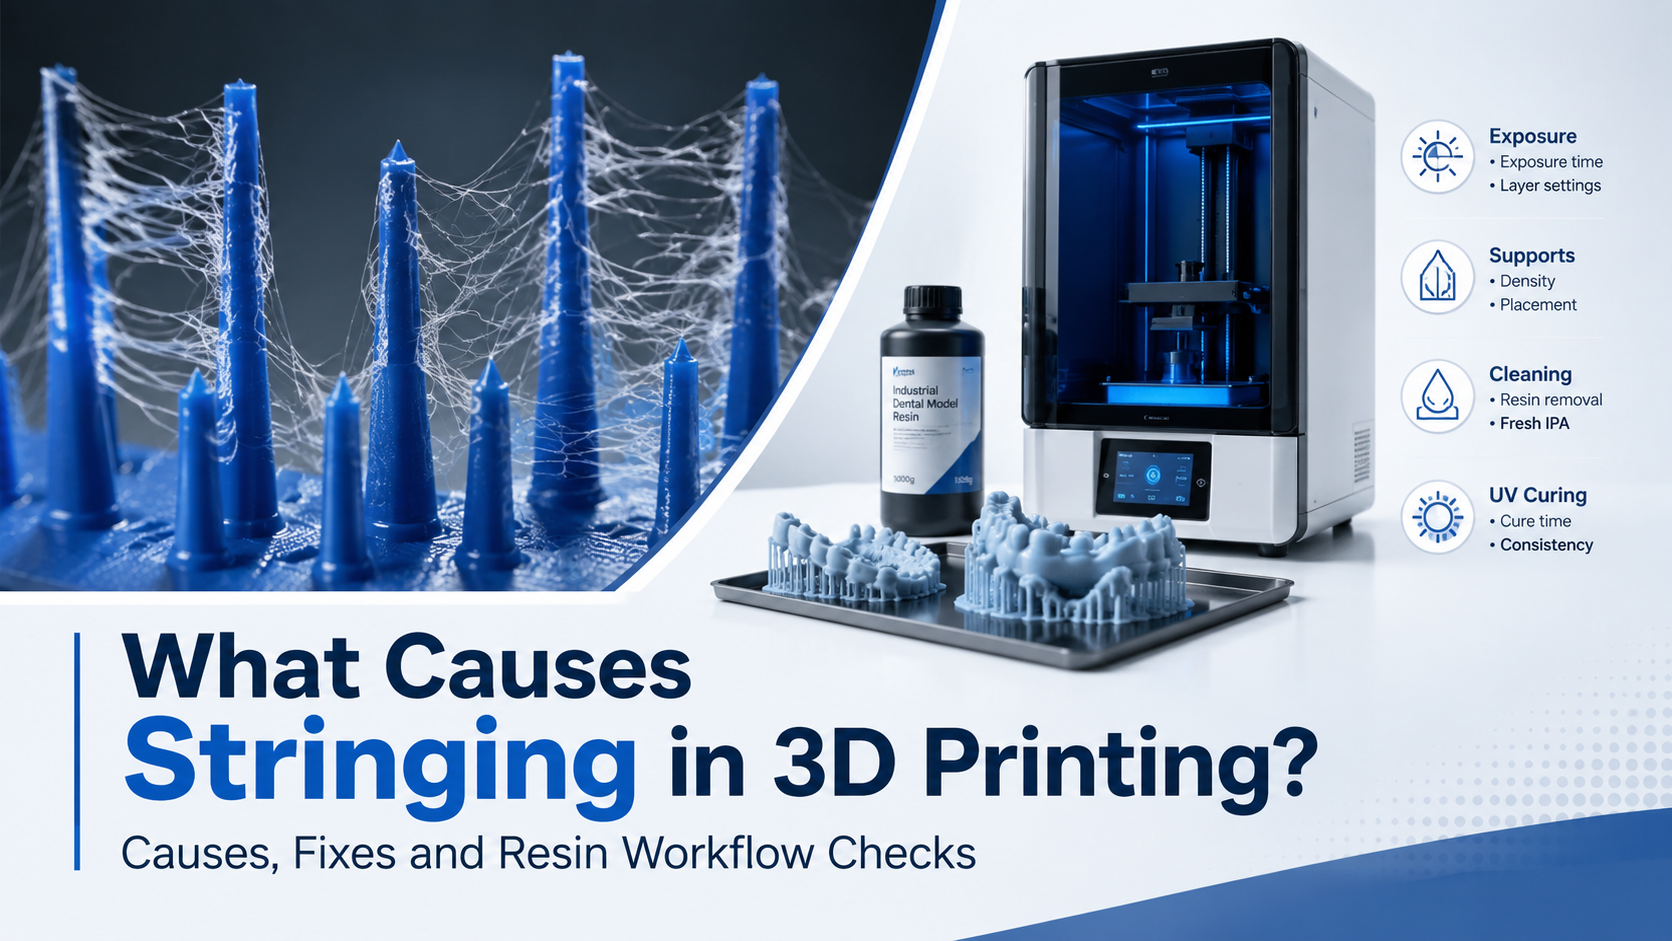
For Yidimu users, the first step is to identify the printing process. If you are using a filament printer, diagnose material flow, retraction, temperature, and travel movement. If you are using a resin printer, such as an industrial resin 3D printer or a dental 3D printer, diagnose exposure, resin condition, supports, peel movement, cleaning, and UV curing workflow.
What Is Stringing in 3D Printing?
In the strict sense, stringing usually refers to thin plastic threads left between separate areas of a printed model during filament-based 3D printing. The print head moves from one island of the model to another. If molten material continues to ooze during that travel move, it leaves a thin strand behind.
Typical signs include:
- Hair-like threads between towers, holes, ribs, or separated features
- Wispy material around fine details
- Thin plastic lines crossing open spaces
- Extra material around travel starts and stops
- Rough surfaces that need manual cleanup
This definition is most accurate for filament or material-extrusion printing. Resin 3D printing works differently. In vat photopolymerization, liquid photopolymer resin is selectively cured by light, not extruded through a hot nozzle.
That difference is important because Yidimu focuses on professional resin 3D printing workflows. Resin printers do not push molten plastic through a hot nozzle, so resin “stringing” usually has a different technical cause.
What Causes Stringing in 3D Printing?
1. Insufficient Retraction
In filament printing, retraction pulls material back before a travel move. If the retraction distance, retraction speed, or pressure control is not enough, the nozzle may keep leaking material while moving across open space.
This is one of the most common causes of classic stringing. However, retraction should not be adjusted randomly. Too little retraction can leave strings. Too much retraction may cause under-extrusion, inconsistent restart points, grinding, or jams depending on the extruder system and material.
2. Nozzle Temperature Is Too High
If the nozzle temperature is too high for the filament, the material becomes less viscous and flows more easily. This can increase oozing during travel moves.
A practical diagnosis is simple: if stringing appears across many small gaps and the material looks shiny, droopy, or overly fluid, temperature may be part of the problem. Reduce temperature gradually while checking layer bonding and extrusion consistency. Do not lower temperature so much that the part becomes weak or under-extruded.
3. Wet or Poorly Stored Material
Many filament materials absorb moisture from the environment. Moisture can cause bubbles, inconsistent flow, surface roughness, popping sounds, and extra oozing. In a production environment, material storage is part of process control.
Professional workshops should define storage rules for opened materials, drying procedures, and traceability by material batch, especially when printed parts are used for customer approval, engineering samples, or repeat production.
4. Travel Speed Is Too Slow
When the print head moves slowly across open space, the nozzle spends more time between features. More time means more opportunity for molten material to leak.
Increasing travel speed can reduce stringing, but it must be balanced against machine rigidity, part geometry, vibration, and positioning accuracy. For tall models, thin features, or delicate details, excessive travel speed may create ringing, layer shifts, or unstable surfaces.
5. Excess Nozzle Pressure
Even after extrusion stops, pressure inside the nozzle can continue pushing material out. This is why stringing may remain even when retraction is enabled.
For professional troubleshooting, this means operators should check not only retraction but also flow rate, extrusion multiplier, acceleration, pressure control, and restart behavior where available. In production, stable material flow is usually more important than simply increasing retraction again and again.
6. Poor Travel Path Planning
Stringing often appears where the slicer sends the nozzle across open air. If the slicer repeatedly travels across holes, towers, separated islands, or visible surfaces, strings may appear in areas that are hard to clean.
Useful slicer strategies may include reducing unnecessary travel moves, avoiding crossing visible perimeters, changing seam position, optimizing part orientation, or arranging parts so travel moves are shorter. The right choice depends on the machine, slicer, material, and surface requirement.
7. Material Type and Viscosity
Some materials string more easily than others. Flexible, elastic, sticky, high-temperature, or specialty materials may require more careful tuning than standard rigid materials. In product development, this matters when the printed part is used to evaluate fit, flexibility, comfort, feel, or assembly.
For soft prototype development, a resin-based workflow may be more suitable for some applications. Yidimu’s flexible resin 3D printers are designed for professional flexible resin applications such as shoe sample development, soft prototypes, elastic models, and product testing. Resin workflows still require parameter validation, but they avoid hot-nozzle filament oozing because the forming mechanism is different.
Is Stringing the Same in Resin 3D Printing?
No. In resin 3D printing, the word “stringing” is often used casually, but the physical cause is different.
In filament printing, stringing usually means molten plastic oozed from a nozzle during travel movement. In resin printing, there is no hot nozzle. Thin strands, floating sheets, soft residue, or hair-like defects may be closer to:
- Semi-cured resin strands
- Ragging-like defects
- Floating cured debris
- Light bleed or unintended curing
- Underexposed layers
- Support movement during peel
- Vat contamination
- Damaged release film
- Z-axis or lift-motion instability
- Incomplete cleaning or post-curing
For Yidimu users, this distinction is important. If a dental lab reports “stringing” on dental models, the technical team should first ask whether the defect is soft uncured resin residue, semi-cured strands, cured flakes, support marks, layer lines, or surface contamination. Each issue has a different root cause.
Practical Table: Causes and Fixes by Printing Process
| Defect Seen on Printed Part | More Likely Process | Possible Cause | What to Check First | Practical Action |
|---|---|---|---|---|
| Fine plastic hairs between towers or holes | Filament printing | Insufficient retraction | Retraction distance and speed | Run a retraction test and adjust gradually |
| Strings plus blobs at travel starts and stops | Filament printing | High temperature or excess nozzle pressure | Nozzle temperature, flow rate, pressure control | Lower temperature step by step and check flow |
| Strings with popping or rough extrusion | Filament printing | Wet material | Material storage and drying history | Dry material according to supplier guidance |
| Strings mainly across large open gaps | Filament printing | Slow travel or poor travel path | Travel speed and slicer movement | Increase travel speed or avoid crossing open areas |
| Thin semi-cured sheets attached to resin model | Resin printing | Low exposure, peel instability, or support flex | Exposure, lift speed, support thickness | Increase exposure cautiously, reduce lift speed, strengthen supports |
| Floating cured particles in resin vat | Resin printing | Vat contamination or failed layers | Resin tank, release film, filtering history | Filter resin and inspect vat before next print |
| Sticky surface after resin print | Resin printing | Incomplete cleaning or curing | Washing time, solvent condition, UV curing | Review cleaning and curing workflow |
| Layer lines plus strand-like artifacts | Resin printing | Z-axis movement, peel force, exposure instability | Z-axis, lift/retract settings, model orientation | Reduce peel stress and verify mechanical stability |
| Dental model has surface residue or soft areas | Resin printing | Cleaning, curing, or resin indication issue | Resin instructions, curing wavelength, post-curing process | Confirm resin workflow before use |
Step-by-Step Workflow: How to Diagnose Stringing
Step 1: Confirm the Printing Technology
Before changing settings, identify whether the part was printed by filament extrusion or resin photopolymerization.
If the part came from a filament printer, the main troubleshooting direction is material flow control. If the part came from a resin printer, the main direction is curing stability, support design, peel movement, resin condition, and post-processing.
This step prevents wasted time. Retraction settings do not solve resin ragging-like defects. Increasing resin exposure does not solve filament nozzle oozing.
Step 2: Identify the Defect Type
Look closely at the defect before removing it.
Ask these questions:
- Is it soft, sticky, rubbery, or fully cured?
- Is it plastic-like or resin-like?
- Does it appear between separate printed features?
- Does it follow travel paths, support areas, or layer directions?
- Does it happen on every print or only on one geometry?
- Does it appear more on tall parts, hollow parts, or large cross-sections?
- Does it appear before or after washing and UV curing?
Photos under consistent lighting are useful. For professional troubleshooting, keep the model file, slicing screenshot, resin or material name, layer thickness, exposure settings, temperature settings, post-processing record, and recent maintenance record.
Step 3: Check the Most Likely Cause First
For filament printing, begin with:
- Retraction
- Nozzle temperature
- Material dryness
- Travel speed
- Flow or pressure settings
- Travel path
For resin printing, begin with:
- Resin condition
- Exposure settings
- Lift speed and retract speed
- Wait time before lift
- Model orientation
- Support thickness and support density
- Vat film condition
- Z-axis stability
- Cleaning and UV curing workflow
Yidimu’s service and technical support can help professional users review machine setup, printing parameters, resin selection, support design, cleaning, and UV curing when defects appear during production.
Step 4: Change One Variable at a Time
Professional troubleshooting fails when operators change too many settings at once. If exposure, lift speed, support thickness, orientation, and cleaning process are changed in the same test, it becomes difficult to know which change solved the problem.
Use a controlled workflow:
- Record the original settings.
- Change one variable.
- Print a small test part or representative section.
- Compare the result.
- Keep the change only if it improves the defect without creating a new problem.
- Record the final working settings for future jobs.
Step 5: Validate on Real Production Geometry
A tower test can help identify filament stringing, and a small resin test can help check exposure stability. However, production geometry still matters.
A factory sample, dental arch, shoe component, jewelry model, engineering housing, or functional prototype may create different peel forces, support loads, surface requirements, and post-processing challenges. Validate final settings on the real part or a representative model before using the result for customer approval, clinical workflow review, or production planning.
Checklist: Quick Troubleshooting Workflow
Use this checklist when a team reports stringing or string-like defects.
- Confirm whether the part is filament printed or resin printed.
- Photograph the defect before cleaning.
- Check whether the strands are plastic, uncured resin, semi-cured resin, or cured debris.
- Review recent material changes, resin batch changes, or machine maintenance.
- Confirm slicing settings and compare them with the last successful print.
- For filament printing, check retraction, temperature, material dryness, and travel movement.
- For resin printing, check exposure, lift speed, wait time, supports, vat cleanliness, and release film condition.
- Inspect whether the defect appears only on certain geometries.
- Test one adjustment at a time.
- Record the final working settings for future jobs.
- For dental workflows, confirm resin indication, post-curing process, and local regulatory requirements before clinical or intraoral use.
How to Prevent String-Like Defects in Resin 3D Printing
Review Exposure Settings
Underexposure can make layers weak and unstable. In resin printing, weak layer bonding may contribute to tearing, ragging-like defects, or semi-cured residue. Overexposure, however, may reduce detail accuracy, thicken small features, or affect fit.
Adjust exposure in small steps and validate with the actual resin, layer thickness, model geometry, and post-processing method.
For dental and industrial work, exposure settings should match the resin, printer light source, layer thickness, and production requirement. Yidimu’s 3D printing resins include resin options for dental models, guide model workflows, castable patterns, water-washable workflows, industrial prototypes, and professional model production.
Reduce Peel Stress
Large cross-sections, hollow parts without drainage, poor orientation, and weak supports can increase peel stress. Peel stress may shift layers, flex supports, or leave semi-cured artifacts.
Ways to reduce peel-related problems may include:
- Reorienting the part to reduce large flat cross-sections
- Adding drainage holes for hollow models
- Increasing support strength in high-load areas
- Reducing lift or retract speed
- Adding wait time before lift
- Checking release film condition
- Avoiding overloaded build plates when stability matters
Keep the Vat Clean
Cured debris in the vat can create repeated defects and may damage the release film or screen area. Resin should be filtered when a print fails or when cured particles are suspected. Operators should inspect the vat before restarting production.
For production users, resin handling should be part of the standard operating procedure. This includes resin storage, mixing, filtering, vat inspection, cleaning, and safe disposal according to local requirements.
Control Cleaning and UV Curing
A resin part can look defective if uncured resin remains in holes, grooves, or fine details. Incomplete cleaning may leave sticky residue, while uncontrolled curing can affect surface condition and final handling properties.
Post-processing is an important part of the final resin workflow. Printed resin parts may need proper washing and controlled UV curing to reach stable handling properties, depending on the resin and application. Workplace safety guidance from NIOSH also highlights the importance of controlling exposure to particles, chemicals, and other hazards in 3D printing environments.
For a more repeatable workflow, professional users should consider controlled post-curing equipment instead of relying on uncontrolled sunlight or inconsistent exposure. Yidimu’s UV curing boxes are designed to support resin post-processing with controlled 405 nm UV curing workflows.
Confirm Dental Workflow Requirements
Dental resin printing has a stricter workflow than general model printing. Customers should confirm resin indication, post-curing process, and local regulatory requirements before clinical or intraoral use.
For dental models, surgical guide model workflows, or temporary dental applications, the full process matters: scan data, design file, slicing, resin selection, printing, cleaning, UV curing, inspection, and storage. A printer alone does not determine final suitability.
Yidimu’s dental 3D printing solutions can help clinics and labs review equipment, resin, and post-processing requirements based on actual application needs.
Common Mistakes to Avoid
Mistake 1: Treating Resin Strand Defects Like Filament Stringing
Retraction fixes filament oozing. It does not fix resin strand defects. If the part was printed with resin, start with exposure, supports, peel motion, resin condition, vat condition, and post-processing.
Mistake 2: Increasing Exposure Too Much
Increasing exposure may reduce weak layers in some resin cases, but too much exposure can reduce detail, close small gaps, thicken fine features, or affect fit. For dental and engineering parts, that may create new accuracy problems.
Mistake 3: Ignoring Supports
Support design is not only a way to hold the model. In resin printing, supports also help resist peel forces. Thin or poorly placed supports may flex during printing, allowing layer movement and surface defects.
Mistake 4: Printing Hollow Parts Without Drainage
Hollow resin models can trap resin and pressure. Without drainage, peel forces and trapped resin can create defects or make cleaning difficult. Hollowing should be designed together with drain holes, orientation, and cleaning access.
Mistake 5: Using Dirty Resin After a Failed Print
A failed resin print can leave cured fragments in the vat. Restarting without filtering may cause repeated failures or damage. Filter the resin and inspect the vat before continuing.
Mistake 6: Assuming One Setting Works for Every Resin
Different resins may need different exposure, lift, cleaning, and curing settings. A dental model resin, castable resin, flexible resin, and water-washable resin should not be treated as the same material.
Mistake 7: Skipping Process Records
Professional users need repeatability. If the operator does not record resin type, resin batch, layer thickness, exposure, lift speed, support settings, cleaning time, and curing time, it becomes difficult to reproduce successful results.
Mistake 8: Overlooking Workplace Safety
Both filament and resin printing require appropriate handling, ventilation, and personal protection based on the material and workflow. NIOSH recommends controls to reduce potential exposure to ultrafine particles, chemicals, and safety hazards in 3D printing environments.
Conclusion
What causes stringing in 3D printing depends on the printing process. In filament printing, stringing usually comes from molten material oozing during travel moves, often due to weak retraction, high nozzle temperature, wet material, slow travel speed, excess nozzle pressure, or poor travel planning. In resin 3D printing, similar string-like defects are not classic nozzle stringing. They may come from semi-cured resin, low exposure, peel-force instability, support flex, vat contamination, damaged release film, Z-axis instability, or incomplete post-processing.
For factories, dental labs, clinics, model-making companies, and R&D teams, the best solution is a controlled workflow: identify the process, classify the defect, change one variable at a time, and validate the result on real production geometry.
If you are evaluating a resin printing workflow, contact Yidimu with your model size, resin requirement, application, and expected workflow. Yidimu can help review printer selection, resin matching, post-processing equipment, and troubleshooting direction for professional resin 3D printing.
FAQ
What causes stringing in 3D printing most often?
In filament 3D printing, the most common causes are insufficient retraction, high nozzle temperature, wet filament, slow travel speed, excess nozzle pressure, and poor slicer travel paths. In resin printing, similar strand-like defects are usually caused by curing, support, peel-force, resin-handling, or post-processing issues rather than nozzle oozing.
Is stringing caused by temperature?
Temperature can be a major cause in filament printing. If the nozzle is too hot, the material may flow too easily and leak during travel moves. Lowering the temperature gradually may help, but it should not cause poor layer bonding or under-extrusion.
Can wet material cause stringing?
Yes. In filament printing, moisture can cause inconsistent extrusion, popping, bubbles, rough surfaces, and extra oozing. Professional users should store material properly and dry it according to supplier guidance when needed.
Why does my resin print have thin strings or sheets?
Resin printers do not create classic filament stringing. Thin strings or sheets on a resin print may be semi-cured resin, floating cured debris, underexposed layers, support movement, peel-force instability, vat contamination, or incomplete cleaning and curing.
How do I fix resin stringing?
First confirm what the defect actually is. Then check resin condition, exposure settings, lift speed, wait time, support thickness, model orientation, vat cleanliness, release film condition, and post-curing workflow. Change one variable at a time and test again.
Does retraction fix resin 3D printing stringing?
No. Retraction applies to filament extrusion systems. Resin printers cure liquid photopolymer layer by layer, so resin strand defects should be diagnosed through exposure, supports, peel motion, resin condition, cleaning, and UV curing.
Can over-curing cause string-like resin defects?
Over-curing is more likely to cause roughness, loss of detail, or dimensional changes. Thin semi-cured strands are often more related to underexposure, support flex, layer movement, contamination, or peel instability. The exact cause depends on the resin and workflow.
Does stringing affect part accuracy?
It can. Filament stringing may add unwanted material to surfaces and edges, requiring cleanup. In professional workflows, it may affect appearance, fitting areas, and inspection time. Resin strand defects may also indicate process instability that should be corrected before production use.
How can factories reduce stringing in repeat production?
Factories should standardize material storage, machine settings, slicing profiles, part orientation, support strategy, inspection methods, and post-processing records. The key is repeatable process control, not one-time manual adjustment.
Is resin 3D printing better if I want smoother surfaces?
Resin 3D printing can support smooth surfaces and fine details depending on printer, resin, model design, and workflow. It is often used for dental models, industrial prototypes, jewelry patterns, model making, and detailed samples. However, customers should confirm resin suitability, post-curing process, and application requirements before use.
Author Bio
Article by Alice Zhang, Yidimu technical content editor.
Alice focuses on industrial resin 3D printing, dental 3D printing workflows, photopolymer resin selection, UV curing, sample printing, and professional 3D printing troubleshooting for factories, dental labs, clinics, model-making companies, and product development teams.
References and Further Reading
- ISO/ASTM 52900: Additive manufacturing terminology and process definitions.
- NIOSH: Approaches to Safe 3D Printing.
- CDC/NIOSH: A Guide for Makerspace Users, Schools, Libraries and Small Businesses.