Yes, you can use Blender for 3D prints with precise measurements, but it requires a controlled workflow. Blender supports metric units, numerical dimensions, measurement tools, and 3D print checking tools, so it can create accurate printable models when the scene scale, object scale, mesh thickness, export settings, and slicer dimensions are verified. However, Blender is mainly a polygon mesh modeling tool, not a full parametric mechanical CAD system. For artistic models, dental scan cleanup, product appearance models, flexible lattice structures, and presentation prototypes, Blender can be very useful. For tight engineering tolerances, mating mechanical parts, or regulated dental workflows, customers should validate the model in CAD, slicing software, print testing, and inspection before production.
Can Blender Really Handle Precise 3D Printing Work?
Blender can support precise 3D printing work when the model is built and exported with real-world dimensions in mind. It is not only a visual design tool. It allows users to set metric units, enter numerical dimensions, use measurement tools, and inspect geometry before export. Blender’s manual states that scene unit settings and scale affect how dimensions are displayed, and the Transform panel allows users to numerically control object position, rotation, scale, and dimensions.
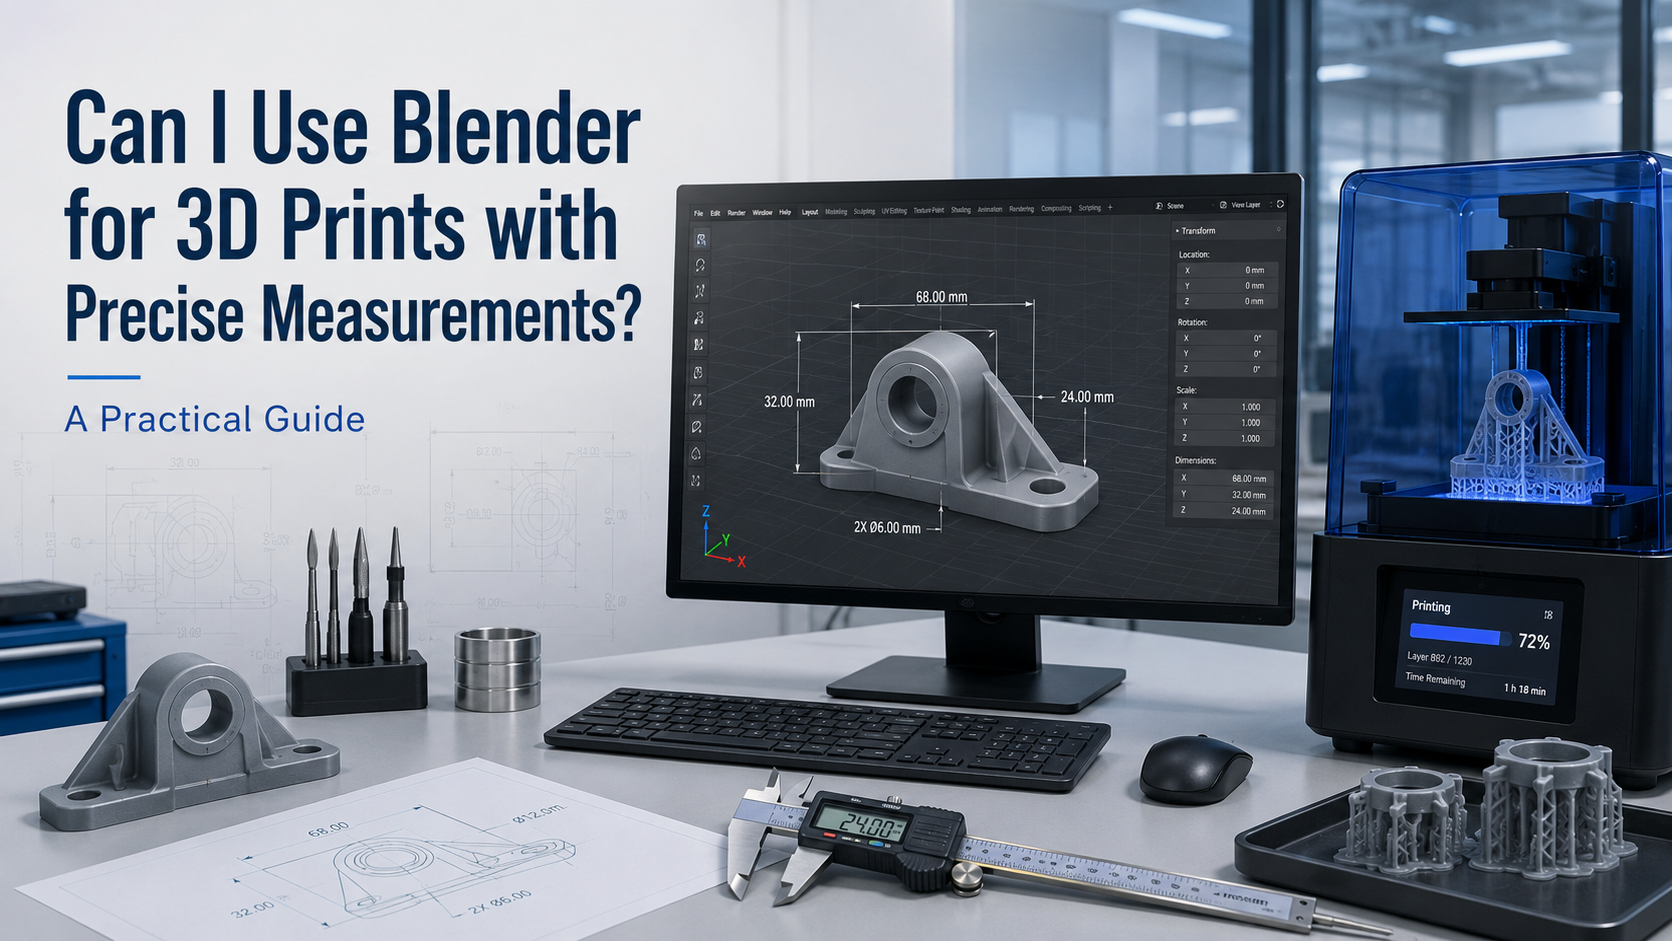
The important point is that Blender precision depends on workflow discipline. A model that “looks right” on screen is not automatically dimensionally correct after slicing and printing. For professional resin 3D printing, the team should check the following:
- Scene unit system
- Object dimensions
- Applied scale
- Wall thickness
- Non-manifold geometry
- Export scale
- Slicer import size
- Resin behavior
- Support design
- Cleaning and UV curing process
- Final printed measurement
For factory users and model-making companies, Blender is often valuable for complex surfaces, sculpted shapes, ergonomic designs, textured models, product appearance prototypes, display models, and organic geometries. For dental labs and clinics, Blender may be used in some workflows for mesh inspection, model cleanup, or non-clinical design preparation, but clinical or intraoral applications require additional caution.
Customers should confirm resin indication, post-curing process and local regulatory requirements before clinical or intraoral use.
Blender vs CAD: Which Is Better for Precise 3D Prints?
Blender and CAD software are designed with different priorities. Blender is strong in mesh modeling, sculpting, organic shapes, rendering, visualization, and creative geometry. CAD software is usually stronger for parametric engineering dimensions, constraints, assemblies, mechanical drawings, and revision-controlled product design.
For professional 3D printing, the question is not “Blender or CAD?” The better question is: “What type of geometry and accuracy requirement does this part need?”
Practical Comparison Table
| Use Case | Is Blender Suitable? | Better Workflow | Notes for Resin 3D Printing |
|---|---|---|---|
| Product appearance model | Yes | Blender design → slicer verification → resin print | Good for shape review, texture, surface detail, and visual prototypes |
| Figurine, statue, character model, display model | Yes | Blender sculpting → mesh repair → resin print | Resin printing can support fine detail depending on printer, resin, layer height, and curing |
| Dental arch model from scan data | Sometimes | Dental scan/design workflow → mesh check → validated print process | Confirm resin indication, post-curing, and local requirements |
| Surgical guide or intraoral dental part | Use caution | Dental-specific validated workflow recommended | Do not rely on Blender alone for clinical suitability |
| Engineering bracket with bolt holes | Possible, but CAD may be better | CAD for dimensions → Blender only for mesh editing if needed | Check hole compensation and final measurement |
| Flexible shoe sample or lattice structure | Yes, with validation | Blender lattice/organic design → print test → fit and material review | Flexible resin performance depends on resin, geometry, and post-processing |
| Assembly fixture or jig | Sometimes | CAD for mating dimensions → resin print test → inspection | Use controlled tolerance and repeatability checks |
| High-tolerance mechanical part | Not ideal as the only tool | CAD-first workflow | Blender can edit meshes, but parametric CAD is usually safer |
If the part is primarily visual, organic, sculptural, or surface-driven, Blender can be a practical design tool. If the part depends on exact hole spacing, thread geometry, snap fits, moving assemblies, or controlled engineering tolerances, CAD should usually be the primary design environment.
For production-oriented resin printing, Yidimu customers can also review application needs through Yidimu industrial resin 3D printer applications before choosing the final equipment and workflow.
Why Scale Problems Happen When Printing Blender Files
Many Blender-to-3D-printing problems are not caused by Blender itself. They are caused by unit mismatch, unapplied object scale, STL export assumptions, or slicer import settings.
One common issue is that STL files do not always carry unit meaning in the way users expect. The Library of Congress notes that STL is widely used for 3D printing and rapid prototyping, but it is a simple triangular mesh format with limitations. In practical terms, many workflows treat STL values as unitless numbers. If Blender exports a model using one unit assumption and the slicer imports it using another, the part can appear too small or too large.
This is why a 100 mm part in Blender may not always import as 100 mm unless the export and import settings are controlled. Professional users should never assume the exported file is correct only because the model looked correct in Blender.
A safer workflow is:
- Set Blender units before modeling.
- Enter numerical dimensions.
- Apply scale before export.
- Export using a known unit workflow.
- Open the file in the slicer.
- Confirm X, Y, and Z dimensions before printing.
- Print a small calibration sample when fit matters.
For teams working with repeated production samples, this verification should become a standard checklist, not an occasional fix.
Recommended Blender Unit Setup for 3D Printing
For most resin 3D printing workflows, millimeters are the easiest unit to manage because printer build volume, layer thickness, dental models, engineering samples, and post-processing dimensions are usually discussed in millimeters.
Basic Setup
Use this setup as a practical starting point:
- Unit system: Metric
- Length unit: Millimeters
- Model size: build at real scale
- Object scale: apply before export
- Transform dimensions: check numerically
- Export format: STL, OBJ, or 3MF depending on workflow
- Slicer check: confirm final imported dimensions
Blender also supports numeric input for transformations, which helps users enter exact values instead of relying only on mouse movement. This is important when designing holes, slots, thicknesses, base plates, connectors, or model boundaries.
Important Rule: Do Not Trust Visual Size
A model can look large on screen but still export incorrectly. Always check dimensions numerically. For professional users, the final authority should be the measured value in the slicer and, after printing, the measured physical part.
Step-by-Step Workflow: Using Blender for Precise Resin 3D Prints
The following workflow is suitable for product development teams, model workshops, dental labs preparing non-clinical models, and factory sample-making teams.
Step 1: Define the Real Application
Before modeling, define what the part needs to do.
Ask:
- Is it only for visual review?
- Does it need to fit another component?
- Does it need a smooth surface?
- Does it need fine engraved detail?
- Is it rigid or flexible?
- Will it be used in a dental workflow?
- Does it require post-curing validation?
- What tolerance is acceptable?
A display model and a functional assembly fixture should not be designed with the same tolerance strategy.
Step 2: Set the Unit System Before Modeling
Set Blender to metric units and work in real dimensions. Avoid modeling first and scaling later unless you understand the export consequences. Scaling late in the workflow can create confusion, especially when multiple objects are involved.
Step 3: Build the Model at 1:1 Scale
Create the part at its intended real-world size. If the part is 80 mm long, model it as 80 mm long. If a base needs to be 3 mm thick, enter 3 mm numerically.
For resin printing, also consider:
- Minimum wall thickness
- Hollowing strategy
- Drainage holes
- Support contact points
- Orientation
- Surface direction
- Critical dimensions after curing
Step 4: Apply Scale Before Export
If you scale an object in Object Mode but do not apply the scale, the object may carry transform values that cause confusion during export, editing, or inspection. For professional workflows, apply scale after the final size is confirmed.
A practical rule:
- Object dimensions should match the intended size.
- Scale values should normally be 1.0 before final export.
- The slicer should show the same dimensions after import.
Step 5: Check Mesh Quality
Blender’s 3D Print Toolbox can check issues such as non-manifold edges and bad contiguous edges; the manual explains that edges should connect properly to form printable geometry.
Before exporting, check for:
- Non-manifold edges
- Open holes
- Inverted normals
- Extremely thin walls
- Internal loose geometry
- Overlapping shells
- Unwanted hidden objects
- Tiny disconnected fragments
- Overly dense mesh that slows slicing
- Unsupported islands after slicing
For resin 3D printing, mesh problems can lead to failed prints, surface defects, trapped resin, dimensional distortion, or difficult cleaning.
Step 6: Export Carefully
STL is common and widely supported, but it is simple. For single-material resin models, STL is often enough. For richer print information, 3MF may be useful in some workflows because it is designed as a 3D printing format for transferring fuller model data between applications, platforms, and printers.
Common professional export rules:
- Export only the selected final model.
- Remove hidden reference objects.
- Confirm export scale.
- Use binary STL if file size matters.
- Use sufficient mesh resolution for curved surfaces.
- Avoid excessive polygon density if it does not improve print quality.
- Save the original Blender file and exported print file separately.
Step 7: Verify in Slicing Software
After import, check:
- Overall dimensions
- Orientation
- Support contact areas
- Hollowing and drainage
- Layer height
- Estimated print height
- Resin profile
- Exposure settings
- Build platform fit
- Critical surfaces
For Yidimu professional users, equipment selection should also match part size, workflow frequency, and material type. Users comparing printer categories can start from Yidimu resin 3D printers for dental, flexible and industrial use.
Step 8: Print a Test Coupon or Critical Section
For precise parts, do not go directly from digital file to production. Print a small test coupon, a cross-section, or the most dimension-critical area first.
Measure:
- Length
- Width
- Height
- Hole diameter
- Slot width
- Wall thickness
- Fit against mating part
- Surface quality after cleaning
- Change after UV curing
Step 9: Adjust for Resin and Workflow Behavior
Printed resin parts may change slightly depending on resin type, exposure, orientation, support design, cleaning time, and UV curing. A precise Blender model does not automatically guarantee a precise physical object.
For resin workflows, dimensional output may be affected by:
- Resin formulation
- Light exposure
- Layer height
- Pixel size or optical resolution
- Z-axis stability
- Support density
- Part orientation
- Cleaning process
- UV curing time and wavelength
- Temperature and storage
This is why Yidimu often recommends reviewing the complete printer + resin + curing workflow, not only the 3D file. For post-processing planning, see Yidimu UV curing boxes for resin 3D printed models.
Practical Checklist for Blender 3D Printing with Precise Measurements
Use this checklist before sending a Blender model to resin printing.
File Preparation Checklist
- Confirm the real application of the part.
- Set the scene to metric units.
- Build the model at 1:1 scale.
- Enter critical dimensions numerically.
- Avoid relying only on visual size.
- Apply object scale before export.
- Check wall thickness.
- Check non-manifold geometry.
- Remove hidden reference objects.
- Confirm the model is watertight.
- Export with controlled scale settings.
- Import the file into slicing software.
- Confirm X/Y/Z dimensions in the slicer.
- Add supports based on the real print orientation.
- Print and measure a test part when fit matters.
- Record resin, exposure, orientation, cleaning, and curing settings.
- Revise the file based on measured print results.
Blender for Dental 3D Printing: What to Be Careful About
Blender may be used in some dental-related workflows, especially for model cleanup, visualization, mesh adjustment, or educational model preparation. However, dental workflows require extra caution because not every resin, printed part, or design process is suitable for clinical or intraoral use.
For dental clinics and labs, Blender should not replace validated dental design software, approved resin workflows, or local regulatory requirements where those are required. The FDA’s additive manufacturing guidance emphasizes technical considerations, testing, characterization, design, and manufacturing controls for additively manufactured medical devices.
Customers should confirm resin indication, post-curing process and local regulatory requirements before clinical or intraoral use.
For dental model production and workflow planning, users can review Yidimu dental 3D printer considerations for clinics and labs. For a professional dental printer option, see the Yidimu Eternal D1 dental 3D printer.
Blender for Industrial Resin 3D Printing Applications
For industrial resin 3D printing, Blender can be useful when the design includes complex surfaces, visual details, flexible structures, sculpted geometry, or presentation-quality appearance. It may support:
- Product appearance prototypes
- Industrial display models
- Consumer product shells
- Ergonomic handles
- Shoe samples
- Flexible lattice structures
- Model-making projects
- Architectural-style models
- Research samples
- Scan-based mesh repair
- Textured or branded prototypes
For flexible resin applications, Blender can be useful for lattice patterns, cushioning structures, organic textures, and shoe-related sample development. However, flexible resin performance depends on geometry, resin hardness, wall thickness, post-curing, and testing. For elastomer sample workflows, see the Yidimu Flex G2 flexible resin 3D printer.
For large prototypes, model workshops should also consider build volume and part splitting strategy. If the part is larger than the printer platform, the model may need to be split, keyed, printed in sections, and assembled after curing. In this case, Blender can help create seams, alignment keys, and surface transitions, but the final fit should still be tested.
Practical Table: When Blender Is Good Enough and When It Is Not
| Requirement | Blender Alone May Be Enough | Use CAD or Additional Validation | Why It Matters |
| Visual prototype | Yes | Optional | Shape and appearance matter more than tight tolerance |
| Organic model | Yes | Optional | Blender is strong for sculpted and mesh-based geometry |
| Dental study model | Sometimes | Recommended workflow validation | Resin, curing, and clinical context matter |
| Intraoral dental appliance | No, not by itself | Yes | Requires resin indication and regulatory confirmation |
| Mechanical assembly | Sometimes | Yes | Fit, holes, and mating faces need tolerance control |
| Snap-fit part | Not recommended alone | Yes | Small dimensional errors can cause failure |
| Flexible lattice | Yes, with testing | Recommended | Material response depends on resin and geometry |
| High-volume repeated printing | Not by itself | Yes | Repeatability must be tested and documented |
| Large model split into sections | Yes | Optional CAD check | Alignment keys and assembly gaps need measurement |
| Precision fixture | Sometimes | Yes | Critical contact surfaces should be validated |
How Accurate Can a Blender 3D Print Be?
The better question is: how accurate can the complete workflow be?
Blender can define precise dimensions digitally, but the printed result depends on the full chain:
- Digital model accuracy
- Export format
- Slicer interpretation
- Printer resolution
- Resin material
- Exposure settings
- Support strategy
- Part orientation
- Cleaning method
- UV curing process
- Measurement method
For example, a 50 mm cube in Blender may import correctly into the slicer and still print slightly differently depending on resin and process settings. This does not mean Blender failed. It means the workflow needs calibration.
For factories and R&D teams, the correct approach is to build a known test part, print it with the target resin and settings, measure it, and then adjust the workflow if necessary. For production users, this data should be recorded so repeated jobs can be compared.
Common Mistakes to Avoid
1. Modeling Without Setting Units First
If the scene unit setup is unclear, the model may look correct but export at the wrong size. Always set units before modeling.
2. Forgetting to Apply Scale
A model may show the right dimensions but still carry unapplied scale values. This can create problems during export, mesh editing, or collaboration.
3. Assuming STL Always Preserves Units
STL is widely used, but professional users should verify imported slicer dimensions instead of assuming the file carries unit meaning correctly.
4. Designing Walls Too Thin
A wall that exists digitally may not print reliably. Minimum wall thickness depends on resin, printer, orientation, and post-processing.
5. Ignoring Resin Shrinkage and Post-Curing
The final printed part is affected by resin behavior, cleaning, and UV curing. For professional resin printing, post-processing is part of dimensional control.
6. Using Blender for Tight Mechanical Tolerances Without Validation
Blender can create precise dimensions, but parametric CAD is usually safer for mechanical interfaces, assemblies, and controlled engineering drawings.
7. Not Checking the Slicer Dimensions
The slicer is the last digital checkpoint before printing. Always confirm the imported dimensions before starting the print.
8. Not Printing a Test Part
For any part that must fit, snap, align, or assemble, print a small test section before producing the full model.
9. Using the Wrong Resin for the Application
A detailed model resin, flexible resin, castable resin, or dental resin may behave differently. The resin must match the application and workflow.
10. Treating Dental Prints as Generic Models
Dental applications require extra caution. Customers should confirm resin indication, post-curing process and local regulatory requirements before clinical or intraoral use.
Conclusion: Can I Use Blender for 3D Prints with Precise Measurements?
Yes, you can use Blender for 3D prints with precise measurements, especially for organic models, product appearance prototypes, dental model preparation, flexible structures, shoe samples, and professional model-making work. The key is to treat Blender as one part of a controlled 3D printing workflow, not as the only source of accuracy.
For precise resin 3D printing, set metric units, model at real scale, enter dimensions numerically, apply object scale, check mesh quality, export carefully, verify slicer dimensions, print test parts, and measure the final result after cleaning and UV curing.
For factories, dental labs, clinics, R&D teams, and model-making companies, the final result depends on the complete workflow: model file, resin, printer, slicing, support design, cleaning, curing, and inspection. If you need help choosing a resin printer for Blender-based files, send Yidimu your model size, resin requirement, application, tolerance expectation, and expected workflow. The Yidimu team can help review whether an industrial resin printer, dental 3D printer, flexible resin printer, UV curing process, or sample printing workflow may be suitable for your project.
FAQ
Can I use Blender for accurate 3D printing?
Yes. Blender can be used for accurate 3D printing if the model is built at real scale, units are set correctly, object scale is applied, mesh problems are repaired, and the exported file is checked in slicing software before printing.
Is Blender accurate enough for engineering parts?
Blender may be suitable for some engineering prototypes, especially visual models and non-critical samples. For tight tolerances, assemblies, bolt patterns, snap fits, and production fixtures, CAD software and physical validation are usually safer.
Why is my Blender STL the wrong size?
The most common reasons are unit mismatch, unapplied scale, incorrect export scale, or slicer import assumptions. Always confirm the final X, Y, and Z dimensions after importing the file into slicing software.
Should I use millimeters in Blender for 3D printing?
For most resin 3D printing workflows, millimeters are recommended because printer build volume, layer thickness, part size, and inspection dimensions are usually handled in millimeters.
Can Blender make dental 3D printing files?
Blender may support some dental-related mesh cleanup, model preparation, or visualization tasks. However, clinical and intraoral dental applications require caution. Customers should confirm resin indication, post-curing process and local regulatory requirements before clinical or intraoral use.
Is Blender better than CAD for 3D printing?
Blender is better for organic shapes, sculpting, textures, visual models, and mesh editing. CAD is usually better for parametric mechanical design, exact assemblies, engineering drawings, and controlled tolerances. Many professional workflows use both.
Do I need to apply scale before exporting from Blender?
Yes, in most professional workflows. Applying scale helps reduce confusion during export, mesh editing, and slicing. Before export, check that object dimensions are correct and scale values are normally set to 1.0.
Is STL or 3MF better for precise 3D printing?
STL is widely supported and often enough for single-material models. 3MF can carry more complete 3D printing information in supported workflows. Regardless of format, users should confirm the final imported dimensions in the slicer.
Can Blender design flexible resin parts?
Yes, Blender can be useful for flexible resin parts, especially lattice structures, shoe samples, cushioning designs, soft prototypes, and organic textures. The final performance still depends on resin type, geometry, printer settings, curing, and testing.
What should I send to Yidimu for application review?
Send the model size, expected resin type, application, required surface detail, tolerance expectation, part quantity, whether the part is rigid or flexible, and your expected workflow from design to cleaning, UV curing, and inspection. You can contact the team through Yidimu contact support.
Optional References
- Blender Manual: scene units, measurement display, Transform panel, numeric input, and 3D Print Toolbox information.
- Library of Congress: STL file format description and its role in 3D printing and rapid prototyping.
- 3MF Consortium and Library of Congress: 3MF as a 3D printing format designed for fuller model data exchange.
- U.S. FDA: Technical considerations for additively manufactured medical devices.