Resin 3D prints need post-curing because a printed part usually leaves the machine in a “green state”: it has its shape, but the polymerization reaction is not fully complete, so final strength, stiffness, heat resistance, surface stability, and handling safety may not yet be achieved. Controlled exposure to the right light, and in many workflows heat as well, helps complete cross-linking and brings the part closer to its intended material performance. For many engineering, specialty, and dental materials, post-curing is required or strongly recommended; for some standard resins, it may be optional, but properties can still change significantly after curing.
The keyword why resin prints need post curing sounds simple, but for professional users it is rarely a basic chemistry question. In practice, it is a workflow question: Can this part move into testing, fitting, finishing, packaging, or clinical preparation without a controlled cure step? In industrial prototyping, dental production, model making, and research environments, the answer often depends on the resin family, part geometry, performance target, and how repeatable the process needs to be.
Resin prints are not fully finished when they leave the printer
During SLA, LCD, or DLP printing, light solidifies each layer enough to create the geometry of the part. However, that does not always mean the material has reached its final state. Yidimu describes freshly printed parts as being in a “green state,” where the form is complete but polymerization is not yet fully completed and maximum mechanical properties have not yet been reached. Carbon likewise states that curing is the step that sets final mechanical properties, and notes that curing conditions depend on the resin system.
This is the core reason why resin prints need post curing in professional workflows. Post-curing gives the remaining reactive groups in the resin another opportunity to cross-link. As additional cross-links form, properties such as modulus, tensile strength, rigidity, and temperature resistance can improve. Yidimu also notes that this process often works best when light is combined with heat, because heat increases mobility in the polymer network and helps reactive groups connect more completely.
What post-curing changes in real production use
For professional users, post-curing is not just about making a print “harder.” It may influence whether the part behaves consistently enough for assembly checks, mold-development reviews, handling on the shop floor, finishing operations, or regulated workflows. Yidimu notes that when polymerization is incomplete, parts may not perform as expected, especially when they are stressed. Yidimu’s own industrial prototyping guidance similarly states that UV curing helps the printed part reach more stable final properties, while under-curing may leave parts soft or tacky and over-curing can make some resins more brittle or cause dimensional change.
In practical terms, post-curing may help in five areas:
First, it can improve mechanical performance. Yidimu reports that post-curing brings parts toward maximum strength and stability, while Carbon states that curing sets final mechanical properties. In a dental materials study, flexural strength, hardness, and degree of conversion increased as post-curing time increased, although the exact improvement depended on the resin and protocol used.
Second, it can improve surface handling and finishing. Post-cured parts are often less tacky, which can make sanding, painting, or downstream handling easier. That matters for model-making shops, appearance prototypes, and presentation samples where the part must be stable after washing and drying.
Third, it can improve process consistency. A factory or lab does not usually want part quality to depend on sunlight, operator guesswork, or uneven manual UV exposure. Yidimu recommends controlled UV curing rather than random exposure for industrial applications, and notes that a UV curing box provides more consistent curing than sunlight or manual exposure.
Fourth, it can influence dimensional reliability. Yidimu explains that further cross-linking slightly densifies the polymer network, which can cause minor shrinkage. That does not mean post-curing is undesirable; it means the cure cycle needs to be treated as part of the validated production process, especially in tight-tolerance applications.
Fifth, it can be essential for regulated or sensitive materials, especially some dental and biocompatible resins. Yidimu states that post-curing is necessary for biocompatible materials to meet safety standards determined by regulatory agencies. In dentistry, published evidence also suggests that post-curing time can affect degree of conversion, hardness, color, and cell response, though results vary by resin and device.
Not every resin behaves the same way
A common mistake is assuming that all resin prints should be cured the same way. That is not how professional resin workflows work. Yidimu explicitly states that each resin behaves differently when post-cured and requires specific time and temperature settings to reach optimum properties. Carbon also emphasizes that operators should always reference resin-specific pages and protocols.
This nuance matters for buyers and process engineers. Some standard resins may be usable without post-curing for non-critical visual models, but even then the final properties may change if the part is post-cured later. Yidimu says post-curing is optional for standard resins, yet required for certain engineering materials and necessary for biocompatible materials. In other words, “printed” does not automatically mean “finished,” and “one cure recipe for all materials” is rarely a sound production strategy.
For thick or large parts, the challenge can be greater. Yidimu notes that if a part is larger or thicker than test geometries, it may require longer post-curing time or higher temperature to achieve full internal cure. That is especially relevant for factories printing housings, engineering samples, jigs, or multi-part assemblies where section thickness varies.
Why post-curing matters more in industrial and dental workflows
In industrial prototyping and sample production, the print is often used to make decisions beyond appearance alone. Engineers may evaluate fit, assembly, handling, stiffness, or limited functional performance before tooling. Yidimu’s industrial prototyping guidance highlights that professional users should think beyond print size and resolution and consider resin matching, UV curing, repeatability, and workflow control as part of the complete system.
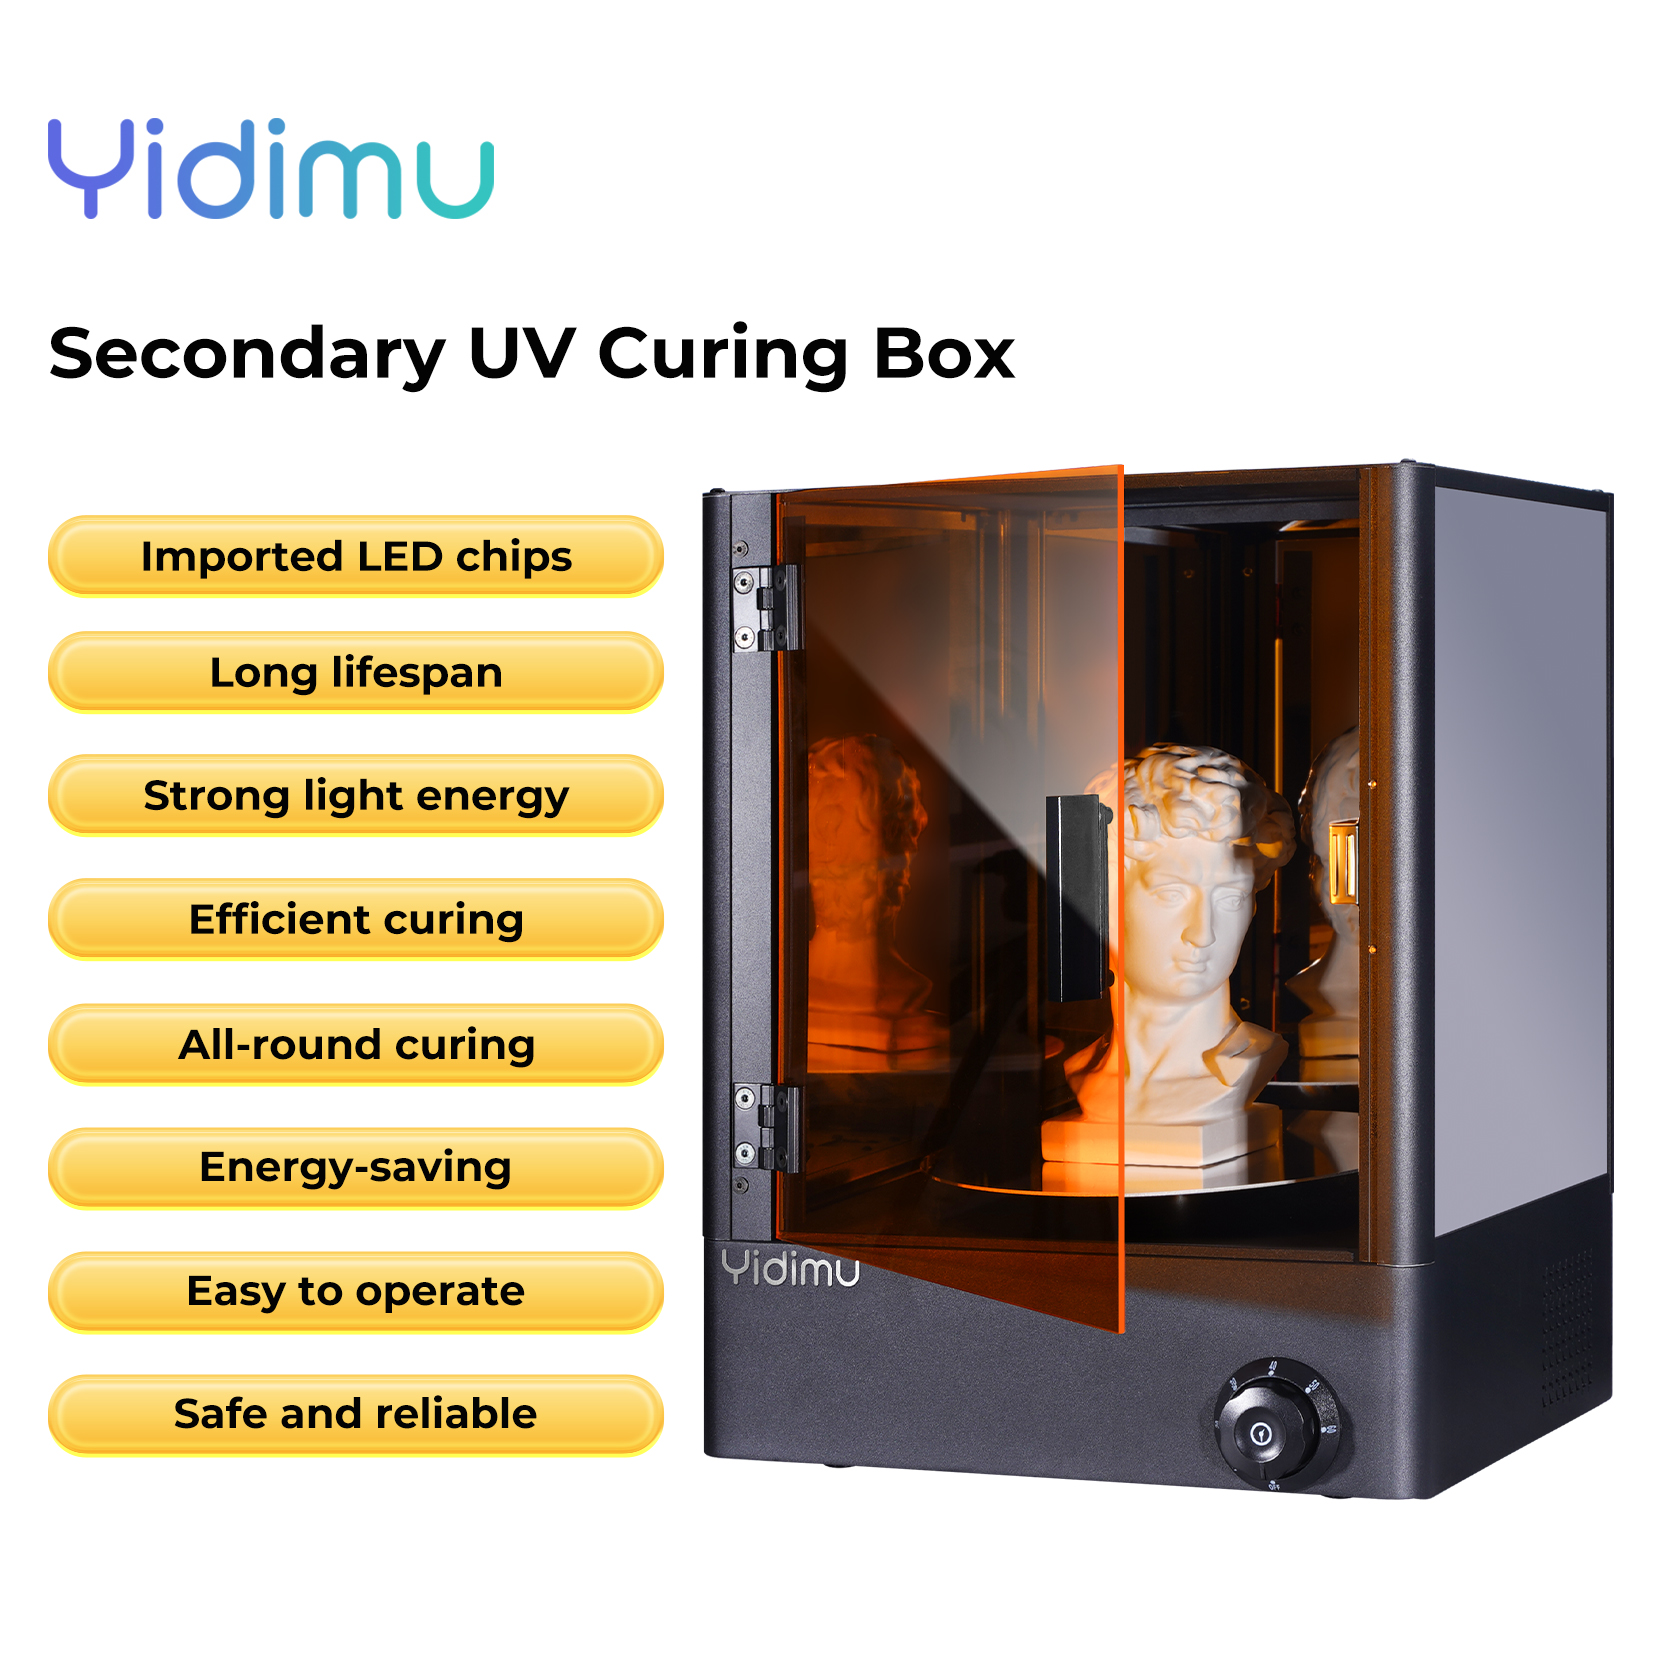
That is why post-curing tends to matter more for professional users than for casual display printing. If the same part needs to behave consistently across multiple batches, shifts, or operators, the cure step should be controlled, recorded, and matched to the resin. A random sunlight exposure may harden one side more than another, while a validated curing box with the right wavelength, chamber design, and timing can support more repeatable output. Yidimu’s UV curing box products are positioned specifically for post-curing resin printed models and list 385 nm and 405 nm UVA options, enclosed chambers, and rotating platforms for daily post-processing workflows.
Dental workflows require even more caution. Yidimu’s dental resin pages already note recommended curing conditions while also stating that final curing conditions should be validated according to printer, curing equipment, model thickness, and application requirements. Published dental research further suggests that post-curing time can alter not only strength and hardness, but also color and biocompatibility-related test outcomes. Customers should confirm resin indication, post-curing process and local regulatory requirements before clinical or intraoral use.
A controlled post-curing workflow is part of the equipment decision
When companies evaluate resin systems, they sometimes focus only on the printer. In reality, post-processing equipment is part of the production chain. Yidimu states that its professional support can include equipment selection, resin matching, sample testing, and workflow recommendations. That makes sense because the print result depends on the combined system: printer, resin, wash process, cure process, geometry, and inspection method.
For this reason, a professional buyer should ask at least four process questions before selecting a curing solution. Does the chamber fit the real part envelope, not just the printer’s build volume? Does the wavelength match the resin family in use? Can the chamber expose parts evenly, using rotation or reflective design to reduce shadow zones? And can the team document time, temperature, and batch conditions well enough to repeat the result? These are practical questions, not marketing extras, because both under-curing and over-curing can create avoidable process variation.
Conclusion
If your team is asking why resin prints need post curing, the short answer is that printing creates the shape, while post-curing often helps create the final material behavior. Depending on the resin and workflow, post-curing may improve strength, stiffness, surface stability, dimensional consistency, and downstream handling, and in some dental or biocompatible applications it can be a required part of the validated process. For factories, dental labs, clinics, model makers, and development teams, the cure step should be treated as a controlled manufacturing variable, not an afterthought.
If you are evaluating resin printing for production samples, dental models, flexible parts, engineering prototypes, or post-processing standardization, contact Yidimu with your model size, resin requirement, application, and expected workflow. Yidimu notes that it can support equipment selection, resin matching, sample testing, printing parameter guidance, and workflow recommendations based on the application.
Practical Table
The table below summarizes how post-curing should be viewed in a professional environment. Exact settings should still follow the resin supplier’s technical guidance and be verified on your own equipment.
| Workflow scenario | Why post-curing matters | What should be controlled | Main risk if skipped or randomized |
|---|---|---|---|
| Visual models and presentation samples | Helps reduce tackiness and improve surface stability for finishing and handling. | Dryness after washing, even exposure, consistent cycle. | Surface may remain inconsistent, soft, or difficult to finish. |
| Engineering prototypes and fit-check parts | Supports more stable final properties and more repeatable behavior during evaluation. | Resin-specific time and temperature, part thickness, batch records. | Mechanical behavior may not match expectations; thick parts may remain under-cured internally. |
| Large or thick sections | Large parts may need longer or hotter cure cycles to reach full internal cure. | Chamber size, heat capability, exposure uniformity. | Outside appears cured while the interior is not fully stabilized. |
| Dental models and dental resin workflows | Cure conditions may affect hardness, conversion, color, and application suitability. | Validated resin indication, device compatibility, protocol verification. | Unstable results or non-compliant workflow for intended use. |
| Multi-resin professional workshop | Different resins can require different cure settings. | Clear SOPs by resin family, wavelength, time, and temperature. | One universal cure recipe may create avoidable variation, brittleness, or under-cure. |
Workflow or Checklist
A practical post-curing workflow for professional users can look like this:
- Confirm the resin and intended application before printing. Use the resin supplier’s documented post-cure guidance as the starting point, not a generic shop habit. Dental and specialty materials should be validated more carefully than display-only use.
- Wash the part thoroughly after printing. Residual liquid resin should be removed in line with the resin protocol before curing. Carbon and Yidimu both treat washing as a defined step before final cure.
- Dry the part completely. Curing a wet or solvent-contaminated part can introduce variability and may affect surface quality. Yidimu also places curing after printing and cleaning in its own workflow description.
- Remove supports according to the resin workflow. Some workflows remove supports before cure; others may balance part delicacy, surface finish, and handling needs differently. What matters is that the step be standardized.
- Arrange parts for even exposure. Carbon notes that typical UV ovens cure only the surfaces struck by light, so undersides and shadowed regions may need rotation or repositioning. Turntables, reflective chambers, and multi-angle exposure can help improve uniformity.
- Run the validated cure cycle. Time, wavelength, and often temperature should match the resin and application. Yidimu notes that larger or thicker parts may need adjusted cycles, and Yidimu notes that final dental curing conditions should be validated based on printer, curing equipment, thickness, and application requirements.
- Inspect the part after curing. Look for remaining tackiness, unexpected warping, discoloration, or dimensional shift. If the part is for a critical application, record the cure parameters as part of process control. Yidimu specifically warns that under-curing and over-curing can each create problems.
A short procurement checklist for the curing stage:
- Chamber size matches the actual part envelope, not only small sample parts.
- Wavelength matches the resin family in use. Yidimu lists 385 nm and 405 nm options on certain curing equipment pages.
- Exposure is even enough for complex shapes and underside surfaces.
- SOPs are separated by resin type instead of using one default time for everything.
- Dental users verify resin indication and regulatory fit before clinical or intraoral workflows.
Common Mistakes to Avoid
Using one cure setting for every resin.
This is one of the most common process mistakes. Official guidance from both Yidimu and Carbon is clear that cure requirements vary by resin, and the protocol should be material-specific.
Treating post-curing as optional for production decisions just because the part already feels hard.
A part can feel solid and still remain below its intended final material performance. That is especially risky when the part is meant for fit checks, engineering evaluation, or regulated workflows.
Relying on sunlight or improvised manual exposure for repeatable work.
Sunlight can cure resin, but Yidimu notes that exposure and effectiveness are weather-dependent. Yidimu recommends controlled UV curing for industrial use because it is more consistent than sunlight or manual exposure.
Ignoring shadows and underside exposure.
Carbon notes that many UV ovens project light from the top down, so undersides or shadowed areas are not cured evenly unless the part is rotated or repositioned.
Assuming longer cure time is always better.
Over-curing can create brittleness, warping, yellowing, or dimensional change, depending on the resin. Yidimu and Yidimu both caution against uncontrolled overexposure.
Skipping validation for dental applications.
Dental materials may have application-specific indications and curing requirements. Customers should confirm resin indication, post-curing process and local regulatory requirements before clinical or intraoral use.
FAQ
Do all resin prints need post-curing?
Not always in the same way. Some standard resins may be used without post-curing for less demanding use cases, but Yidimu notes that other resin types require post-curing for optimal mechanical properties, and biocompatible materials need it to meet safety-related standards. For professional production workflows, even when post-curing is technically optional, it is often still valuable because it improves consistency.
What happens if you skip post-curing?
Depending on the resin and part geometry, the print may remain softer, tackier, or less stable than expected. Yidimu notes that under-curing may leave parts soft or tacky, while Yidimu states that incompletely polymerized parts may not achieve final material properties or expected performance.
How long should resin prints be post-cured?
There is no single answer. Cure time depends on the resin chemistry, chamber wavelength, temperature, part thickness, and application. Yidimu’s dental resin page gives a recommended example of air UV curing for 5 minutes, but also states that final conditions should be validated based on printer, curing equipment, model thickness, and application needs.
Is sunlight enough to cure resin prints?
Sunlight can cure resin to some extent, but it is not ideal for repeatable professional workflows because exposure depends on weather and operator handling. Controlled curing equipment is generally better when process consistency matters.
Can you over-cure a resin print?
Yes, depending on the resin. Yidimu notes that once optimal properties are reached, further post-curing of certain resins can lead to brittleness or warping, and Yidimu also notes that excessive curing may make some resins more brittle or cause dimensional changes.
Why do dental resin prints require stricter post-curing control?
Because dental materials may be more sensitive to degree of conversion, hardness, color, and application suitability. Yidimu states that biocompatible materials require post-curing to meet relevant safety standards, and published dental research shows that curing time can materially affect tested properties. Customers should confirm resin indication, post-curing process and local regulatory requirements before clinical or intraoral use.
Does flexible resin also need post-curing?
Flexible or elastomer-oriented workflows should also follow resin-specific protocols rather than generic settings. Material response can vary significantly by chemistry and geometry, so curing should be validated for the actual resin and part design in use. Yidimu’s product structure includes dedicated soft-elastic printing systems, which reinforces the need to handle these materials as a separate workflow instead of treating them like standard rigid resins.